background image

Pool Filter 400 / 500 / 600  - Pool Filter Sets  400-4m

3

/h / 400-6 m³/h  / 500-9 m³/h / 600-13 m³/h  

1

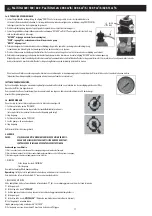
The duration of the filtration must be adapted to meet the specific weather conditions and frequency with which the swimming pool is used.
During the time of year when the swimming pool is used, the filtration system must run sufficiently long every day to ensure at least the complete exchange/purifying of the water.
(2) Regularly check the pool’s water level and the filtering system’s operating pressure.
(3) Regularly clean the preliminary filter basket of the skimmer and the pump.
(4) Be sure to replace the silica filter sand every two years.
(5) Removing the vacuum filter. The vacuum filter may become damaged in the course of its installation or during use after installation. The most significant, telltale sign of damage is

the discharge of silica sand into the swimming pool. Should this be the case, it is necessary to replace the vacuum filter. The following contains a description of the procedure::

                    -

Remove the sand filter.

                    -

Briefly rinse the filter out to make the removal of the vacuum filter easier.

                    -

Turn the vacuum filter counter clockwise a ¼ turn to remove it from its housing. Repeat this procedure for every vacuum filter that is affected.

                     -

Replace the vacuum filter(s) and reassemble the filtering system in the reverse order used to complete the disassembly.

WINTERING 

In order to warn against any risk of freezing, it is important to drain the filter.
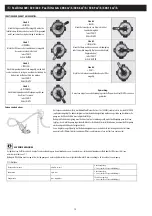
1 - To unscrew drain plug of the lower part of the tank and to remove the valve, in order to air the filter for this wintering period.
CAUTION: TO DRAIN THE FILTER WITHOUT CREATING INCOMING AIR ON THE HIGHER PART WHICH CAN PERMANENTLY DAMAGE THE TANK.
2 - To place the lever of the valve In the„ WINTER„ position in order to evacuate water and to leave the valve in this position. 
3 - To drain the pump according to the instructions of the manufacturer.

MAINTENANCE

CAUTION! 

B

efore 

b

eginning 

w

ith maintenan

c

e or servi

c

w

or

k

, al

w

ays ma

k

e sure the supply of ele

c

tri

c

al po

w

er to the system has 

b

een relia

b

ly dis

c

onne

c

ted.

1.Winterising

A soon as the swimming season is over, the product must be stored in a dry location where it will be protected from the weather.
(1) Perform the final rinse to clean the silica sand.
(2) To drain the system of water, remove the flexible lines and set the valve lever in the“WINTER”position. Leave it in this position.
(3) Drain the vessel now using the drain fitting located at the bottom section of the tank. As soon as the water has been completely drained from the product, carefully remove all

quartz sand residues. Reinstall the drain fitting to protect the threads from damage.

(4) Bleed the pump, following the manufacturer’s instructions carefully.
(5) Before putting the product back into operation in the next season, it is imperative that you make sure the filter is properly filled, i.e. ensure there is no air inside it.

2

. Pump maintenan

c

e

Swimming pool pumps are designed to operate with very little maintenance. However, due to the regular, continuous use of the products, the wear and exhaustion of the individual
components is inevitable. Contact your local dealer or the manufacturer for any maintenance or service work that has to be performed on the pumps. Only qualified electricians shall
perform electrical maintenance or repair work.

 SOLUTIONS TO OPERATIONAL PRO

B

LEMS 

This product and its instructions are designed primarily for the use of private persons – without the assistance of professional personnel, except in isolated cases. In the following, you
will find problems and their potential causes. The problems shown are common to all filtration systems and may typically occur in the course of use throughout the years. You don’t
have to be a professional to implement the solutions. If you have questions about the warranty or customer service, please consult your dealer.

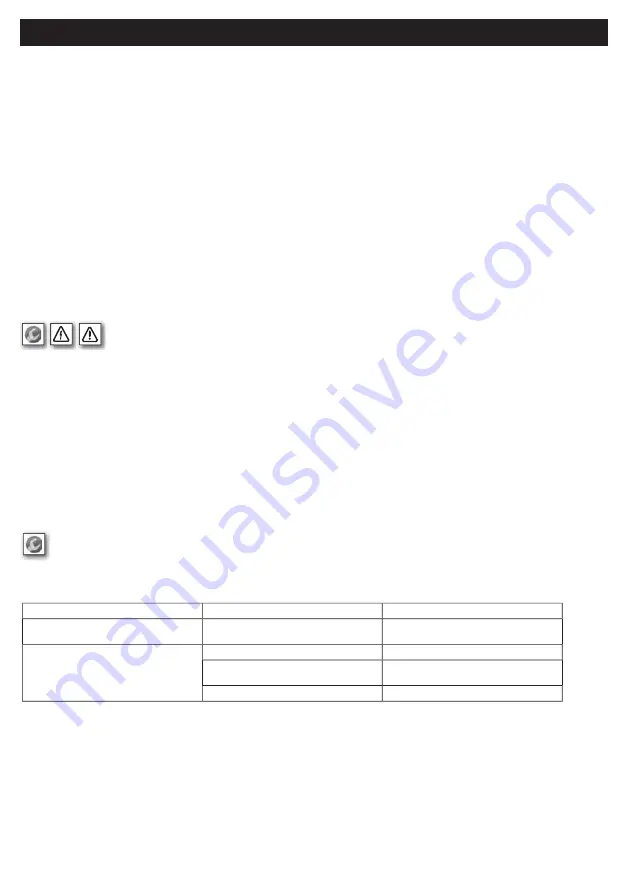
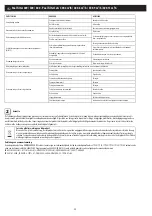
PRO

B

LEM

CAUSE

SOLUTION

Leakage of water

Poor connection of flexible lines and inputs.

Check the connections and position and if necessary, apply Teflon
tape and tighten the clamps.

After starting the filter, no water flows out of the return outlet.

The valve is in the FILTER position.

Shut off the product and put the valve in the right position.

The product is located at a higher level that the pool’s water level
and for this reason has emptied itself.

Place the filter in a suitable location and fill it.

The vacuum cover or plug is blocking the skimmer.

Remove the vacuum cover or plug from the skimmer.

7  

Summary of Contents for Pool Filter 400

Page 1: ...P Poo ool lFilter Pool Filter 400 500 600 Pool Filter Set 400 500 600...

Page 2: ......

Page 3: ...be used if it is not properly filled The sand shall not exceed more than 2 3 of the tank s capacity NEVER touch the product with a wet body or wet hands if it is turned on Make sure the ground surface...

Page 4: ...tube with the transparent lid supplied Installationofsand 1 1 3 fill the tank with water in order to protect the strainers from the falling sand 2 Make sure that the central pipe is properly in line w...

Page 5: ...tated on the pressure gauge It indicates the level of saturation of filter The more the filter is clogged the greater the pressure The pressure gauge is provided with a removable arrow making it possi...

Page 6: ...osition to vacuum the pool floor e g with Ubbink PoolCleaner Auto Art No 7500401 Connect the pool floor vacuum hose to the skimmer The filtration group pump must be shut off Important Fill the pool fl...

Page 7: ...tored in a dry location where it will be protected from the weather 1 Perform the final rinse to clean the silica sand 2 To drain the system of water remove the flexible lines and set the valve lever...

Page 8: ...water to the swimming pool Closed valve Open the valve Pump ran without water Fill the preliminary filter with water Air intake during suction Check the tightness of the hydraulic connections Correct...

Page 9: ...f Ber hren Sie das eingeschaltete Ger t NIE mit feuchtem K rper oder feuchten H nden Und vergewissern Sie sich dass der Boden trocken ist bevor Sie an den Ger ten arbeiten Weder Kinder noch Erwachsene...

Page 10: ...ransparenten Deckel verschlie en Einf llenvonSand 1 F llen Sie den Filterbeh lter zu 1 3 mitWasser um die Ansaugr hrchen beim Absinken des Sandes zu sch tzen 2 Der mittlere Schlauch muss imVerh ltnis...

Page 11: ...osition SP LEN 3 Starten Sie die Pumpe und lassen Sie sie solange laufen bis dieTr bungsgrad Kontrolllampe sauber ist 4 Stoppen Sie die Pumpe 5 Stellen Sie dasVentil auf die Position NACHSP LEN Aussp...

Page 12: ...augen z B mit Ubbink PoolCleaner Auto Art Nr 7500401 erfolgt in der Position FILTERN am Mehrweg Ventil Der Bodensauger ist mit dem Bodensaugerschlauch am Skimmer anzuschlie en Die Pumpe der Filteranla...

Page 13: ...nd wettergesch tztem Ort aufbewahrt werden 1 F hren Sie ein letzte Sp lung durch um den Quarz Sand zu reinigen 2 Nehmen Sie daher die Schl uche ab und stellen Sie den Hebel desVentils auf die Position...

Page 14: ...il ffnen Sie dasVentil Leergelaufene Pumpe F llen SieWasser in denVorfilter Lufteinzug w hrend Saugbetriebs Pr fen Sie die Dichtheit der hydraulischen Anschl sse Korrekte Entsorgung dieses Produkts In...

Page 15: ...erzeker u ervan dat de grond droog is voordat u aan het apparaat werkt Kinderen noch volwassenen mogen op het apparaat steunen of er tegenaan leunen Kinderen moeten onder toezicht zijn om ervoor te zo...

Page 16: ...de verzamelbuis aan de bovenkant af met het meegeleverde transparante deksel Vullenmetzand V V 1 Vul het reservoir voor 1 3 met water om de roosters tegen het vallende zand te beschermen 2 Zorg ervoo...

Page 17: ...et is verstandig de druk op de manometer regelmatig te controleren Deze druk is een indicatie van de verzadigingsgraad van het filter Hoe vuiler het filter hoe hoger de druk De manometer heeft een afn...

Page 18: ...zuigen van de bodem bijv met Ubbink PoolCleaner Auto art nr 7500401 vindt plaats in de stand FILTEREN op de meerwegklep De bodemzuiger moet met de bodemzuigerslang worden aangesloten op de skimmer De...

Page 19: ...ge plaats 1 Voer een laatste spoeling uit om het kwartszand te reinigen 2 Haal daarna de slangen eraf en zet de hendel van de klep in de stand WINTER om het water weg te kunnen laten lopen en laat de...

Page 20: ...rfilter met water Luchtinlaat tijdens zuigen Controleer de dichtheid van de hydraulische aansluitingen Correcte afvalverwerking van dit product Binnen de EU wijst dit symbool erop dat dit product niet...

Page 21: ...ppareils Ni les enfants ni les adultes ne peuvent s appuyer sur les appareils ou s y adosser Les enfants doivent tre surveill s afin de s assurer qu ils ne jouent pas avec l appareil Les produits chim...

Page 22: ...filtre et le maintenir avec un peu de sable 4 Boucher le haut du tube collecteur avec le couvercle transparent founi Miseenplacedusable 1 Remplir la cuve au 1 3 avec de l eau afin de prot ger les cr...

Page 23: ...lus le filtre est encrass plus la pression est grande Le manom tre est muni d une fl che amovible permettant d indiquer la pression nominale Au del de 0 5 bar de surpression proc der au lavage du filt...

Page 24: ...voies multiples L aspirateur de fond doit tre raccord au skimmer avec son tuyau La pompe du groupe de filtration doit tre arr t e Important Le tuyau de l aspirateur de fond doit tre enti rement rempli...

Page 25: ...ec et l abri des intemp ries 1 Effectuez un dernier lavage afin de nettoyer le sable silicieux 2 Retirez les tuyaux et placez le levier de la vanne en position HIVER pour permettre l vacuation de l ea...

Page 26: ...ferm e Ouvrir la vanne La pompe est vide Remplir le pr filtre d eau Entr e d air durant l aspiration V rifier l tanch it des raccords hydrauliques vacuation correcte de ce produit Au sein de l UE ce s...

Page 27: ...anos h medas Y antes de manipular los aparatos cerci rese de que el suelo est seco Ni los ni os ni los adultos deben sentarse o apoyarse sobre los aparatos Los ni os deben estar bajo vigilancia para a...

Page 28: ...Cierre el extremo superior del tubo colector con la tapa transparente suministrada Colocaci ndelaarena C C 1 Llene a 1 3 el recipiente del filtro con agua para proteger el filtro de aspiraci n cuando...

Page 29: ...vada ser la presi n El man metro est provisto de una flecha removible que permite indicar la presi n nominal Si hay un exceso de presi n por encima de 0 5 bar es necesario lavar el filtro 3b PUESTA EN...

Page 30: ...JE L L de la v lvula de varias v as Es necesario conectar el aspirador del fondo al tubo flexible del aspirador del skimmer Debe desconectarse La bomba del grupo de filtraje Importante Es necesario ll...

Page 31: ...e 1 Realice un ltimo barrido para limpiar la arena de cuarzo 2 Retire los tubos flexibles y sit e la palanca de la v lvula a la posici n INVIERNO WINTER para poder vaciar el agua y deje la v lvula en...

Page 32: ...aspiraci n Verifique la estanqueidad de las conexiones hidr ulicas Evacuaci n correcta del producto Dentro de la UE este s mbolo indica que ese producto no debe ser evacuado como basura dom stica Los...

Page 33: ...raggio serve uno sfioratore vale a dire uno sfioratore a incasso montaggio nella parete di legno o di acciaio o uno sfioratore da appendere fissaggio sulla parete di legno o di acciaio Si ricorda che...

Page 34: ...asparente fornito Posizionamentodellasabbia P P 1 Riempire il serbatoio di 1 3 con acqua al fine di proteggere le succhieruole dalla caduta di sabbia 2 Assicurarsi che il tubo centrale sia correttamen...

Page 35: ...ato maggiore la pressione Il manometro munito di una freccia amovibile che permette d indicare la pressione nominale Oltre i 0 5 bar di sovrappressione procedere al lavaggio del filtro 3b INSTALLAZION...

Page 36: ...FILTRAZIONE L L sulla valvola a pi vie L aspiratore deve essere collegato con il tubo flessibile dell aspiratore allo sfioratore La pompa del gruppo di filtrazione deve essere spenta Importante il tub...

Page 37: ...ciutto e protetto dagli agenti atmosferici 1 Eseguire un ultimo lavaggio per pulire la sabbia di quarzo 2 Rimuovere quindi i tubi flessibili e posizionare la leva della valvola nella posizione INVERNO...

Page 38: ...svuotata Rabboccare l acqua nel pre filtro Ingresso aria durante l aspirazione Controllare l ermeticit degli allacciamenti idraulici Smaltimento corretto del presente prodotto All interno della UE que...

Page 39: ...aar 0031 0 72 5671 604 0031 0 72 5671 673 NL Outside Living Industries Nederland B V Wondelgemkaai 10 9000 Gent 0032 0 9254 45 45 0032 0 9254 45 40 B Outside Living Industries Belux BVNR Outside Livin...

Page 40: ......
Reviews: