background image

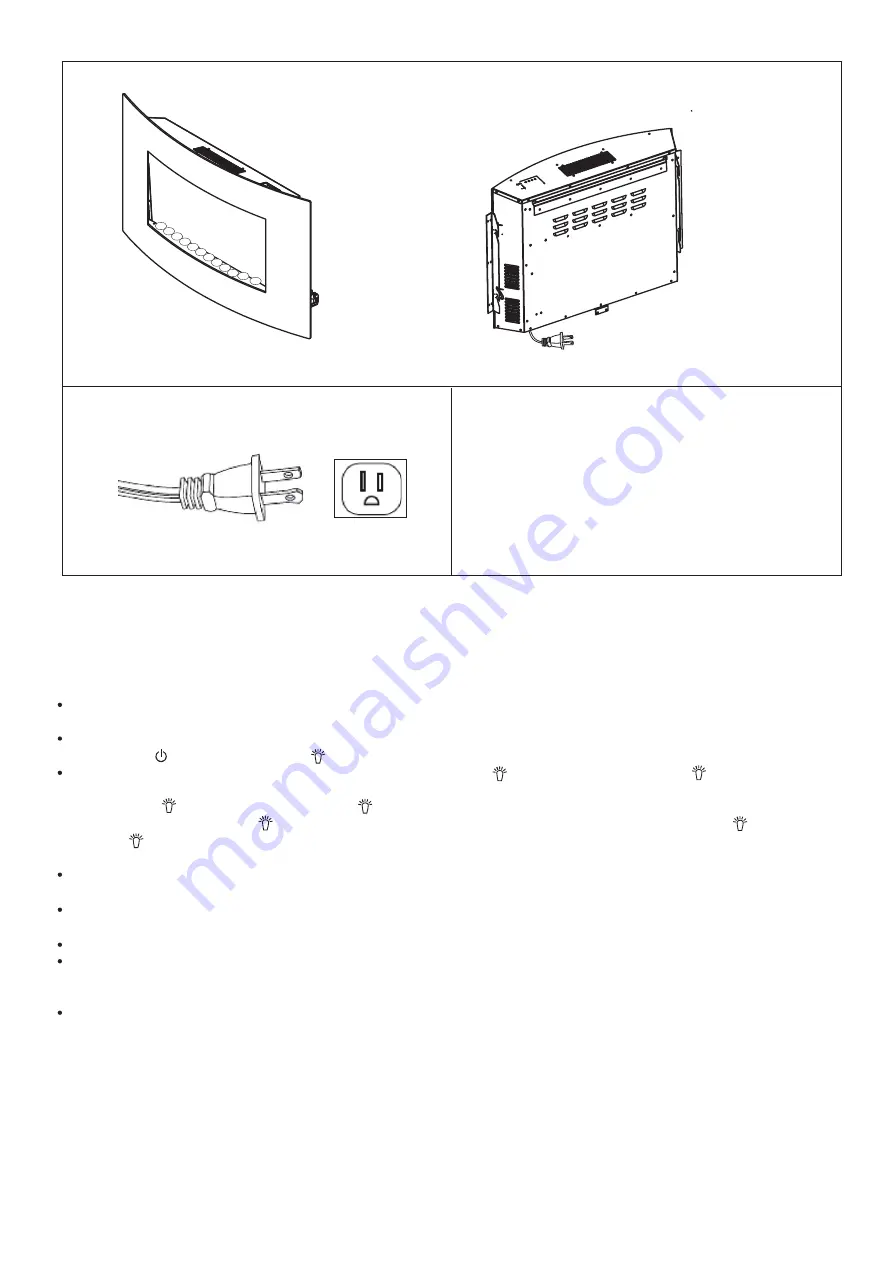
Plugging in the heater
Note: 

1)This heater is for use on 120 Volts.
2)A 15AMP circuit is required to operate this appliance.
    If the breaker trips when the appliance is running, you 
    may need to move the appliance to another location or 
    unplug other appliances that are on the same circuit.

Completed unit

Figure 7

Figure 8

4

Using the Control Panel:
Master Power Switch (A)

Open the cover and push button A down (I) to “On”position. (see FIG A)

Flame Effect:

Push “O/I” (On/Off)button

 (

B

or “O/I”(On/Off)button (M)on


the


remote


control


to


begin flame effect. The red 

power light “    ” and dimmer light “     ”will automatically come on.
The flame effect can be adjusted by pressing the dimmer “    ” button (C) or dimmer  “    ” Button (L) on the 
remote control. When pressed, the red light will blink and the flame effect will cycle from high to low. Press 
the  dimmer  “        ”  button  (C)  or  dimmer  “        ”  button(L)  on  the  remote  control  again  to  lock  in  desired  flame 
brightness. The red light “    ” will remain on.This brightness will be kept until the dimmer “    ” button © or 
dimmer “    ” button (L) on the remote control is pressed again.
Heat setting:
Turning on Master Power Switch (A) and  “O/I”(On/Off) button

 (

B

or “O/I”buttom (M) on 

the remote control.
Press  

650W

” 

button

 (

D

or “650W”button (K) on


the


remote


control


to


active


the


low heater setting. The 

red light above will indicate that the heater is functioning.
Press “650W” button (D) or “650W” button (K) on


the


remote


control


again


to


shut


off


the heater.

Press “1300W” button

 (

E

or “1300W” button (J) on


the


remote


to


active


the


high


heater

setting.The red lights above “650W” and “1300W” buttons


will


indicate


that


the


heater

is functioning on high.
Press “1300W” button (E) or “1300W” button (J) on


the


remote


control


again


to


shut


off the heater.

Note

When the heater begins to work, it will give off cool air for about 10 seconds before the
heating function is activated.

OPERATING INSTRUCTIONS

Summary of Contents for 83035028

Page 1: ...Model Modèle 83035028 EA1118B ...

Page 2: ...of internal heater parts and will not occur again 3 If your does not emit heat consult the Trouble Shooting section of this manual 4 Light bulbs may become loose during shipment If the flame effect is dim or does not operate properly at first ensure that the light bulbs are properly secured in the sockets bulbs should be finger tight do not over tighten see Replacing Light Bulbs section of this ma...

Page 3: ...es not fit contact a qualified electrician to install the proper outlet Do not change the plug in any way Do not insert or allow foreign objects to enter any ventilation or exhaust opening as this may cause an electric shock or fire or damage the appliance To prevent a possible fire do not block air intake or exhaust in any manner Do not use on soft surfaces like a bed where openings may become bl...

Page 4: ...Remove screws as shown in wall bracket as shown in Step 3 the pebbles 6 on the front of PP plastic board Figure 5 Then assemble the front glass by locking the left plate 7 and right plate 8 Figure 6 Then remove the protective covering on glass surface Place as shown in hanging hanging as shown in wall bracket bracket plastic anchors screws ST4 2 40 screws ST3 5 8 pebbles left plate hanging right p...

Page 5: ...er button C or dimmer button L on the remote control again to lock in desired flame brightness The red light will remain on This brightness will be kept until the dimmer button or dimmer button L on the remote control is pressed again Heat setting Turning on Master Power Switch A and O I On Off button B or O I buttom M on the remote control Press 650W button D or 650W button K on the remote contro...

Page 6: ... dirt or foreign objects build up Using the Remote Control This heater includes a remote control To operate the appliance using the remote control the Master Power Switch A must be the ON position See below for directions to use the remote control 1300W Heater Button J Push 1300W button once to active high heat setting Push second time to turn the heater off Dimmer Button L Adjust the brightness o...

Page 7: ...ck in and restart 3 Reset house circuit breaker Thank you for investing in a UBERHAUS Design product These products have been made to quality standards and are guaranteed for domestic use against manufacturing faults for a period of 12 months from the date of purchase This warranty does not affect your statutory rights In case of any malfunction of your UBERHAUS Design product failure missing part...

Page 8: ...eurs douilles serrez à la main ne serrez pas trop Voyez la section Remplacement des ampoules de ce manuel pour plus d informations Les ampoules utilisées pour le remplacement doivent être uniquement de type E12 base candélabre 120 V 40 W maximum Gardez les draperies et autres matériaux à au moins 3 pi 0 9 m de l avant et des côtés de l appareil AVERTISSEMENT 1 Danger d incendie garder toujours les...

Page 9: ... aires à haute circulation afin d éviter les risques de trébuchement sur le cordon Pour débrancher cet appareil placer tous les contrôles à OFF puis retirer la prise de courant de la prise murale Toujours débrancher I appareil lors qu il n est pas utilisé Cet appareil possède une fiche polarisée une lame est plus large que I autre Cette fiche sera insérée dans une prise d une seule façon Si la fic...

Page 10: ...sur le tel qu illustré à Étape 3 assemblez le verre frontal en verrouillant les plaques de suspension gauche N 7 et droite N 8 l image 6 Ensuite retirez de protection du verre Placez les galets N 6 sur le devant de la plaque en plastique PP l image 5 Puis tel qu illustré à tel qu illustré à la pellicule Remarque Les plaques de suspension gauche et droite ont été préinstallées sur le verre frontal ...

Page 11: ...ton 1300W J de la télécommande pour régler le chauffage à un niveau élevé Les voyants rouges situés au dessus de 650W et de 1300W indiquent que I intensité de chauffage de I appareil est réglé à un niveau élevé Appuyez sur le bouton 1300W E ou sur le bouton 1300W J de la télécommande éteindre I appareil pour NOTE Quand I appareil émet de I air frais pendant environ 10 est mis en marche il secondes...

Page 12: ...avaux d entretien sur cet appareil placez tous les contrôles en position OFF et Laissez I appareil en position OFF pendant débranchez le au moins 10 minutes avant de faire des travaux d entretien de sorte que tous les composants refroidis soient bien Utilisation de la télécommande Cet appareil inclut une télécommande Pour contrôler I appareil en utilisant la télécommande I interrupteur principal A...

Page 13: ...utes au moins avant d essayer de dépanner l appareil Seul un professionnel qualifié devrait faire les travaux de service ou de réparation de I appareil PROBLÈME La flamme est faible ou inexistante L appareil ne produit pas de chaleur L appareil s éteint et il ne se rallume pas CAUSE POSSIBLE 1 Les ampoules sont grillées 2 Le producteur de flammes s est désserré de son support 3 Le moteur du produc...

Reviews: