6629029
F-1671
3
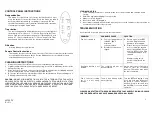
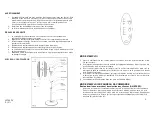
CONTROL PANEL INSTRUCTIONS
On/speed button
:
This button is to turn the fan on or choose the fan speed. You must
press this button first to operate the fan. Press this button, the fan will
work on medium speed and go on turning to low speed. The fan
speed will be rotated at low (L), medium (M) and high (H) speed by
continually pressing the Speed button.
Timer button
:
This fan is equipped with a timer that allows you to set the length of
operating time from 1/2 hour to 7 1/2 hours. By pressing the Timer
button, each press will increase the length of operating by 1/2 hour
and up to 7 1/2 hours maximum. At 7 1/2 hours, depress the Timer
button again it will reset the fan to the continuous running mode.
Off button
:
Pressing Off button to stop the fan.
Remote Control Instructions:
This fan may also be controlled by remote control. The remote control has similar function
as control panel described on above. Put two AAA batteries (not provided) in remote
control hand unit before you use it.
CLEANING INSTRUCTIONS
1. Always disconnect the cord from the electrical outlet when cleaning your fan.
2. Light accumulated dust may be removed by using a soft cloth to wipe away the dust at the
back grille of the fan.
3. Wipe the exterior surfaces of the fan occasionally with a damp cloth (not dripping wet) and
dry thoroughly with a soft dry cloth before operating the fan.
4. Do not use harsh cleaners or materials to clean this unit, doing so will cause damages to it.
Cleaning is required every 3-4 months.
CAUTION:
DO NOT ALLOW WATER TO RUN INTO THE INTERIOR OF THE FAN AS THIS
COULD CREATE A FIRE OR ELECTRIC SHOCK HAZARD. THE FAN MOTOR IS FACTORY
LUBRICATED FOR LIFE AND WILL REQUIRE NO FURTHER LUBRICATION. NO OTHER
USER MAINTENANCE IS REQUIRED OR RECOMMENDED. IF SERVICE IS REQUIRED,
SEND YOUR FAN TO THE NEAREST AUTHORIZED SERVICE DEPOT.
STORING YOUR FAN
1. Follow cleaning instructions 1-4 above. Make sure to disassemble and clean fan before
storing.
2. Retain the original packaging to store your fan.
3. Always store in a dry place.
4. Never store while still plugged in.
5. Never wrap cord tightly around the fan or put any stress on the cord where it enters the fan as
it could cause the cord to fray or break.
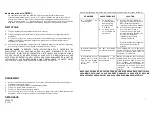
TROUBLESHOOTING
If your fan fails to operate, please follow these procedures:
PROBLEM
PROBABLE CAUSE
SOLUTION
Fan is not turning on.
A. Fan is not plugged into a
120V AC, 60Hz
polarized
outlet/receptacle.
B. Breaker/fuse has been
tripped.
A. Ensure unit is in the OFF
position. Plug in unit and
attempt to turn on again.
B. Please check your electrical
box to confirm the breaker
has not been blown. Ensure
unit is in OFF position. Plug
in unit and attempt to turn
on again.
Attempt to plug unit in
another receptacle in the
house.
Oscillation function is not
working.
The oscillation pin has not
been activated.
Simply press the oscillation pin
down to start the oscillation
function. This can be done while
the fan is operating.
Fan is on but air coming
out of it is not strong
enough.
There is dust built up at the
back of the fan.
Turn fan OFF and unplug. Using
a soft, dry cloth, wipe the back of
the grille to remove any dust
build-up. Plug in unit and turn
fan back ON to resume normal
operation.
PLEASE DO NOT ATTEMPT TO OPEN OR REPAIR THE FAN YOURSELF. DOING SO COULD
VOID THE WARRANTY AND CAUSE DAMAGE OR PERSONAL INJURY.


