

11
UBI Shell 4.0 Standard – Startup Manual
Continued!
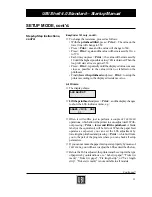
EasyCoder 101 only, cont'd.:
❑
To change the resistance, proceed as follows:
• With the printhead lifted, press < Print >. The value on the
lower line will change to 552.
• Press < Print > once and the value will change to 560.
• Press < Print > again and the value will be increased by 10, i.e.
to 570.
• Each time you press < Print >, the value will be increased by
10 until the highest possible value (748) is obtained. Then the
loop will start all over again at 552.
• Press < Print > repeatedly until the displayed value comes as
close as possible to the value written or labelled on the
printhead.
• Finally lower the printhead and press < Print > to set up the
printer according to the displayed resistance value.
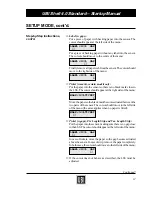
All Printers:
❑
The display shows:
LSS ADJUST
❑
Lift the printhead and press < Print >, and the display changes
to show the LSS indicator menu, e.g.:
LABEL <103> GAP
■
❑
Often it will suffice just to perform a couple of
TESTFEED
operations, which allows the printer to auto-adjust itself. With-
out pressing < Print >, lower and lift the printhead. A blank
label (or the equivalent) will be fed out. When the paper feed
operates as expected, you can exit the LSS adjustment by
lowering the printhead and pressing < Print >, which will take
you to the part of the program where you can check all setup
parameters.
❑
If you cannot make the paper feed operate properly by means of
TESTFEEDs
, you will have to adjust the LSS as described below.
❑
Before the LSS is adjusted, the printer must be set up for the type
of paper web you intend to use, i.e. “Label (w gaps)”, “Ticket (w
mark)”, “Ticket (w gaps)”, “Fix length strip”, or “Var. length
strip”. “Tickets (w mark)” is not available in all models.
Step-by-Step Instructions,
cont'd.
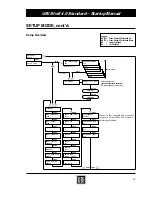
SETUP MODE, cont'd.


