background image

81

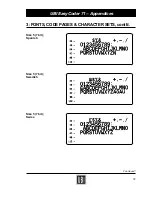
Resident Fonts

The EasyCoder 71 printer supports 160 different characters for font
size 1–4 and 80 characters for font size 5.

Note:
All fonts are Non proportional. The ASCII value of the different
characters is determined by the I command setting.

Font

Size in dots

Size of characters

1

8 x 12 dots

20.3 characters/inch (cpi), 6 points

2

10 x 16 dots

16.9 cpi, 7 points

3

12 x 20 dots

14.5 cpi, 10 points

4

14 x 24 dots

12.7 cpi, 12 points

5

32 x 48 dots

5.6 cpi, 24 points

3: FONTS, CODE PAGES & CHARACTER SETS

Fonts, Code Pages  and
Character Sets

 UBI EasyCoder 71 – Appendices

Font Sizes 1 – 5

Summary of Contents for EasyCoder 71

Page 1: ...ning the Printhead 20 Troubleshooting 21 Removing Caught Label Introduction 22 Remove the Access Cover and optional Self strip Device 23 Remove the Enclosure Top 24 Remove Caught Label from Printhead 25 Remove Caught Label from Mechanism 27 Printhead Replacement Remove Printhead 29 Install Printhead 30 Specifications Thermal Paper General Information 31 Pre printed Paper 31 Recommended Paper Brand...

Page 2: ...t Variable Data KDU only 50 Consecutive Numbering Command C Define Counter 51 Protect Consecutive Number KDU only 52 Real Time Clock Commands TS Set Real Time Clock 53 TT Define Time Layout 53 TD Define Date Layout 54 Print Parameters Commands Q Set Form Length 55 Z Print Direction Select 56 R Reference Point Setting 57 S Speed Select 58 D Heat Density Select 58 Text Bar Code Commands A Place Text...

Page 3: ...ecial control program described later in this manual The program uses short lines of ASCII characters to format the labels enter text and bar codes and control the printing This makes it possible to use a terminal or a personal computer that does not operate under MS Windows The EasyCoder 71 can print labels or tags with a web width of up to 108 mm 4 25 and a maximum print width of 104 mm 4 09 A s...

Page 4: ...ULATIONS COMPLIANCE DOC A ThisdigitalapparatusdoesnotexceedtheclassAlimitsforradio noise emissions from a digital apparatus as set out in the radio interferenceregulationsoftheCanadianDepartmentofCommu nication Ministère des Communications du Canada CONFORMITE DE REGLEMENTS DOC A Le présent appareil numérique n émet pas de bruits radio électriques dépassant les limites applicables aux appareils nu...

Page 5: ...rd Cleaning card in paper envelope One full label roll This manual One3 5 floppydiskcontainingUBIEasyCoder71Windows Driver Note that no cable for printer to computer connection is in cluded unless in case of EasyPak 71 or if ordered separately 5 Check the separate transformer unit in regard to voltage rating 120 VAC 60 Hz or 220 VAC 50 Hz 6 Pull out the battery protection strip from the memory car...

Page 6: ...ituatedimmediatelytotheleftofthepowerinlet The Power controllampontheprinterlightsredorgreen toindicatethatthe power is on MAINS CONNECTION UBI EasyCoder 71 Installation Instructions Easy Coder 71 Power Feed Control lamp No light Power off Red light Power on Out of paper Green light Power on Ready to print Orange light Error Tap Feed key to reset or Press Feed key a few sec s to enter Dump Mode or...

Page 7: ...of the printer These feet can be pulled out by hand 4 Using a Phillips screwdriver remove the four 4 screws from the base of the printer 5 The printer cover will be loose at this point and the removable frontcovermaycomeloose Ifso settheremovablefrontcover asideandturntheprinteronitssideandholdittogetherbyhand 6 Position the Mounting Plate with the vents facing front and secure it with the four 4 ...

Page 8: ...htturnson Youshouldbeabletoprintanaverageofeight 8 hourswithout requiring a recharge 2 Switchthebatterypackoffwhenitisnotconnectedtotheprinter or to a charging power source 3 The battery pack is recharged by connecting it to the printer s transformer unit The charging time is approximately thirteen 13 hours The battery pack must be ON to recharge 4 The battery pack can also be recharged while conn...

Page 9: ...nged cover 2 Place the spindle into the core of the paper roll 3 Place the paper roll and spindle in the open hinged cover 4 Pullthepaperguidesoutwardsasfarastheycan possibly go 5 Place the front edge of the paper between the paper guides and push it forwards until you notice a resistance 6 Adjusttheguidessotheybecomeflushwiththe edges of the paper without causing it to bend 7 Pressthe Feedbuttont...

Page 10: ...s the back of the printeruntilthereisnoslackaroundeitherroller 5 PresstheFeedbuttonandreleaseitwhenthetop of next label becomes visible 6 If you want to use the label taken sensor pull it out until it snaps into extended position 7 Rewindexcesslabelwebontotherollandplace it into the cavity Close the cover 8 If the printer does not feed out the labels com pletely thepaperfeedneedstobeadjusted See T...

Page 11: ...lows 1 Press down the Feed button and keep it that way until further notice 2 Turn on the power 3 The first Test Label will be printed It contains the following information Software version Current serial communication setup Test pattern for checking the printhead dots Information on the size of various parts of the RAM memory Information on number of character bits code page and country code for ...

Page 12: ...l interface is one way only TheserialRS232Cchannelcanbeusedtorunthecontrolprogram described later but is not suited for the Windows Driver The RS 232C communication setup is variable by means of the Y command seepage41 UsetheTestMode seepage11 tocheck the printer s present setup bold letters indicate default setup Baud rate 1200 2400 9600 or 19200 Parity None Odd or None Data bits 7 or 8 Stop bits...

Page 13: ...o print labels from any Windows application such as Microsoft Word Paintbrush or Microsoft Excel and from UBI s own label creating WYSIWYG program UBI LabelShop The Windows Driver is stored on a 3 5 floppy disk included in the delivery Install the Windows Driver as follows Open Microsoft Windows in your PC In the Main window of the Program Manager open the Control Panel In the Control Panel choose...

Page 14: ...ndowwillshow A asthepath InserttheWindows DriverfloppydiskforEasyCoder71 andclickthe OK button Innextwindow select UBIEasyCoder71 andclickthe OK button Step by step Instructions cont d Continued UBI WINDOWS DRIVER INSTALLATION cont d Install Button UBI EasyCoder 71 Installation Instructions OK Button OK Button ...

Page 15: ...from the alternatives in the Paper size box Thewidthofthelabelisalwayssetto100mm evenifyouenter another width with user defined size The left margin or indent setting in your Windows application may if required be used to indentforanarrowlabel Thusignorethewidthatthispoint The height of the label is measured from the top to the bottom of the label Step by step Instructions cont d Continued Setup B...

Page 16: ...intedacrossthelabel upside down from right to left Landscape means that a line of text is printed along the web starting with the first character in the line Click the Options button A new window will be displayed In this window you can set up the printer in regard of Print Quality and PaperQuality IntensityControl and Dith ering have no consequences Print Quality Controls the darkness of the prin...

Page 17: ...rn off both the printer and the computer and fit a parallel communicationcablebetweenthe36 pCentronicsconnectoron the printer and the selected parallel port on your PC Start up the printer and the PC again and the installation is completed UBI WINDOWS DRIVER INSTALLATION cont d Step by step Instructions cont d ALSO SEE Application Notes ON NEXT PAGE Connect Button UBI EasyCoder 71 Installation Ins...

Page 18: ...orm is sent to the printer from a Windows application after a power up This value is stored in the printer as long as the power is on Memory restrictions If the print image is too large to fit in the printer s memory the Power control lamp on the printer will turn orange and an error messagewillappearonthescreen Ifthishappens turnprinterback on line by pressing the Feed key on the printer When the...

Page 19: ... should be replaced at least once a year Proceed as follows 1 Turn off the printer 2 Pull the cartridge straight up 3 Remove the Phillips screw on the side of the cartridge 4 Separate the two sides of the cartridge by sliding one of them slightly sideways and then pulling them apart 5 Quicklyreplacethebattery TheRAMpackageswillkeeptheir content for 5 minutes without any current from the battery 6 ...

Page 20: ...ents as they will scratch the surface We recommend using the special Cleaning Card and the proce duresbelowtocleantheprintheadonceamonthforlowusage and weekly for high usage printers 1 Remove the label or tag web from the paper feed slot 2 Openthepouchalongthedottedlineandremovecleaningcard Be careful not to tear the card inside 3 Place the cleaning card into the paper feed slot at the bottom of t...

Page 21: ...ith the thermal sensitive side up Cleantheprintheadwiththecleaningcard asdescribedonpage20 If printing is still faded increase the print energy with appropriate setup as described on pages 16 and 58 Labelcaughtonprinthead Refertopage22forinstructionsonhow to remove the caught label Labelcaughtonprintheadorintheprintmechanism Refertopage 22 for instructions on how to remove the caught label Referto...

Page 22: ...s Remove the Access Cover and Self strip device Remove the Enclosure Top Remove Caught Label from Printhead Remove Caught Label from Mechanism The most likely place for a label to get caught is on the printhead orinside the mechanism including the lower paper guide where thelabelsenterthemechanismthroughthepaperfeedslot Youcan removeacaughtlabelfromtheprintheadafterjusthavingremoved the access cov...

Page 23: ... to come off loosen the forward two screws that holds the enclosure top see next page c If the printer is fitted with an optional label taken sensor disconnect the cable from the connector on the Feed button Power indicator assembly underneath the left side of the opening in the enclosure top d Remove the access cover e If the printer is fitted with an optional self strip device remove the strippe...

Page 24: ...4 Remove the enclosure top as follows a Place the printer on its side b Remove the four rubber feet by pulling them off c Using a Phillips screwdriver remove the four screws d Remove the enclosure top e Disconnect the cables to the Memory Cartridge adapter and to the Feed button Power indicator assembly from the CPU board 5 After having removed the caught label reassemble in reverse order Rubber f...

Page 25: ...et b Remove printhead retainer bracket and spring c Raise front end of printhead unit and remove printhead release rod Note If you have not removed the enclosure top be careful not to drop printhead release knob inside the printer d Remove the printhead unit without unplugging it Note Thepaperguidefitsonthebackofthemechanismand isheldinplacebytheprintheadunit Itmightcomeoffifyou movetheprinterafte...

Page 26: ...d onto the platen b Place the release rod inside the top enclosure and fit the D shaped end into the corresponding slot in the release knob c Fit the release rod underneath the hooks on the printhead mounting bracket Fit the rod into the slots in the sides of the mechanism d Place the leaf spring with its fingers underneath the release rodandwiththepinsofthemechanisminthealignmentholes in the spri...

Page 27: ... the printhead unit c Tiltthemechanismforwardandremovethetwocablesfrom the slot in the lower paper guide d The lower paper guide is held in place by two flexible tabs Graspbothtabsandpullthemtowardseachother thenliftthe guide out of the mechanism REMOVING CAUGHT LABEL cont d Remove Caught Label from Mechanism Phillips screws 2 Cables Lower paper guide Mechanism Slot Continued Tab Tab Phillips scre...

Page 28: ...h replacement guide strip 4 Install mechanism as follows a Placelowerpaperguideinmechanismwithbottomofguide on top of two stubs at bottom of mechanism Make sure bottom of guide is even with bottom of mechanism b Push lower paper guide into mechanism until tabs snap into place c Installthecablefromthemotorandthelabel stopsensorinto the cable slot d Connect cables to CPU board according to Cable Con...

Page 29: ...ead unit and remove printhead release rod Note If you have not removed the top enclosure be careful not to drop printhead release knob inside the printer d Removetheprintheadunitwithoutdisconnectingtheground cable Note Thepaperguidefitsonthebackofthemechanismand isheldinplacebytheprintheadunit Itmightcomeoffifyou movetheprinterafterremovingtheprintheadunit Toinstall it simply slide the paper guide...

Page 30: ...the platen d Place the release rod inside the top enclosure and fit the D shaped end into the corresponding slot in the release knob e Fit the release rod underneath the hooks on the printhead mounting bracket Fit the rod into the slots in the sides of the mechanism f Place the leaf spring with its fingers underneath the release rodandwiththepinsofthemechanisminthealignmentholes in the spring The ...

Page 31: ...nd potassium since these agents may adversely affect the printhead through chemical corrosion If pre printing cannot be avoided on areas intended for thermal printing the ink or varnish must be resistant to heat up to 225 C 437 F foratleast1secondat2 0kgs cm2 Otherwise theinkwill melt and clog printhead UBI recommends the following brands of thermal paper for use with the EasyCoder 71 printer Gene...

Page 32: ...le expense of an impaired printout quality However the stiffness is also important A stiff web limits the maximum thickness and vice versa Labelsshouldbewoundwiththelabelsfacingoutwardsandunroll from the top of the roll Tags should be wound with the thermal sensitive layer facing inwards and unroll from the bottom of the roll Important Protect the paper stock against sand grit and other hard parti...

Page 33: ...bel width excl backing paper Maximum 104 0 mm 4 09 Minimum 21 0 mm 0 83 c Label length Maximum label length 165 1 mm 6 5 Minimum label length 12 5 mm 5 d Label gap height Maximum 10 mm 39 Recommended 3 mm 125 Minimum 2 mm 08 Self adhesive Labels UBI EasyCoder 71 Specifications a b c d SELF ADHESIVE LABELS ...

Page 34: ... 0 mm 1 00 b Tag length Maximum length 165 1 mm 6 5 Minimum length 12 5 mm 5 c Detection slot length Minimum 12 mm 47 d Detection slot height Maximum 10 mm 39 Recommended 3 mm 125 Minimum 2 mm 08 The detection slot should be centred on the web UBI EasyCoder 71 Specifications a c TICKETS TAGS d b ...

Page 35: ...device Label taken sensor Real time clock circuit Battery pack Keyboard display unit General Directthermalprintingonself adhesivelabelsand tags Optional self strip device Dimensions Length 230 mm 9 1 Height 145 mm 5 7 Width 196 mm 7 8 Net Weight 3 kg 6 6 lbs excl options Mains Separate transformer unit 120 VAC 60 Hz or 220 VAC 50 Hz Power consumption 61 5 W Interfaces 1 RS 232C serial plus 1 Centr...

Page 36: ...m in dump mode which meansthattheprinterwillprintouttheechoofthereceivedASCII Usethiscapabilitytodebugyoursoftwarewhentheprinterdoesnot perform as you expect To enter Dump Mode Turn OFF the power to the printer Hold down the Feed key and turn On the power again Hold the Feed key until the printer starts to feed Then immedi atelyreleasetheFeedkey else youwillEntertheTestMode see page 11 Whenanerror...

Page 37: ... ThelabelremainsstoredintheImagebufferandcan be printed over and over again by sending new P print commands see page 49 until the buffer is cleared by an N command or by retrieving and printing a Form see FR on page 48 The Direct Mode is also used for retrieving and printing prepro grammed label formats and for the issuing of Global Setup com mands Form Edit Mode This mode is used to permanently s...

Page 38: ...aracteris tics of the printer e g communication memory allocation and selection of character set Global Setup commands can only be issued in the Direct Mode Direct Mode Commands These commands are used to control the printing in the Direct Mode i e when printing labels without the use of prepro grammedlabelforms aswellastoretrieveandprintlabelforms Form Edit Mode Commands The commands are stored w...

Page 39: ... the field Fields can contain fixed data variable data or a combination of both Fixed data are embedded in the form Variable data are provided from the host at print time Field Positioning Dots are used as the unit for establishing position on the form in relation to a specified reference point in this example the top left corner of the form There are eight dots per millimetre or 203 dots per inch...

Page 40: ...66 Write Variable Text Aa b c d e f g Vnn 59 Write Variable Bar Code Ba b c d e f g Vnn 62 Write Counter Aa b c d e f g Cn 59 Ba b c d e f g Cn 62 7 Store Form End form with FE 48 DOWNLOAD GRAPHICS 1 Delete Graphic Delete Graphic using GK Name 47 2 Store New Graphics Prepare to Down load PCX file GM Name a 66 3 Send PCX file to Printer At the DOS prompt type Copy Name pcx prn b press Enter 66 RETR...

Page 41: ... parity c 7 7 data bits 8 8 data bits d 1 1 stop bit 2 2 stop bits TheprintercommunicateseitherviaaCentronicsparallelportoran RS 232C serial port The EasyCoder 71 serial port settings can be controlled by this software command Example Y19 O 7 1 19 200 baud Odd parity 7 bit data 1 stop bit UBI EasyCoder 71 Programming COMMUNICATION COMMAND Y Serial Port Setting ...

Page 42: ...kages If your label size is larger then the current Image area If you have a large number of forms to be stored and they do not fit in the current Form memory Ifyouhavealargenumberofgraphicsoralargegraphicthatdoes not fit in the Graphics memory Tocheckthecurrentsettings performastatusprintoutbyentering dump mode see page 37 Image Buffer The image buffer is the area where the active print image is ...

Page 43: ... in multipleformsandstilljusttakeuponespaceinmemory Usethe file size of the PCX file or files in DOS The graphics memory requirement is the same as this file size Round off to the next highest even number Factory Setting The EasyCoder 71 printers are factory delivered with 252K of available memory Expansion of the basic memory runs in multi ples of 128K up to maximum 508K The memory is initialized...

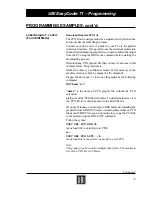
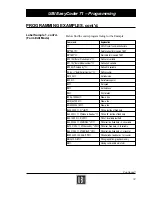
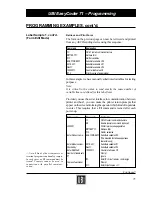
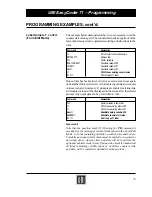
Page 44: ... Italian 6 Spanish 7 Swedish 8 Swiss COUNTRY CODE 032 Belgium 055 Brazil 002 Can French 042 Czech 042 Slovak 045 Denmark 358 Finland 033 France 036 Hungary 061 Intl Eng 039 Italy 003 Latin Am 031 Holland 047 Norway 048 Poland 351 Portugal 034 Spain 046 Sweden 041 Switzerland 001 USA 044 UK 038 Yugoslavia 049 Germany Example I8 5 047 8bit Nordic Norway Note The default setting is I8 0 001 For furth...

Page 45: ...e character followed by the graphics information The Wa command will set the printer to ignore or accept any Escape sequence sent from the Host Note DefaultstoacceptEscapesequencesanditwillonlyberequiredto usethiscommandtoignoretheEscapesequenceiftheprinterdoes not perform properly in a main frame application UBI EasyCoder 71 Programming WINDOWS MODE COMMAND W Windows Mode On Off ...

Page 46: ...ion channel with the Codepage status and also presets the printer to return variable and counter prompts back to the computer on the serial interface newUIinstructionmustbeissuedaftereachpowerup Example UI Note The optional Keyboard Display Unit sends this command automatically asitrequiresthesepromptsforitsdisplayfunctions Ifthedeviceusedisnotprogrammedtohandleprompts makesure not to send any UI ...

Page 47: ...buffer between each new label Example N Used for Direct Mode Syntax FK Filename Erase label form named within the quotation marks Example FK TEST Used for Direct Mode Syntax GK Filename Erase graphic file named within the quotation marks Example GK UBI Used for Direct Mode Syntax FK Erase all label forms Example FK Used for Direct Mode Syntax GK Delete all graphics from memory Example GK GK Delete...

Page 48: ...ST Used for Form Edit Mode Syntax FE Indicates the end of a form and stores it in the Form memory Example FE Note Global Setup commands such as FI GI EI FK GK EK I M N P TS U Y W are not allowed inside of FS FE Used for Direct Mode Syntax FR Filename The command FR Filename is the starting command line to clear the image buffer and retrieve a stored label form from the printer s Form memory FR For...

Page 49: ...lanation FR Filename Form Retrieve If required add write commands here Variables and counters will follow Send variables Pa b Print labels a sets b copies The question mark line indicates the start of variable and consecu tive numbers The number of lines following the question mark line must match exactly the total number and order of variables and consecutive numbers for that specific form Exampl...

Page 50: ...automatically Thesyntaxrequiresthatvariablesaredefinedinorder startingwith V00 on the command line following the FS Filename line If Left and Right justification is selected and the input is less then the maximum field length the full field length is going to be retained andthedatawillbeleftorrightjustified Ifnojustification isselected thefieldwilladjusttofittheactuallengthofthedataand will not ex...

Page 51: ...that counters are defined in order starting with C0 on the command line following variables if any or otherwise directly after the FS Filename line Left and right justification means that if the input is less then the maximum field length the full field length is going to be retained and the data is will be left or right justified If no justification is selected the field will adjust to fit the ac...

Page 52: ...desirable for applications where data should not be changed e g serial numbers Example C0 10 L 1 Enter Serial Number Theprotectedconsecutivenumberisaccessedandmodifiedfrom the optional Keyboard Display Unit only Enter the following when the KDU is displaying FORM retrieve form F2 list forms vx x 1 If necessary press Exit key to display above 2 Press F1 key 3 Press 4 9 1 6 4 Press Form key 5 Key in...

Page 53: ...clock Can be ignored or set to a sign to define a 12 hour clock with AM PM Separator Can be any separator between ASCII 32 dec and 63 dec or no separator Certain labels require time information on the label form If the printer has the optional clock circuitry the time can be read from this internal clock The program allows you to use any separator betweenASCII32dec through63dec Anyorderofhour minu...

Page 54: ...and 63 dec or no separator Certain labels require date information on the label form If the printerhastheoptionalclockcircuitry thedatecanbereadfromthis internal clock Any order of year month and day can be defined Partial entry is accepted such as years only TDy2 The program allows you to use separator between year month day and entries Example TDy2 me dd 94 JAN 01 TDdd me y4 01 JAN 1994 TDdd mn ...

Page 55: ...abel path is centred Example 1 Standard Label Qa b a 20 0 mm 160 dots b 3 0 mm 24 dots Therefore the command should be Q160 24 Example 2 Butterfly Labels Qa b c a 12 5 mm 100 dots b 3 0 mm 24 dots c 3 0 mm 24 dots Therefore the command should be Q100 24 24 UBI EasyCoder 71 Programming PRINT PARAMETERS COMMANDS Q Set Form Length a b c PRINT DIRECTION a b 1 The paper feed controlled by the Q command...

Page 56: ...ThefigurebelowshowstheformorientationonthelabelwhenaZT commandissent Thiscommandcausesthelabeltobeprintedfrom the top to the bottom Provided that there is a Q command sent to the printer the printer can also handle a ZB command ThefigurebelowshowstheformorientationonthelabelwhenaZB commandissent Thiscommandcausesthelabeltobeprintedfrom the bottom to the top UBI EasyCoder 71 Programming PRINT PARAM...

Page 57: ...ength in the Q command ThefigurebelowshowstheReferencepointwhenprintorientation is set to ZB or ZT By increasing a and b value in the Ra b command the present reference point moves in horizontally and vertically Note Set the reference point correctly so the printing will occur on the media Repeated printing outside the media will cause excessive printhead wear Feed Direction Sensor Location a b Re...

Page 58: ... GlobalSetup FormEditMode resetsGlobalSetup Syntax Sa where a 0 Print speed 1 0 inch sec 25 mm sec 1 Print speed 1 5 inch sec 37 mm sec 2 Print speed 2 0 inch sec 50 mm sec Used for GlobalSetup FormEditMode resetsGlobalSetup Syntax Da where a Density value 0 to 7 0 is the lightest printing and 7 is the darkest ...

Page 59: ...rmal image R for Reverse image DATA Fixed data entry Must be enclosed in quotation marks DATA can be replaced by or combined with below commands Variable Vnn nn 2 digit number from 00 to 29 Places variable Vnn entry in this position in this field Consecutive Number Counter Cn n Onedigitnumberfrom0to9 PlacescounterCnentry in this position in this field or Cn b n Onedigitnumberfrom0to9 Placescounter...

Page 60: ...e Form Step value is explained in Consecutive Num bering Commands Ca b c d prompt Time TT Places current time read from the RTC if fitted using time layout defined or TT nnn Places sellby time Addsnnnnumberofminutes must be three digits to the current time read from the RTC if fitted andplacesitontheformusingtimelayoutdefined or TD Places current date read from the RTC if fitted using date layout ...

Page 61: ...ite Counter Aa b c d e f g h TT Write Current Time Aa b c d e f g h TT 015 Write Current Time 15 minutes Aa b c d e f g h TD Write Current Date Aa b c d e f g h TD 10 Write Sell By Date or a combination thereof Aa b c d e f g h DATA V00C0 DATA TD 05V01TT 015 IMPORTANT In case of Forms a question mark must be sent after the Form Retrieve FR command This does not apply to the Direct Mode Time and Da...

Page 62: ...2 of 5 1 10 2C Interleaved 2 of 5 w check digit 1 10 3 Code 39 std extended 1 10 3C Code 39 with check digit 1 10 9 Code 93 1 10 E30 EAN13 2 4 E32 EAN13 2 digit add on 2 4 E35 EAN13 5 digit add on 2 4 E80 EAN8 2 4 E82 EAN8 2 digit add on 2 4 E85 EAN8 5 digit add on 2 4 K Codabar 1 10 P Postnet fixed UA0 UPCA 2 4 UA2 UPCA 2 digit add on 2 4 UA5 UPCA 5 digit add on 2 4 UE0 UPCE 2 4 UE2 UPCE 2 digit ...

Page 63: ... Onedigitnumberfrom0to9 PlacescounterCnentry in this position in this field b Onedigitnumberfrom0to9 tepsupthecounter sstart value with the value b Enter to increment or to decrement Example Whenlabelswithconsecutivenumbersareprintednextto each other across the web it is done by using a single counter in one form The command Cn b in our example will be used twice andcountupthesinglecounterbyone 1 ...

Page 64: ... the current date read from the RTC if fitted andplacesitontheformusingdatelayoutdefined Valid Bar Code Commands Explanation Ba b c d e f g h DATA Write Barcode Ba b c d e f g h Vnn Write Variable Ba b c d e f g h Cn Write Counter Ba b c d e f g h TT Write Current Time Ba b c d e f g h TT 015 Write Current Time 15 minutes Ba b c d e f g h TD Write Current Date Ba b c d e f g h TD 05 Write Sell By ...

Page 65: ...d the overlapping print area will print In other words black print on black will be white This command is useful for creating reverse images beyond the reverse option offered in Write Text and Write Bar Code Commands section Used for Direct Mode Form Edit Mode Syntax LOa b c d where a Horizontal start position in dots b Vertical start position in dots c Horizontal length in dots d Vertical length ...

Page 66: ...ads file to default printer PRN or COPY UBI PCX LPT1 b downloads file to the printer connected to port LPT1 Note PCX file must be 2 colour only Send a GI to verify that the file has been successfully stored This PCXfileisnowpermanentlystoredtothegraphicsmemoryandcan be deleted only by using GK UBI or GK This graphic can be used for multiple label forms Used for Direct Mode Form Edit Mode Syntax GG...

Page 67: ...lated error ERROR 3 Graphics related error BATTERY LOW Replace Memory Cartridge battery Note Error 2 and Error 3 usually mean an invalid syntax or memory overflow has occurred HINT If a persistent programming error occurs or the printer starts to behave in an unexpected way it can often be remedied by turning the power off and on ...

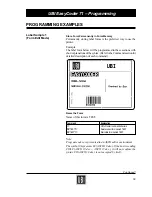
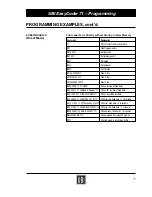
Page 68: ... the Form Name of this form is TEST Command Explanation CR LF to start command structure FK TEST Delete current form named TEST FS TEST Start store form named TEST Note Program codes are presented in an ASCII editor environment The symbol represents LF ASCII 10 dec If the host is sending CR LF ASCII 10 dec ASCII 13 dec it will not confuse the syntax CR ASCII 13 dec is not accepted by itself UBI Ea...

Page 69: ...the host when the label form is retrieved serial printer only Define Counter The counter has maximum 6 digits Command Explanation C0 6 L 1 Enter Serial Number Define counter Note Thevariables V00 V01 V02 andcounter C0 aredefinedwithin this label form named TEST The next label form containing variables and counters will again start with V00 and C0 If variable data is being sent from an external dat...

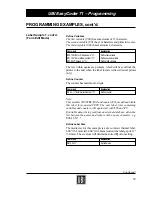
Page 70: ...value setting Command Explanation R40 0 Set reference point Set Print Speed Set the print speed to 2 inches sec 50 mm sec Command Explanation S2 Set speed Set Print Darkness Level Set the darkness level to 5 The print quality is affected by this heat setting Reduceorincreasethisvaluedependingontheresultwhen taking out a test print at the end of this chapter Command Explanation D5 Set darkness Set ...

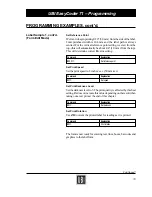
Page 71: ...UBI in text size 5 the largest size The quotation marks enclosing the fixed data will not be printed Write a 90 degree text line with the text Made in Sweden Thetextsize 1 isthesmallestresidentfontintheprinter Command Explanation A456 48 0 5 1 1 N UBI Write a text line fixed data A40 400 1 1 1 1 N Made in Sweden 90 deg text line fixed data Place a Variable Text Thenextlineisatextline usingtextsize...

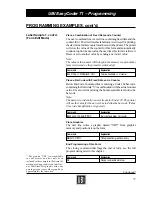
Page 72: ...t for printing the human readable text below the bar code Note The narrow to wide ratio is not relevant for Code 128 The printer will use the value for the narrow bar to define the bar code Value 3 for wide bar definition is ignored Command Explanation B200 440 0 1 2 3 96 B S C0 Bar code fixed data 1 st counter Place Graphics The next line writes a graphic named UBI 1 from graphics memory and posi...

Page 73: ...yCoder 71 to receive the graphic by the following command GM name a name is the name of PCX graphic file without the PCX extension aisthesizeofthe PCXfilesizeinbytes Todeterminethesize view the PCX file in its directory and use the listed file size If you use Windows you must go to DOS before downloading the graphicfile useMS DOSPrompt Assumingthatyouhavea PCX file named UBI PCX in your current di...

Page 74: ...ox LO0 144 752 4 Draw a line LO440 232 4 160 Draw a line A456 48 0 5 1 1 N UBI Write a text line of fixed data A40 400 1 1 1 1 N Made in Sweden Write a 90 text line of fixed data A24 160 0 5 1 1 R V00 Write 1 st variable text field A24 250 0 4 1 1 N MODEL V01 Write text line fixed data 2 nd variable A472 312 0 4 1 1 N Checked by V02 Write text fixed data 3 rd variable A24 312 0 4 1 1 N SERIAL C0 W...

Page 75: ... between printer and host1 you can make the printer return prompts that appearonthescreeninformingtheoperatorwhichkindofinputdata to enter This requires that a UI command is issued after each power up Printer sends Command Explanation CR LF to start command structure UI Enable prompts command optional UI80 001 Printer returns codepage status FR TEST Retrieve form Call for variables Enter Product n...

Page 76: ...re stored in memory If prompts are enabled existing data and counter values will be displayed on the screen after the related prompt Any input data can be overwritten at will Command Explanation Call for variables in same form CR LF to use existing data in V00 CR LF to use existing data in V01 Sam Substitute data in variable V02 200000 Substitute counter start value P1 1 Print 1 copy of 1 label Im...

Page 77: ...232 4 160 Draw a line A456 48 0 5 1 1 N UBI Write a text line of fixed data A40 400 1 1 1 1 N Made in Sweden Write a 90 text line of fixed data A24 160 0 5 1 1 R EASYCODER Write 1 st variable text field A24 250 0 4 1 1 N MODEL 501 E Write text line fixed data 2 nd variable A472 312 0 4 1 1 N Checked by Dan Write text fixed data 3 rd variable A24 312 0 4 1 1 N SERIAL 000001 Write text line fixed da...

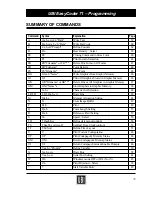
Page 78: ...ic Memory 66 I Ia b c Character Set Selection 44 LE LO LE LO a b c d Draw Line 65 M Ma b c Memory Allocation Setting 42 N N Clear Image Buffer 47 P Pa b Print 49 Q Qa b Form Length Setting 55 R Ra b Reference Point Setting 57 S Sn Speed Select 58 TD TDaa bb cc Define date layout option 54 TS TSaa bb cc dd ee ff Set Real Time Clock option 53 TT TTa b c d Define Time Layout 53 U U Print Current Conf...

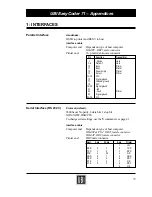
Page 79: ... 19 30 Signal ground 31 Init 32 Fault Printer 33 Signal ground 34 36 N C Protocol default 9600 baud No parity 8 data bits 1 stop bit XON XOFF DSR CTS To change serial settings use the Y command see page 41 Interface cable Computer end Depends on type of host computer IBM XT PS 2 DB25 female connector IBM AT DB9 female connector Printer end DB9 male connector Host 9 pin 25 pin 9 pin Printer 1 5V RX...

Page 80: ...0 039 8 0 315 64 9 1 13 0 044 9 0 354 72 10 1 25 0 049 10 0 394 80 20 2 50 0 099 20 0 787 160 30 3 75 0 124 30 1 181 240 40 5 00 0 197 40 1 575 320 50 6 26 0 246 50 1 969 400 60 7 51 0 296 60 2 362 480 70 8 76 0 345 70 2 756 560 80 10 01 0 394 80 3 150 640 90 11 26 0 443 90 3 543 720 100 12 51 0 493 100 3 937 800 200 25 02 0 985 200 7 874 1600 300 37 54 1 478 400 50 05 1 970 500 62 56 2 463 600 75...

Page 81: ...rent characters is determined by the I command setting Font Size in dots Size of characters 1 8 x 12 dots 20 3 characters inch cpi 6 points 2 10 x 16 dots 16 9 cpi 7 points 3 12 x 20 dots 14 5 cpi 10 points 4 14 x 24 dots 12 7 cpi 12 points 5 32 x 48 dots 5 6 cpi 24 points 3 FONTS CODE PAGES CHARACTER SETS Fonts Code Pages and Character Sets UBI EasyCoder 71 Appendices Font Sizes 1 5 ...

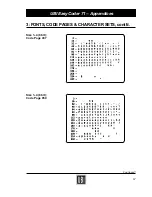
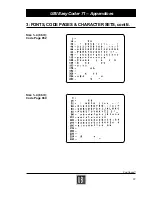
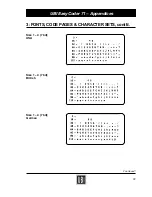
Page 82: ...82 3 FONTS CODE PAGES CHARACTER SETS cont d Continued UBI EasyCoder 71 Appendices Size 1 4 8 bit Code Page 437 Size 1 4 8 bit Code Page 850 ...

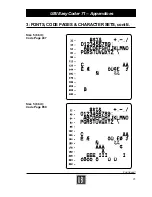
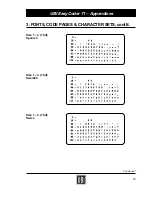
Page 83: ...83 3 FONTS CODE PAGES CHARACTER SETS cont d Continued UBI EasyCoder 71 Appendices Size 1 4 8 bit Code Page 852 Size 1 4 8 bit Code Page 860 ...

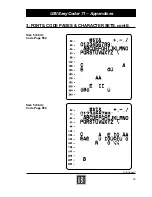
Page 84: ...84 3 FONTS CODE PAGES CHARACTER SETS cont d Continued UBI EasyCoder 71 Appendices Size 1 4 8 bit Code Page 863 Size 1 4 8 bit Code Page 865 ...

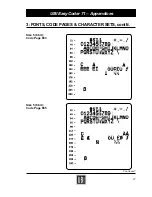
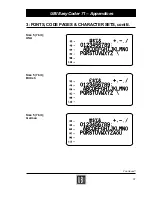
Page 85: ...85 3 FONTS CODE PAGES CHARACTER SETS cont d Continued UBI EasyCoder 71 Appendices Size 5 8 bit Code Page 437 Size 5 8 bit Code Page 850 ...

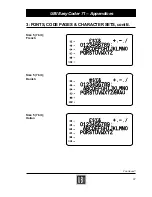
Page 86: ...86 3 FONTS CODE PAGES CHARACTER SETS cont d Continued UBI EasyCoder 71 Appendices Size 5 8 bit Code Page 852 Size 5 8 bit Code Page 860 ...

Page 87: ...87 3 FONTS CODE PAGES CHARACTER SETS cont d Continued UBI EasyCoder 71 Appendices Size 5 8 bit Code Page 863 Size 5 8 bit Code Page 865 ...

Page 88: ...88 UBI EasyCoder 71 Appendices 3 FONTS CODE PAGES CHARACTER SETS cont d Continued Size 1 4 7 bit USA Size 1 4 7 bit German Size 1 4 7 bit British ...

Page 89: ...89 UBI EasyCoder 71 Appendices 3 FONTS CODE PAGES CHARACTER SETS cont d Continued Size 1 4 7 bit French Size 1 4 7 bit Italian Size 1 4 7 bit Danish ...

Page 90: ...90 UBI EasyCoder 71 Appendices 3 FONTS CODE PAGES CHARACTER SETS cont d Continued Size 1 4 7 bit Spanish Size 1 4 7 bit Swiss Size 1 4 7 bit Swedish ...

Page 91: ...91 UBI EasyCoder 71 Appendices 3 FONTS CODE PAGES CHARACTER SETS cont d Continued Size 5 7 bit USA Size 5 7 bit German Size 5 7 bit British ...

Page 92: ...92 UBI EasyCoder 71 Appendices 3 FONTS CODE PAGES CHARACTER SETS cont d Continued Size 5 7 bit Danish Size 5 7 bit French Size 5 7 bit Italian ...

Page 93: ...93 UBI EasyCoder 71 Appendices 3 FONTS CODE PAGES CHARACTER SETS cont d Continued Size 5 7 bit Spanish Size 5 7 bit Swiss Size 5 7 bit Swedish ...

Page 94: ...94 UBI EasyCoder 71 Appendices 3 FONTS CODE PAGES CHARACTER SETS cont d Size 5 7 bit Characters in Dump Mode ...

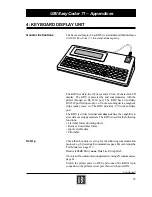
Page 95: ...DU is strictly terminal and does not have the capability to store data or set up parameters The KDU is used for the following functions List label forms stored in printer Retrieve stored label forms Input variable data Print label Check that the printer is set up for the following communication protocol e g byissuingaUcommand seepage 46 orenteringthe Test Mode see page 11 Baud rate 9600 Parity non...

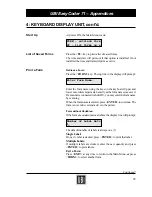
Page 96: ...rs must match exactly as the form name was saved IfascannerisconnectedtotheKDU youmayentertheformname by scanning Whentheformnameisentered press ENTER tocontinue The form is now retrieved and active in the printer Form without Variables Iftheform doesnotcontainvariables thedisplaylinewillprompt Number of Label Sets 1_ The default number of labels is always one 1 Single Label If one 1 label is desi...

Page 97: ...tiple labels are desired enter the new quantity and press ENTER to print labels Exit a Form Press EXIT at any time to return to the Main Menu or press FORM to select another form Form with Consecutive Number Fields If the form contains a consecutive number field the system will automaticallykeeptrackofthenextnumbersequence Ifyoudonot needtointerferewiththispredeterminedsequence press ENTER at this...

Page 98: ...sbeendesignedto hide avariableprompt e g Store No that data will be protected and this prompt will appear only when the form is initially retrieved Another label design command will prevent a prompt from ever showing and may be desirable for applications where data should not be changed e g Serial Numbers The auxiliary port is intended for RS 232C communication from e g ascannerormagneticstripread...

Reviews: