background image


11


Gripper Configuration Node


Confirm that the pink wire is connected to 
the correct output port. 

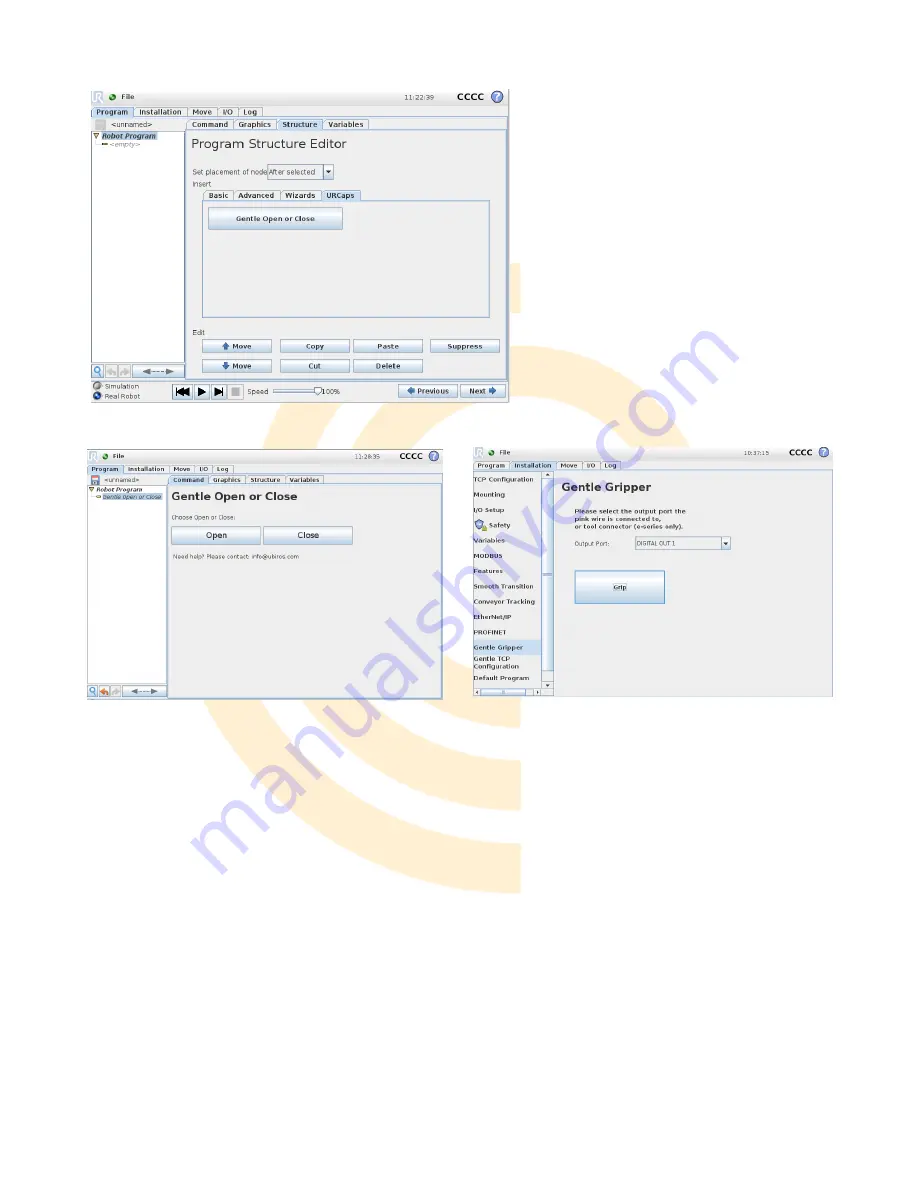
This  node  in  Figure  15  is  available  at 
“Installation → Gentle Gripper”. Select the 
output  port connected to  the  gripper from 
the dropdown menu. Tool outputs are not 
available on CB series. 
The button below the dropdown menu will 
set  the  output  to  true  (releasing)  or  false 
(gripping). If the button displays “Initialize” 
and/or “Start”, click on the button and it will 
attempt to access the digital IO. The button 
and  dropdown  disable  themselves  if  the 
attempt fails. 


Figure 13 Add Program Node, CB-Series


Figure 14 Gripper Actuation Node, CB-Series 

Figure 15 Gripper Configuration Node, CB-Series 

Summary of Contents for GENTLE DUO MINI

Page 1: ...GENTLE DUO MINI USER MANUAL October 2020...

Page 2: ...large range of object sizes and shapes to pick them up gently Gentle Duo is the first electrically actuated soft robotic gripper and it offers individual finger actuation Contact Us UBIROS INC 251 W C...

Page 3: ...6 KUKA IIVA 7 Yaskawa Motoman HC10 w YRC1000micro controller 7 GRIPPER SETUP 7 URCAP USAGE 8 URCap Feature Overview Compatibility 8 Universal Robots e Series 8 Installation 8 Uninstallation 8 Tool Ce...

Page 4: ...1 1 in Weight 800 g 1 8 lbs Payload 1 500 g 3 3 lbs Grasping time 100 ms 50 mm 100 ms 2 in Maximum cycle 500 000 Input Voltage 15 V 25 V Max Current idle load instantaneous 0 03 A 2 A 3 A Control Int...

Page 5: ...1 5 mm and 63 mm See the dimensions of the universal mounting plate below Figure 1 Mounting steps 1 Attach the universal mounting adapter to your robot s tool flange using 4 screws provided 2 Insert U...

Page 6: ...pply Gentle Duo Mini with power from the auxiliary power supply The PINK Gentle Duo Mini lead is signal where 24V is gripper open and 0V is gripper closed Select a third wire from S 2 for the signal t...

Page 7: ...ss Point You can adjust Gentle Duo Mini s settings by following the steps below 1 Connect any WiFi enabled device to the WiFi network named Ubiros Product ID Please note that this network is not conne...

Page 8: ...uration section Uninstallation To uninstall this URCap navigate back to the screen shown in Figure 5 select the URCap and press the button Tool Center Point TCP Configuration To install the Tool Cente...

Page 9: ...o open the gripper or Close to close the gripper Alternatively you can use the SET function to set the gripper s digital or tool output to 1 HIGH Open or 0 LOW Close to operate the gripper if you choo...

Page 10: ...xt field enter the new value and press the Save Changes button The Remove TCP button will remove the displayed configuration and the Restore Default button will restore the default tool center point s...

Page 11: ...ool outputs are not available on CB series The button below the dropdown menu will set the output to true releasing or false gripping If the button displays Initialize and or Start click on the button...

Reviews: