


4
Technical Specifications
LCD Display 7” TFT Capacitive Multi-touch LCD – 800*480 pixels
OS
Android 4.2.2
Processor
Cortex A7; Dual Core 1.2 GHz Processor
Memory
1GB RAM
Storage
4GB on board, expandable to 32GB via MicroSD
PC Interface MicroUSB
Power
3.7V Li-Polymer rechargeable battery
Audio
External speakers, 3.5mm headset jack
Video
GPU w/ HD video supported
Camera
Front Facing VGA Camera & Rear facing 2MP camera
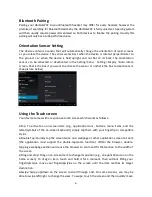
Sensor
G-Sensor (Orientation Sensor)
Connectivity Wi-Fi 802.11 b/g/n, GPRS & Bluetooth
Software
Over 30 languages supported, full office suite, 2 mobile browsers, social
networking, games, educational content, etc…
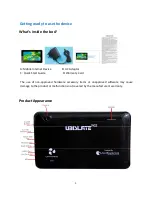
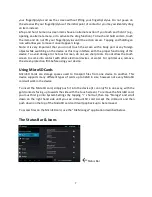
Quick Start Guide
Charging the Battery
Your device has a built-in battery. Before using the device for the first time, you must charge
the battery for at least 6-8 hours. Use only Datawind approved chargers. Unauthorized
chargers may cause damage to your device and/or may lead to overcharging and/or explosion.
When your battery is low, the battery level indicator will be very thin. If the battery level
reaches a critical level, the device will automatically turn off. Recharge the battery to continue
use. Recharge the battery by first inserting the cable into the charging head and then plugging
the head into a standard AC power outlet. After the charging is complete, unplug the charging
head. Note that it is best to charge the device at room temperature. It is not necessary to wait
until the battery is completely drained before recharging, you may charge at any time. Also,
the battery will maintain its lifespan longer if it is not left uncharged for periods of more than 2
weeks at a time.
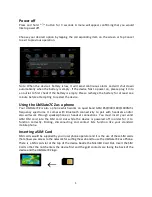
Power on
Press and hold “
” button for 3 seconds to power on the device. It can take up to a minute
and half to boot the system. After system boot is completed, it will enter Android desktop.
Slide the lock icon “
” to the right to unlock the screen to start to use the device.
Power Save mode and Lock Screen
You can turn off the screen to save power by quickly pressing the power “
” button. The
screen will turn to Lock Screen mode. Repeat the process to reactivate the device.
Note: The device will remain operational as will any applications when the device is in power
saving mode, only the screen is turned off.
Summary of Contents for 7CZ
Page 1: ...1 UBISLATE 7CZ USER MANUAL...


