5
|
7
V1.1
2017-07-27
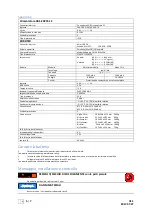
Specifications
Power supply DAS-20PFE-12
Electrical connectors
EURO-connector, DC-Connector
Input
100-240 V~ 50/60 Hz 0.7 A
Output
9.6 V
2 A
Standby-power
0.15 W
Protection class
2
Protection type
IP20
ROBOTER
Electrical connectors
Mini-USB 2.0,
Micro-TF Karte: 128 MB ~ 32 GB
Operating system
Windows/Mac OS/iOS/Android
Bluetooth version
3.0/4.0 BLE+DER Dual Mode
Processor type
STM32-F103RDT6
Servomotors
Torque: 6.5 V
8 kg x cm,
8.5 V
12 kg x cm,
Speed: 6.5 V
0.238 s/60°,
8.5 V
0.198 s/60°
Battery
Model
Other Jimu models
Alpha 1 Pro
Technology
Li-Ion
Voltage
7.4 V
Capacity
1200 mAh
2200 mAh
Energy
8.80 Wh
16.28 Wh
Circuits
Overcharging and deep discharge protection
Input
9.6 V
1 A
Operating time
≥ 1 h
Charge time
~2 h
Bluetooth Frequency band
2402-2480 MHz
Occupied channel band width
1.03 MHz
Type of antenna
PCB
Antenna amplification
1.0 dBi
Operating conditions
-5~+85 °C 20-75 % RH
Storage conditions
-5~+55 °C 20-75 % RH
Antenna cable
BT3.0: 0.49 mW (-3.14 dBm)
BT4.0: 0.25 mW (-5.94 dBm)
Protection class
3
Weights and measures
Alpha 1 Pro:
398 x 208 x 122 mm 1650 g
Astrobot Kit:
255 x 65 x 305 mm 850 g
Explorer Kit:
263 x 60 x 350 mm 1000 g
Inventor Kit:
292 x 407 x 82 mm 1650 g
Mini Kit:
304.8 x 65 x 254 mm 1000 g
TankBot Kit:
207 x 65 x 254 mm 750 g
Only Astrobot and Inventor Kit
Speaker impedance
4
Ω
Speaker output
3 W
Only Astrobot and Tankbot Kit
IR Sensor
48 MHz
Charging the battery
1.
Completely charge the battery of the robot before initial use.
The battery is delivered partly charged.
2.
Insert the power plug of the delivered power supply unit into a free and easily accessible socket.
3.
Connect the DC-plug of the power supply unit to the DC-jack of the robot.
The battery can be charged in a mounted or unmounted state.
Assembly, Installation and Control
CHOKING HAZARD / RISK OF SUFFOCATION through small parts
-
Not suitable for children under the age of 3.
DAMAGE TO PROPERTY
-
Make sure cables are properly fixed


