


AeroCut X / XPro SERVICE MANUAL
51
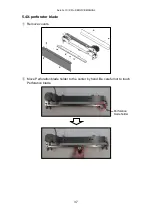
6.3
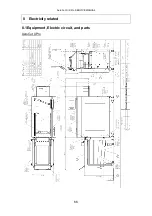
Electrical equipment
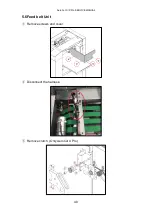
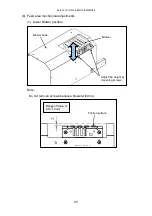
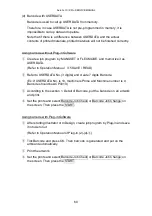
6.3.1
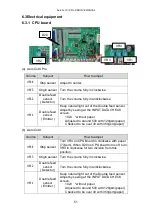
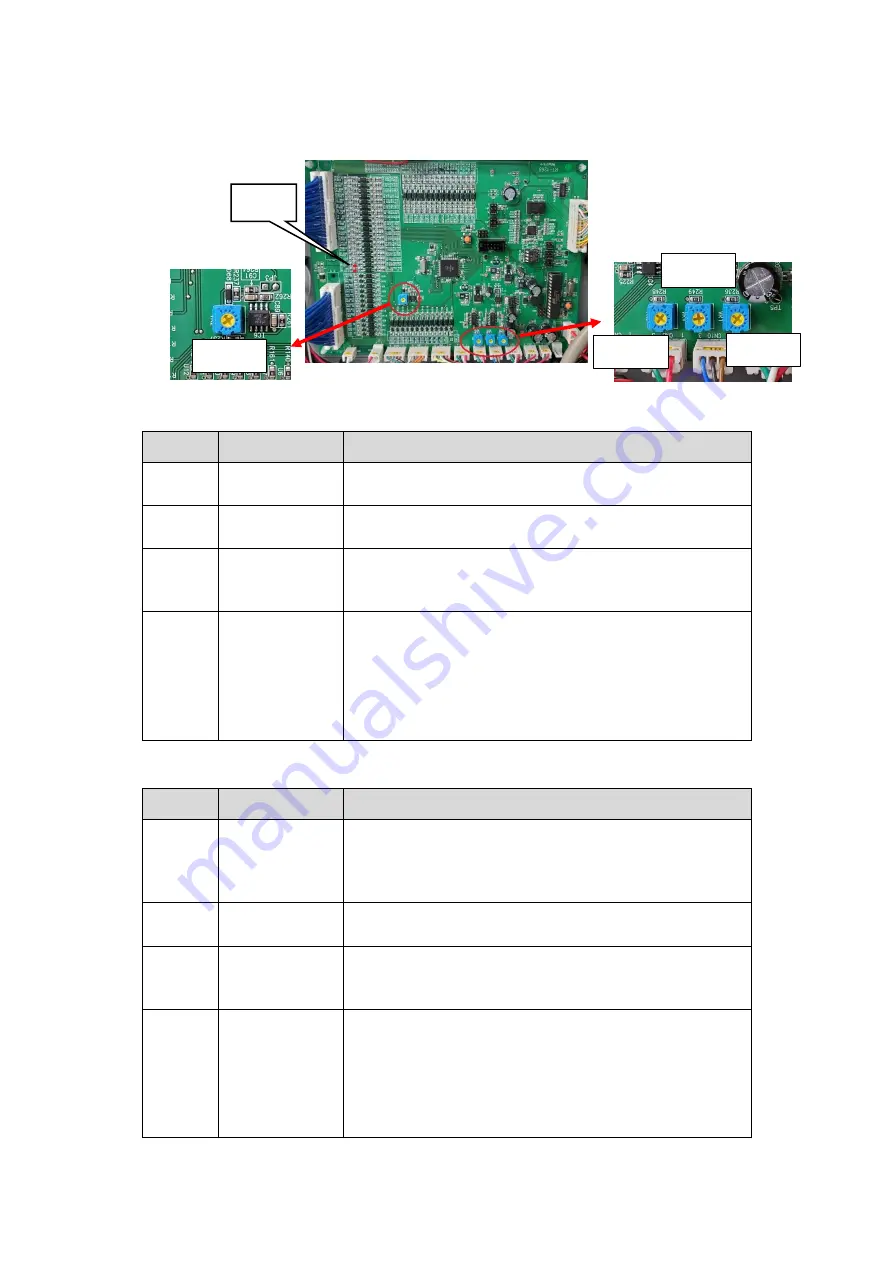
CPU board
(a)
AeroCut X Pro
Volume
Subject
How to adjust
VR
4
Stop sensor Adjust to center.
VR
3
Origin sensor Turn the volume fully in clockwise.
VR
2
Double feed
sensor
( Detector )
Turn the volume fully in anticlockwise.
VR
1
Double feed
sensor
( Emitter )
Keep natural light out of the Double feed sensor.
Adjust by seeing at the INPUT DATA CHECK
screen.
·
1023 *without paper
·
Adjusted to around 500 with 120gsm(paper)
·
Checked to be over 40 with 350gsm(paper)
(b)
AeroCut X
Volume
Subject
How to adjust
VR
4
Stop sensor
Turn VR4 on CPU Board in clockwise with paper
(77gsm). When D20 on CPU board turns off, turn
VR4 in clockwise for two division from this
position.
VR
3
Origin sensor Turn the volume fully in clockwise.
VR
2
Double feed
sensor
( Detector )
Turn the volume fully in anticlockwise.
VR
1
Double feed
sensor
( Emitter )
Keep natural light out of the Double feed sensor.
Adjust by seeing at the INPUT DATA CHECK
screen.
·
1023 *without paper
·
Adjusted to around 500 with 120gsm(paper)
·
Checked to be over 40 with 350gsm(paper)
VR2
VR4
VR3
VR1
D20
Summary of Contents for AeroCut X
Page 1: ...SERVICE MANUAL UCHIDA YOKO CO LTD TOKYO JAPAN V1 00 ...
Page 9: ...AeroCut X XPro SERVICE MANUAL 9 d Remove covers ...
Page 27: ...AeroCut X XPro SERVICE MANUAL 27 3 7MAINTENANCE Screen AeroCut XPro AeroCut X ...
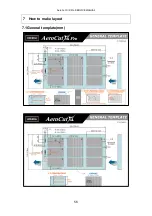
Page 56: ...AeroCut X XPro SERVICE MANUAL 56 7 How to make layout 7 1General template mm ...
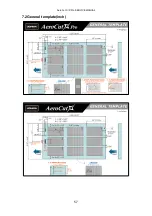
Page 57: ...AeroCut X XPro SERVICE MANUAL 57 7 2General template inch ...
Page 67: ...AeroCut X XPro SERVICE MANUAL 67 AeroCut XPro ...
Page 68: ...AeroCut X XPro SERVICE MANUAL 68 AeroCut XPro ...
Page 69: ...AeroCut X XPro SERVICE MANUAL 69 AeroCut X ...
Page 70: ...AeroCut X XPro SERVICE MANUAL 70 AeroCut X ...
Page 71: ...AeroCut X XPro SERVICE MANUAL 71 AeroCut X ...
Page 81: ...AeroCut X XPro SERVICE MANUAL 81 8 5Wiring Details ...
Page 82: ...AeroCut X XPro SERVICE MANUAL 82 ...
Page 113: ...UCHIDA YOKO CO LTD TOKYO JAPAN ...


