

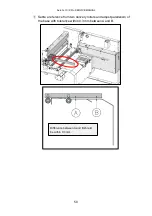

AeroCut X / XPro SERVICE MANUAL
54
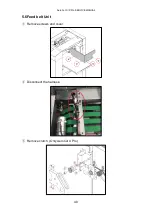
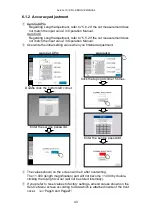
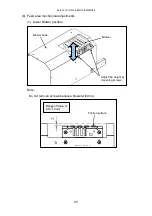
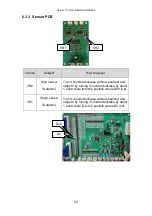
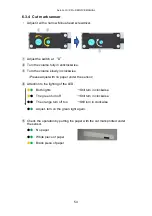
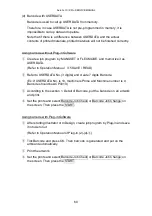
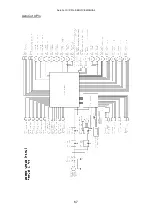
6.3.4
Cut mark sensor
・
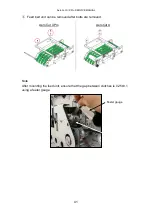
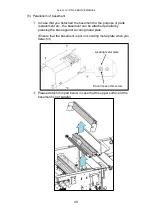
Adjust it with a narrow Minus-head screwdriver.
①
Adjust the switch at
“
D
”
.
②
Turn the volume fully in anticlockwise.
③
Turn the volume slowly in clockwise.
(
Please adjust with no paper under the sensor.
)
④
Attention to the lighting of the LED.
●
●
Both lights
→
Still turn in clockwise
●
●
The green turn off
→
Still turn in clockwise
●●
The orange turn off too
→
Still turn in clockwise
●
●
Adjust, turn on the green light again.
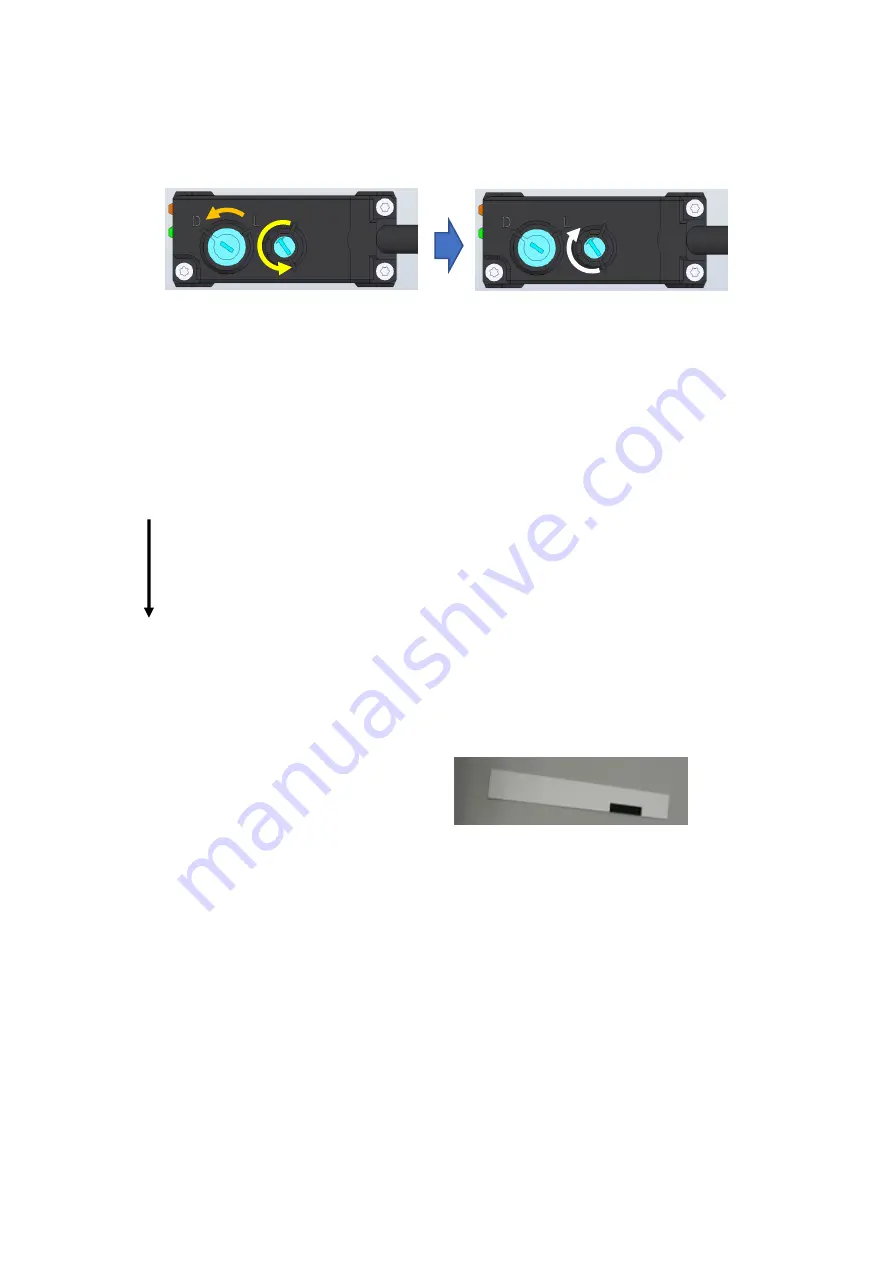
⑤
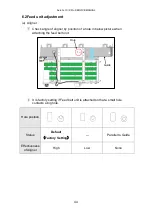
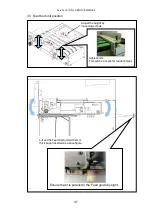
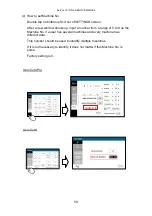
Check the operation by putting the paper with the cut mark printed under
the sensor.
●
●
:
No paper
●
●
:
White piece of paper
●
●
:
Black piece of paper
①
②
③
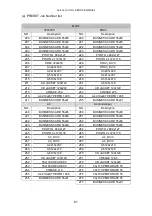
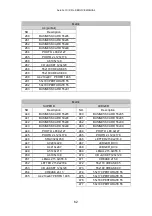
Summary of Contents for AeroCut X
Page 1: ...SERVICE MANUAL UCHIDA YOKO CO LTD TOKYO JAPAN V1 00 ...
Page 9: ...AeroCut X XPro SERVICE MANUAL 9 d Remove covers ...
Page 27: ...AeroCut X XPro SERVICE MANUAL 27 3 7MAINTENANCE Screen AeroCut XPro AeroCut X ...
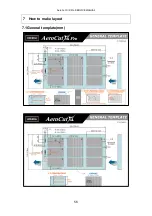
Page 56: ...AeroCut X XPro SERVICE MANUAL 56 7 How to make layout 7 1General template mm ...
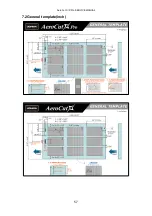
Page 57: ...AeroCut X XPro SERVICE MANUAL 57 7 2General template inch ...
Page 67: ...AeroCut X XPro SERVICE MANUAL 67 AeroCut XPro ...
Page 68: ...AeroCut X XPro SERVICE MANUAL 68 AeroCut XPro ...
Page 69: ...AeroCut X XPro SERVICE MANUAL 69 AeroCut X ...
Page 70: ...AeroCut X XPro SERVICE MANUAL 70 AeroCut X ...
Page 71: ...AeroCut X XPro SERVICE MANUAL 71 AeroCut X ...
Page 81: ...AeroCut X XPro SERVICE MANUAL 81 8 5Wiring Details ...
Page 82: ...AeroCut X XPro SERVICE MANUAL 82 ...
Page 113: ...UCHIDA YOKO CO LTD TOKYO JAPAN ...


