


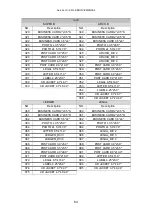
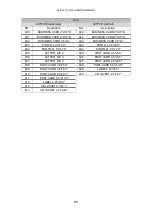


AeroCut X / XPro SERVICE MANUAL
55
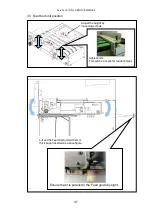
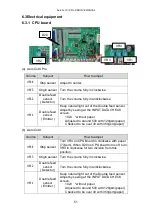
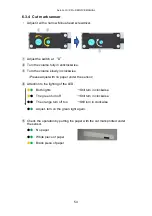
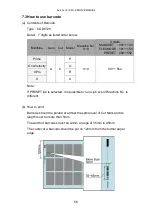
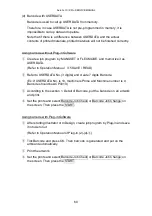
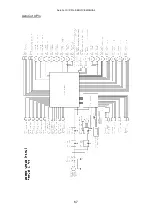
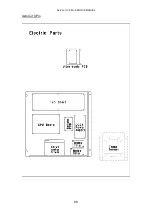
6.3.5
Ultra-sonic PCB
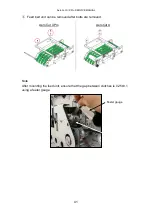
①
Close all safety covers.
②
Turn the VR1 and VR2 fully in clockwise.
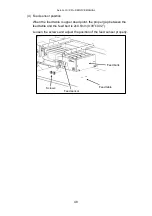
③
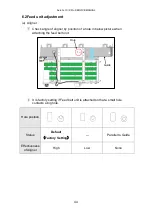
Put two sheets of paper (45gms) under the Ultra-sonic sensor.
④
Turn the VR2 slowly in anticlockwise.
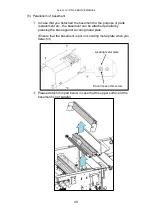
⑤
Match the place where the LED on the board turns from a weak light to a
strong light.
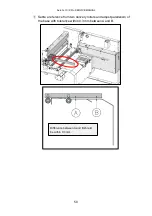
⑥
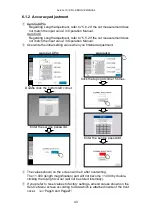
Check the INPUT DATA CHECK screen lamp does not blink, It must be lit.
AeroCut XPro
AeroCut X
⑦
Check the lamp turns on with two sheets of paper, turns off with one sheet,
and turns off without paper.
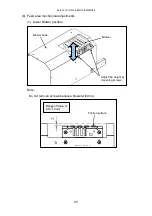
VR2
VR1
Check the LED
VR2
Summary of Contents for AeroCut X
Page 1: ...SERVICE MANUAL UCHIDA YOKO CO LTD TOKYO JAPAN V1 00 ...
Page 9: ...AeroCut X XPro SERVICE MANUAL 9 d Remove covers ...
Page 27: ...AeroCut X XPro SERVICE MANUAL 27 3 7MAINTENANCE Screen AeroCut XPro AeroCut X ...
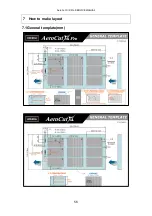
Page 56: ...AeroCut X XPro SERVICE MANUAL 56 7 How to make layout 7 1General template mm ...
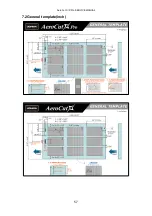
Page 57: ...AeroCut X XPro SERVICE MANUAL 57 7 2General template inch ...
Page 67: ...AeroCut X XPro SERVICE MANUAL 67 AeroCut XPro ...
Page 68: ...AeroCut X XPro SERVICE MANUAL 68 AeroCut XPro ...
Page 69: ...AeroCut X XPro SERVICE MANUAL 69 AeroCut X ...
Page 70: ...AeroCut X XPro SERVICE MANUAL 70 AeroCut X ...
Page 71: ...AeroCut X XPro SERVICE MANUAL 71 AeroCut X ...
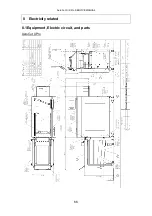
Page 81: ...AeroCut X XPro SERVICE MANUAL 81 8 5Wiring Details ...
Page 82: ...AeroCut X XPro SERVICE MANUAL 82 ...
Page 113: ...UCHIDA YOKO CO LTD TOKYO JAPAN ...


