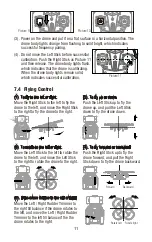
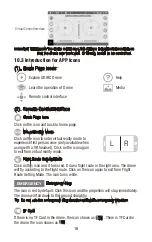
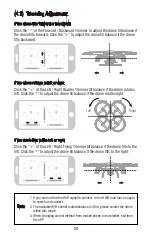

(7). If the drone tilts to the left or right
Move the Left / Right Flying Trimmer to the
right till balance if the drone drifts to the left,
and move the Left Trimmer to the left till
balance if the drone drifts to the right.
Drift left
Drift right
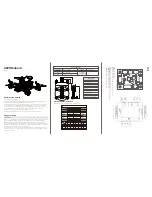
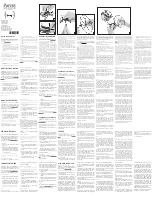
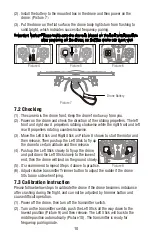
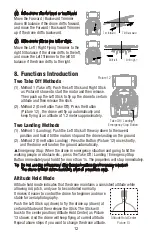
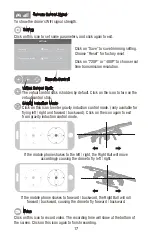
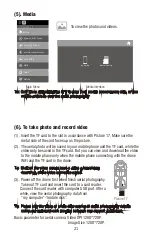
Two Take Off Methods
Take Off / Landing /
Emergency Stop Button
8. Functions Introduction
(2). Method 2 (One Button Take Off): Press the Button
(Picture 12) , the drone will fly up automatically and
keep flying at an altitude of 1.2 meters approximately.
(1). Method 1 (Take off): Push the Left Stick and Right Stick
as Picture 8 shown to start the motor and then release.
Then push up the Left Stick to fly up the drone to certain
altitude and then release the stick.
Picture 12
(2). Method 2 (One Button Landing): Press the Button (Picture 12) once shortly,
and the drone will land on the ground automatically.
▲
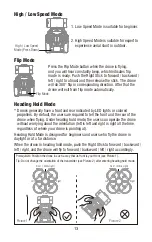
Emergency Stop: When the drone in emergency situation and going to hit the
walking people or obstacle etc., press the Take Off / Landing / Emergency Stop
Button immediately and hold it for more than 1s. The propellers will stop immediately.
Tip: Do not use the emergency stop function unless in emergency situation.
The drone will fall down suddenly after all propellers stop.
Two Landing Methods
(1). Method 1 (Landing): Push the Left Stick all the way down to the lowest
position and hold it till the motors stop and the drone landing on the ground.
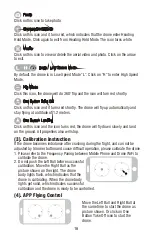
(6). If the drone tilts forward or backward
Move the Forward / Backward Trimmer
down till balance if the drone drifts forward,
and move the Forward / Backward Trimmer
up if the drone drifts backward.
Tilt forward
Tilt Backward
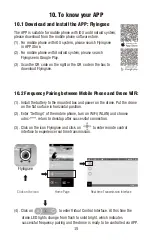
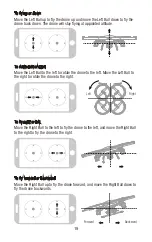
Altitude Hold Mode
Altitude hold mode indicates that the drone maintains a consistent altitude while
allowing roll, pitch, and yaw to be controlled normally.
It makes it easier to control the drone for beginner and more
stable for aerial photography.
Push the Left Stick up (down) to fly the drone up (down) at
certain altitude and then release the Stick. The Stick will
back to the center position (Altitude Hold Center) as Picture
13 shown. And the drone will keep flying at current altitude.
Repeat above steps if you want to change the drone altitude.
Altitude Hold Center
Picture 13
12