background image

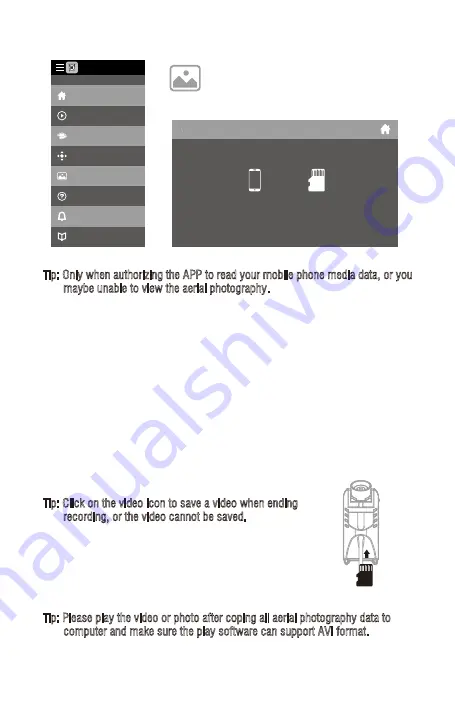
Tip: Please play the video or photo after coping all aerial photography data to

       computer and make sure the play software can support AVI format.
Basic parameter for aerial camera: Video DPI 1280*720P; 

                                                      Image Size 1280*720P.
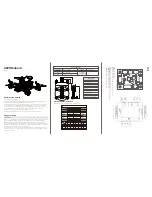
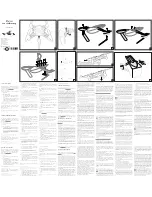
Picture 17

(6). To take photo and record video

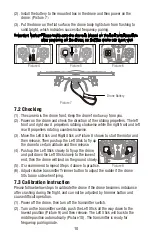
(1). Insert the TF card to the slot in accordance with Picture 17. Make sure the

       metal side of the card faces up as the picture.
(2). The aerial photo will be saved in your mobile phone and the TF card, while the

       video only be saved in the TF card. But you can view and download the video 

       to the mobile phone only when the mobile phone connecting with the drone 

       WiFi and the TF card in the drone.

Tip: Click on the video icon to save a video when ending

       recording, or the video cannot be saved. 

(3). Power off the drone first when finish aerial photography. 

       Take out TF card and insert the card to a card reader. 

      Connect the card reader with computer USB port. After a

      while, view the aerial photography data from

       “my computer”-”mobile disk”.

Tip: Only when authorizing the APP to read your mobile phone media data, or you

       maybe unable to view the aerial photography.

To view the photos and videos. 
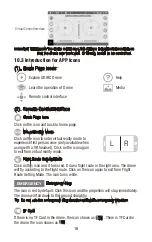
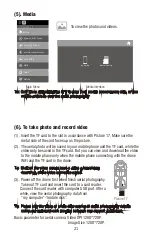
(5). Media 

Main Menu

Media Interface

My Gallery

Internal Memory

Home

Explore UDIRC Drone

Learning Drone

Remote control interface

My Gallery

Help

News

Notice

FLYINGSEE 1.0

21

Summary of Contents for VOYAGER U845Wifi

Page 1: ...U818A WIFI Operations Guide...

Page 2: ...Battery 4 Charging Instruction for Drone Battery 5 Checklist before Flight 5 Instruction for Drone and Transmitter 6 Pre flight Operation Instruction 9 Functions Introduction 12 Propeller Installation...

Page 3: ...erienced RC drone user aged 14 years or above This product contains small parts please put it out of child s reach The flying field must be legally approved by your local government Do not fly the dro...

Page 4: ...nly Power off the drone before cleaning the RC drone Check the USB cable charging plug etc regularly to ensure they can work well If there is any damage stop using it immediately till it s fixed well...

Page 5: ...operation may cause drone crash which may arouse motor defective and noise and then effect the flying status or even stop flying Please go to the local distributor to buy new parts for replacement so...

Page 6: ...nce Radius 40m 100m 55 65mins Camera Resolution 1280x720P Remote Control Technology 2 4Ghz Transmitter Battery 4xAA Alkaline Batteries Drone Battery 3 7Vx2 350mAh Main Motor 8520x4 Charging Time for D...

Page 7: ...otor Red and Blue Wire 11 25 Counterclockwise Motor Black and White Wire Motor Gear 12 26 Front Light of Motor Holder Blue Bearing 13 9 No 1 2 3 4 5 6 7 8 Name Housing Front Light White Front Light Ho...

Page 8: ...the drone becomes balance if the drone rotates to the left or right Move the button till the drone becomes balance if the drone drifts forward or backward Move the button till the drone becomes balanc...

Page 9: ...ed use new and old batteries 3 Do not mixed use different kinds of batteries 4 Do not charge the non rechargeable battery Notice 1 Press the self locking switch on the top right side of the mobile hol...

Page 10: ...the rotating propellers The left front and right rear A propellers rotating clockwise while the right front and left rear B propellers rotating counterclockwise 6 Adjust relative transmitter Trimmer...

Page 11: ...to the left to fly the drone to the left and move the Right Stick to the right to fly the drone to the right 1 To fly to the left or right 2 To fly up or down 4 To fly forward or backward 3 To rotate...

Page 12: ...immediately and hold it for more than 1s The propellers will stop immediately Tip Do not use the emergency stop function unless in emergency situation The drone will fall down suddenly after all prop...

Page 13: ...ly have a front and rear indicated by LED lights or colored propellers By default the users are required to tell the front and the rear of the drone when flying Under heading hold mode the users can o...

Page 14: ...rone may out of control and fly away Propellers Stuck Protection 1 When the drone propeller was stuck the drone body lights flash rapidly and the propellers stuck protection function turn on automatic...

Page 15: ...er Virtual Control Interface At this time the drone LED lights change from flash to solid bright which indicates successful frequency pairing and the drone is ready to be controlled via APP Flyingsee...

Page 16: ...experience first person view only available when using with a VR headset Click on the icon again to exit from virtual reality mode Click on this icon and it turns red Draw a flight route in the right...

Page 17: ...r gravity induction control mode only available for flying left right and forward backward Click on the icon again to exit from gravity induction control mode To show the drone s WiFi signal strength...

Page 18: ...erial video and photo Click on the arrow to exit Media Click on this icon and it turns red which indicates that the drone enter Heading Hold Mode Click again to exit from Heading Hold Mode The icon tu...

Page 19: ...ht Move the Left Ball to the left to rotate the drone to the left Move the Left Ball to the right to rotate the drone to the right To fly right or left Move the Right Ball to the left to fly the drone...

Page 20: ...he to adjust the drone till balance if the drone rotates right If the drone tilts to the left or right Click the of the Left Right Flying Trimmer till balance if the drone tilts to the left Click the...

Page 21: ...ile phone only when the mobile phone connecting with the drone WiFi and the TF card in the drone Tip Click on the video icon to save a video when ending recording or the video cannot be saved 3 Power...

Page 22: ...WIFI 06 Clockwise Motor Red and Blue Wire U818AWIFI 07 Counterclockwise Motor Black and White Wire U818AWIFI 08 Clockwise Motor Parts Blue Light U818AWIFI 09 Clockwise Motor Parts Red Light U818AWIFI...

Page 23: ...ttery 3 Incorrect installation of propeller 3 Install the propeller in accordance with the user manual 2 The propeller deformed seriously 2 Replace propeller 3 The motor holder deformed 3 Replace the...

Page 24: ...correct the interference by one or more of the following measures The equipment may generate or use radio frequency energy Changes or modifications to this equipment may cause harmful interference un...

Reviews: