MIN/MAX mode
When using the MIN / M AX capture mode for Amps, it is recommended
that you first select the range of the expected maximum value. If this
is not done it will lock in the lowest range possible for the initial
measurement. If the maximum value exceeds this range the meter will
capture “
O . L
” as the maximum value.
Manual ranging will also provide a faster response current input.
Data Hold
Press the “ “ button to activate. This will freeze the reading and
range in the display for your review.
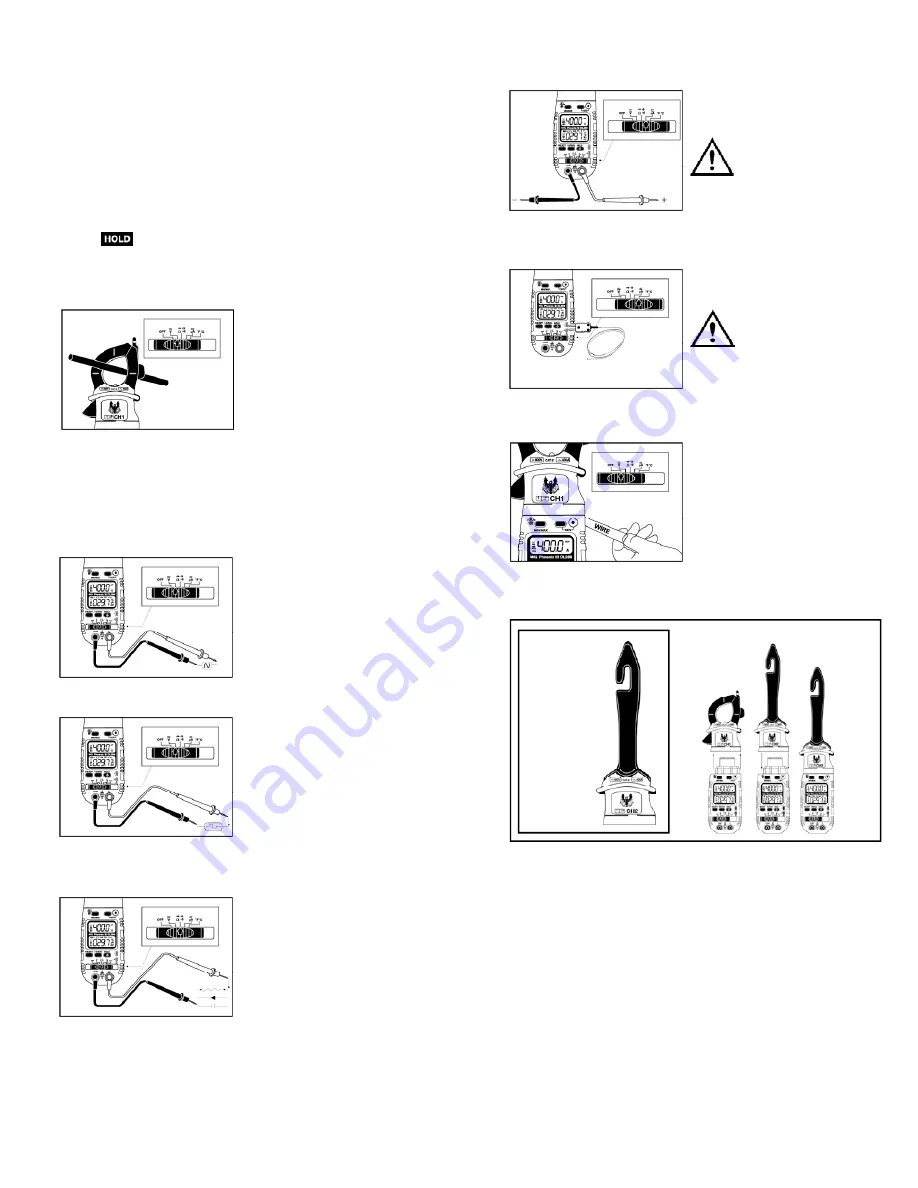
Measuring AC Amps
Measuring AC or DC Volts
Measuring Frequency or Duty Cycle
Measuring Resistance, Continuity, Diode and Capacitance
NOTE: Capacitance
- leave the meter connected to the capacitor for
10 seconds or more for the reading to stabilize.
Diode
- “
OL
” in reverse mode and approximate forward voltage
drop when connected in forward mode.
Continuity
- sounds the tone at approximately 50
Ω
or less.
Measuring AC, DC or µA
Measuring Temperature
( D L 279 / D L 289 only)
Measuring NCV
Optional Extended Clamp Head (CH2)
(Sold separately)
NOTE:
Remove the hook adapter when not in use to extend battery life. The
hook will consume a small amount of battery power when connected to the
meter even when the meter display is off. The meter will automatically
display “
A
” for amps with the CH2 or “
ADP
” for other adapters.
DL269/DL279/DL289-MAN
P. 3
Press “
SELECT
” to change the
reading from AC to DC.
• DL269
Select “ADP” to measure AC
Amps with the clamp head or
hook
• DL279/DL289
Select any range to power the
upper display
Press “
Min/Max
” to activate Max
capture, Min capture, or normal
display.
Press “
NCV/RANGE
” to select
range prior to MIN/MAX.
Meter must be in AC Volts mode first
then press “
Hz/Duty
” to change
function to Frequency or Duty Cycle.
NOTE:
Frequency greater than
100Khz will display “
0.000 Hz
”
Press “
SELECT
” to move from
Resistance mode to Continuity, diode
or continuity mode.
NOTE:
Meter must be in series for µA
measurements. Press “
SELECT
” to
change AC or DC source.
WARNING!
Do not exceed 2000µA AC or DC
current or damage to the meter
may occur.
Press “
SELECT
” to change scale from
˚F to ˚C.
WARNING!
Disconnect test leads from any
voltage source and the meter before
plugging in thermocouple.
Non-Contact Voltage
(DL279/DL289 only)
Non-contact voltage with the power
switch in the off position, press and
hold the “
NCV
” button and move the
meter near this voltage source.
Optional
CH2 hook
Connection
for optional
CH2 hook


