


12/2009
Weldmaster
11
3.4 Genuine Spare Parts
Spare parts and accessories are designed especially for the
Weldmaster. We explicitly point out that other parts must not be
used.
By using other parts the safety of the machine can be jeopardized.
Wolff is not liable for damage caused by not using genuine
spare parts.
4.0 Maintenance
The Weldmaster is nearly maintenance-free.
The hot air nozzle, the feed tube and the rollers should be
cleaned from floor covering residues from time to time. The feed
tube can be removed from the machine by turning black "ball"-
screw.
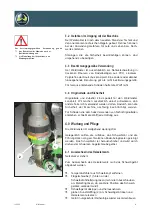
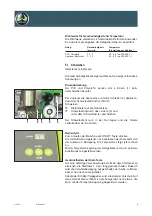
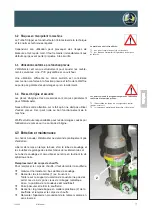
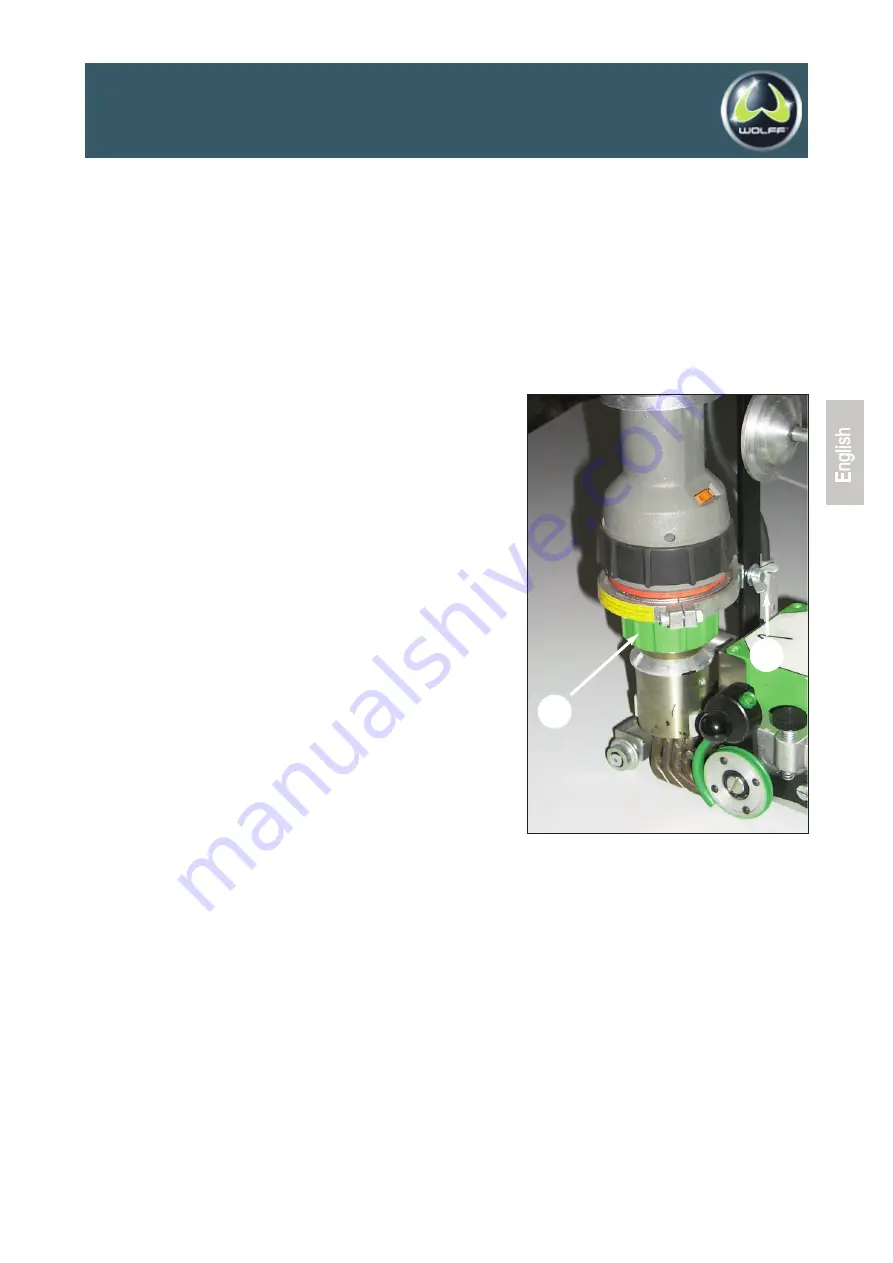
Changing the heating element.
Disconnect the power supply!
For changing the heating element the hot air gun has to be
removed from the machine.
Delete thermo couple off the welding head.
remove the thumb screw (1) at the back side of the welding
rod support (do not loosen the hexagon socket screw at the
metal ring, this would change the position of the hot air gun)
turn and detach the hot air gun
remove the big plastic ring (2) of the hot air gun and change
the heating element
reassemble the machine in reverse sequence
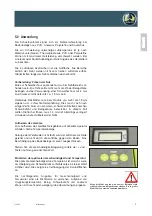
5.0 Use
The Weldmaster is designed for welding PVC-, Polyolefine-,
Caoutchouc- and Linoleum floor coverings.
The various materials need different welding temperatures.
Thermoplasts like PVC or Polyolefines can be welded with
maximum temperature.
For welding Linoleum or caoutchouc materials pay attention to
the manufacturers specifications.
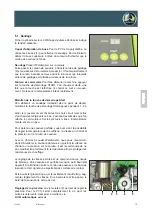
The 4 welding nozzles (1) only heat the area of the groove. The
other parts besides the groove are not heated. You avoid shiny
stripes along the groove by that means.
Preparing the groove
The seam has to be prepared with a groove suitable to the welding
rod. The groove depth should not amount more than 2/3 of the
flooring thickness. It should not amount more than 1.8 mm if you
use a 4 mm welding rod.
Half-round blades with a radius of more than 1.8 mm might
cause reduced collateral welding. In this case you observe small
dark stripes between welding rod and flooring. Decrease the
groove depth to 1.3 mm if this happens. Surely the durability of
the groove will decrease, too.
2
1
Summary of Contents for WOLFF Weldmaster 056259
Page 22: ...Notes 12 2009 Weldmaster 22...
Page 23: ...Notes 12 2009 Weldmaster 23...


