background image

 13

Chapter 4 

Menu Operation

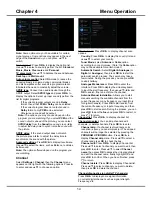
Select 

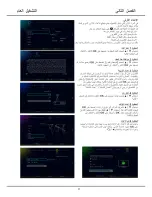
Settings > Picture

, then the 

Picture

 menu 

appears on the right with the following options. Press 


to enter and use 

▲/▼

to choose an option.

Note:

 Some options may not be available for certain 

modes. Some options may appear in the next page of 

the 

Picture

 menu, you can press


▲/▼


to switch.

Picture preset:

 Use 

◄/► 

to scroll through the picture 

preset settings: 

Standard, Dynamic, Natural, Movie 

and 

Personal

.

Brightness:

 Adjusts the brightness of the picture.

Contrast:

 adjusts the difference between light and dark 

areas of the picture.

Saturation:

 Adjusts the richness of colour. 

Sharpness:

 Adjusts the crispness of the edges in the 

picture. 

Backlight:

 Adjusts the brightness of the back light, 

depending on room lighting.

Tint:

 Adjusts the balance between the red and green 

levels.

Colour temperature:

 Adjusts the colour temperature 

of the picture. Use 

◄/►

 to scroll through the colour 

settings: 

Normal

Warm

,

 Cool

 and 

Customer.

Auto format:

 Enables/disables the aspect ratio 

selection automatically.

Screen mode:

 Use 

◄/►

 to select the picture size.

Note

: You are recommended to use the full screen 

mode. Do not use the display mode with black bars on 

both sides of the picture (such as 4:3) for a long time, 

otherwise the TV screen may be damaged permanently. 

Overscan:

 Set Overscan function to 

On

 or 

Off

.

ECO settings:

 Press 

OK

/

 to display its submenu.

Energy saving:

 Press 

◄/► 

to select the desired  

power saving mode, 

High

Low

 or 

Off

.

Advanced settings:

 Press 

OK

/

 to display its 

submenu.Use 

▲/▼

 to select the items, such as 

Noise 

reduction

, to adjust for obtaining a clearer picture. 

Note:

 The options offered depend on the program you 

are watching.

Picture reset:

 Select to reset the picture settings to the 

factory default

.

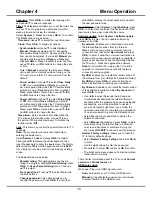
Sound

Select 

Settings > Sound

, then the 

Sound

 menu 

appears on the right with the following options. Press 


to enter and use 

▲/▼

 to choose an option.

Schedule List

This function is used to perform scheduled recording.

1. 

Press 

 on the remote control and select 

Schedule 

List

.

2. 

Press 

OK

/

 to display the schedule list. 

3. 

To add a schedule into your schedule list, press the 
red button first to display schedule information.Then,

Channel number: 

Press 

OK

/

 to enter, then use 

▲/▼

 to select the channel number.

Start date:

 set the recording date with virtual 

keyboard by pressing 

OK

.

Start time:

 set the starting time of the recording.

Stop time: 

set the stopping time of the recording.     

Schedule type

a. Set 

Reminder

 to be reminded that you can 

switch to the scheduled program when the time 
you have set comes. When time is out and you do 
not execute any operation, the dialogue box will 
disappear and no further operation will be executed.
b. Set 

Record

, if you really want to start your 

scheduled recording when the time you have set 
comes. When time is out and you do not execute 
any operation, scheduled recording will start 
automatically.

Repeat type

: set different repeat modes for the 

recording. 

After you enter all the information, use


▲/▼


to 

select 

OK

, then press 

OK 

to add the schedule you 

set into your schedule list. 

4. 

Press the red button and repeat above procedures 
to add another schedules. 

5. 

If you wish to edit a schedule, select it and press 

OK


to enter. You can also remove the selected schedule 
by pressing green button. 

6. 

Press 

 to close the menu.

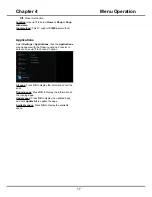
Settings

The Settings menu allows you to configure the TV 

with your preferences. For details, please refer to the 
following 

Using System Settings

 part. 

Using System Settings

The Settings menu allows you to configure the TV with 

your preferences.

Pressing 

 under TV mode and select 

Settings

then press 

OK

 to display its options: 

Picture, Sound, 

Channel, Network, System

 and 

Applications

.

Picture

The menus for adjusting the picture are used to obtain 
the best picture settings according to your preference, 
the type of program you are watching and the ambient 
lighting.

Summary of Contents for UG55SMART4K

Page 1: ...OPERATION MANUAL...

Page 2: ...ions Chapter 2 General Operation Switching on Switching off Network Connection Initial Setup Chapter 3 Homepage Operation Using Homepage TV Using Homepage Apps Chapter 4 Menu Operation Using Quick Acc...

Page 3: ...y from direct sunlight Apparatus shall not be exposed to dripping or splashing and no objects filled with liquids such as vases shall be placed on the set Do not use the set in dusty place Operating T...

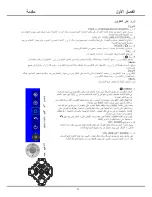
Page 4: ...and shape may vary depending on the model 1 MENU Turns the TV on by pressing the Controller when the TV is in standby mode In the menu system press and release it within 2 seconds it acts like OK but...

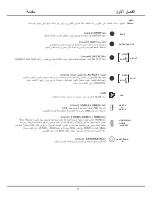
Page 5: ...decoders satellite receivers DVD players or games consoles The VIDEO IN socket provides composite video connection LAN RJ45 plug for connecting to external modem or network access equipment USB2 0 or...

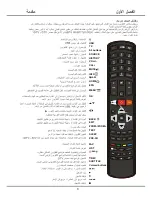
Page 6: ...te through the menus to select menu options to switch to the previous or next photo song or video in USB function to adjust channels during GoLive playback To navigate through the menus to set functio...

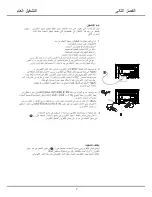
Page 7: ...nly be connected to an AC supply It must not be connected to a DC supply If the plug is detached from the cable do not under any circumstances connect it to a mains socket as there is a risk of electr...

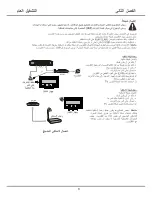
Page 8: ...Internet Service Provider Modem Internet TV Set Router Ethernet Port on the back panel or Chapter 2 General Operation Connecting to a wired network To connect to a wired network 1 Ensure you have An...

Page 9: ...res Internet service to access the web and Smart TV applications Connect Internet using your existing wireless home network or Ethernet cable and follow the guides on the screen Select Wireless or Wir...

Page 10: ...plication s updates or the application itself may be discontinued Depending on your country s regulations some applications may have limited service or not be supported Using Homepage TV Note Some opt...

Page 11: ...ress TV Apps Use to focus on each item App Store Pre installed apps App Stores Many useful and entertaining apps are available for downloading After entering the APP store you will see the recommendat...

Page 12: ...th If you want to change channel or signal source during recording store the recording data before changing the channel or source The TV cannot play files normally if the parameters of the file exceed...

Page 13: ...ns Press to enter and use to choose an option Schedule List This function is used to perform scheduled recording 1 Press on the remote control and select Schedule List 2 Press OK to display the schedu...

Page 14: ...Channel delete Press OK to display Channel list Press to select a channel you want to delete then press OK to delete the channel Channel diagnostics on digital TV channels Press OK to display some si...

Page 15: ...y connecting the LAN port on your TV directly to a network wall outlet using a Cat 5 cable Note that the wall outlet is attached to a modem or router elsewhere in your house Select Settings Network th...

Page 16: ...Change password This option allows you to change the password Press OK to enter then press OK to display the virtual keyboard and enter the new password twice Input Settings Select System Input Setti...

Page 17: ...cations then the Applications menu appears with the following options Press to enter and use to choose an option All apps Press OK to display the information of all the apps Running apps Press OK to d...

Page 18: ...h the TV at the same time they will not be recognized some times All mobile hard disks consume a lot of power which may result in power supply problems We recommend inserting only one hard disk or a l...

Page 19: ...ts When the signal is extremely weak it may be necessary to install a special antenna to improve the reception 1 Adjust the position and orientation of the indoor outdoor antenna 2 Check the connectio...

Page 20: ......

Page 21: ...2...

Page 22: ...3...

Page 23: ...4 TV controller The on screen NAV menu...

Page 24: ...5 SPDIF EARPHONE OUT AV OUT VIDEO L R AUDIO USB2 0 USB3 0 or HDMI1 MHL HDMI2 or HDMI3 ANTENNA IN AV IN LAN VIDEO L R AUDIO...

Page 25: ...6 USB 0 9 buttons TV EPG VOL CH SOURCE HISTORY INFO OK MENU HOME BACK SUBTITLE EXIT TEXT SLEEP PRE CH FAV LIST Colored buttons ZOOM ZOOM REC APP MUTE Lang USB...

Page 26: ...7...

Page 27: ...8...

Page 28: ...9...

Page 29: ...10...

Page 30: ...11...

Page 31: ...12...

Page 32: ...13...

Page 33: ...14...

Page 34: ...15...

Page 35: ...16...

Page 36: ...17...

Page 37: ...18...

Page 38: ...19...

Reviews: