15
Chapter 4
Menu Operation
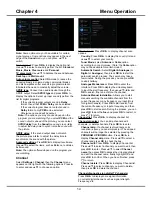
Time shift:
Set
Time Shift
to
On
or
Off
. Default setting
is On.
Subtitle:
this enables subtitle for digital TV channels.
Select
Subtitle
, press
OK
/
►
to display its submenus:
Subtitle:
press
OK
/
►
to enter, press
▲/▼
to turn
On
or
Off
the subtitles. When Subtitle is set to On, you
can enable subtitle languages on digital TV channels:
1.
Press ▲/▼ to select
Digital subtitle language
.
2.
Press
OK
/
►
to enter, press ◄/► to select a
subtitle language as your preferred language.
3.
Press ▲/▼ to select
Digital subtitle language
2nd
.
4.
Press
OK
/
►
to enter, press ◄/► to select a
secondary subtitle language.
5.
Press to return to previous menu.
6. Subtitle type:
press
OK
/
►
to enter, press
▲/▼
to select a subtitle type. You can select
Hearing
impaired
to display the hearing impaired subtitle
with your selected language.
Teletext:
press
OK
/
►
to display its submenu.
Decoding page language:
select a proper type of
language in which Teletext will display.
Digital teletext language:
for digital TV channels,
your TV could zap to a service with multiple initial
Teletext pages in different languages. This function
allows you to select an available language as primary
language which relates to different initial Teletext page.
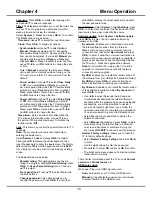
Network
You can set up your TV so that it can access the Internet
through your local area network (LAN) using a wired or
wireless connection.
Ethernet settings:
you can attach your TV to your LAN using cable in three
ways:
• You can attach your TV to your LAN by connecting the
LAN
port on your TV to an external modem using a
Cat 5 cable.
•
You can attach your TV to your LAN by connecting the
LAN
port on your TV to a IP Sharer which is connected
to an external modem. Use Cat 5 cable for the
connection.
• Depending on how your network is configured, you may
be able to attach your TV to your LAN by connecting
the
LAN
port on your TV directly to a network wall outlet
using a Cat 5 cable. Note that the wall outlet is attached
to a modem or router elsewhere in your house.
Select
Settings > Network,
then select
Ethernet
settings
to connect to a wired network.
Wireless settings:
To connect your TV to your network wirelessly, you need
a wireless router or modem and a wireless LAN adapter.
Note:
If your TV doesn’t have an in-built wireless
Adapter, then you need a wireless USB dongle (which is
sold separately). Connect the USB dongle to your TV’s
USB port.
Select
Settings > Network
, then select
Wireless
settings
to connect to a wireless network. you can set
up the wireless network connection accordingly.
WiFi switch:
Select
WiFi switch
and press
OK
/
►
to enter, use
▲/▼
to set it to
On
, then below options
are available. Otherwise, they are in gray and not
available.
Scan:
Select
Wireless settings > Scan
, then press
OK
/
►
, the TV will scan all access points within
range. The access points found by the TV will be
displayed. Select an available access point, then
press
OK
to connect the TV to it.
Notes:
-
If you select a protected access point, you will
have to enter the corresponding password. Press
OK
on the remote control to display virtual
keyboard to enable you to enter it.
-
This set has a memory function of available
access points, which enables your set to be
connected to the network even if you switch on
TV after power off.
Manual:
Select
Wireless settings > Manual
, then
press
OK
/
►
, you will be prompted to enter the correct
SSID of an available wireless router to set up the
connection.
Wi-Fi Direct:
Select
Wireless settings > Wi-Fi Direct
,
then press
OK
/
►
to enter, you can do Wi-Fi direct
password setting and change the password here.
Information:
Select
Wireless settings > Information
,
then press
OK
/
►
to enter, you will find the information
about WiFi status, etc.
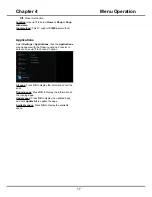
System
Select
Settings > System
, then the
System
menu
appears on the right with the following options. Press
►
to enter and use
▲/▼
to choose an option.
Summary of Contents for UG55SMART4K
Page 1: ...OPERATION MANUAL...
Page 20: ......
Page 21: ...2...
Page 22: ...3...
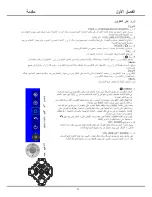
Page 23: ...4 TV controller The on screen NAV menu...
Page 26: ...7...
Page 27: ...8...
Page 28: ...9...
Page 29: ...10...
Page 30: ...11...
Page 31: ...12...
Page 32: ...13...
Page 33: ...14...
Page 34: ...15...
Page 35: ...16...
Page 36: ...17...
Page 37: ...18...
Page 38: ...19...


