16
Chapter 4
Menu Operation
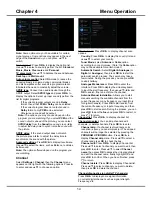
Language:
Press
OK
/► to display the language list
and use ▲/▼ to select a language.
Timer:
The
Timer
menu allows you to set the time zone
on your TV set, to program an automatic turn-off or
wake-up timer and to view the calendar.
Select
System > Timer
and press
OK
/
►
to confirm.
The
Timer
options are as below:
Time zone:
Use
▲/▼
to select the local time zone.
Clock:
Press
OK
/
►
to display its options:
-
Synchronization:
Use
▲/▼
to select
Auto
or
Manual
. If
Auto
is selected, the TV will get the
time automatically from DTV signals, and the Time
item cannot be adjusted. If you select
Manual
, you
should set date and time at
Date
and
Time
item.
Highlight
Date
or
Time
, press
OK
to enter and then
use
▲/▼/◄/► and
OK
buttons to change
the date
or time.
Note: If
Manual
is selected, the time set in
Time
option will not be memorized when turning on the
TV next time, and the TV 's time will start from the
default.
-
Power on timer:
Use
▲/▼
to select
Once, Daily
or
Off.
If you select
Once
or
Daily
, you should
set a time period after which the TV automatically
switches to on at
Time
below this item. Highlight
Time
, press
OK
to enter and then use
▲/▼/◄/►
and
OK
buttons to change
the time.
-
Power off timer:
Use
▲/▼
to select
Once, Daily
or
Off
. If you select
Once
or
Daily
, you should
set a time period after which the TV automatically
switches to off at
Time
below this item. Highlight
Time
, press
OK
to enter and then use
▲/▼/◄/►
and
OK
buttons to change
the time.
Sleep timer:
Sets a period of time after which the
TV set goes into standby mode. Use
▲/▼
to set
the period (120 minutes maximum). To disable this
function, select
Off
.
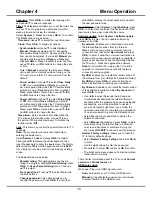
Lock:
This menu can control the special function for TV
channels.
Note:
You must enter your personal code before
entering the
Lock
menu.
Select
System > Lock
and press
OK
/
►
to confirm.
Then press
OK
to display the virtual keyboard, then
input the password to enter the
Lock
menu. The factory
default code is
1234
. And the super password is
0423
.
If you forget your code, enter it to override any existing
codes.
The
Lock
options are as below:
-
Parental rating:
This option allows you to set a
rating to a program. Highlight
Parental rating
, press
OK
/
►
to display
Parental rating
menu. Then use
▲/▼
to adjust.
-
Front panel lock:
Press
▲/▼
to select
On
to lock
the set's buttons.
-
Change password:
This option allows you to
change the password. Press
OK
/
►
to enter, then
press
OK
to display the virtual keyboard, and enter
the new password twice.
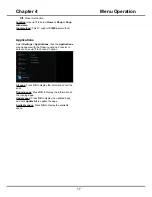
Input Settings:
Select
System > Input Settings
, press
OK
/
►
to enter. User can select the device name of the
input source here, easy to identify the source.
Software update:
Select
System > Software update
,
press
OK
/
►
to enter. You can update software by
network or by USB.
-
By network:
Enables you to download and install
the latest software version from the Internet.
Make sure to set up a wired or wireless network
connection first, then select
By network
and press
OK
/
►
to enter. Follow the on-screen instructions to
continue. When new-version software is available, a
progress bar appears. When the download finishes,
the TV will go black and upgrade the software.
Note
: Do not switch off or unplug the TV until the
upgrade is completed. Keep successful network
connection during upgrade.
-
By USB:
Enables you to install the latest version of
the software from your USB ports if available. Select
By USB
and press
OK
/► to enter. Follow the on-
screen instructions to continue your installation.
-
By Channel:
Enables you to install the latest version
of the software if available. Select
By channel
and
press
OK/►
to enter.
• Use ◄/► to select
Yes
under Auto download
to automatically download the latest software if
available. After the software has been downloaded
successfully, you will be prompted to decide if
you want to install it right now. If yes, follow the
onscreen instructions to complete your installation.
You can also select to ignore the installation here.
• Select
No
under Auto download to decline the
automatic download.
• Select
Manual
download and press
OK/►
to start
manual scanning the latest software. Follow the
on-screen instructions to complete. During the
scan, press
OK/EXIT
to cancel or exit the process.
-
Restore Factory settings:
Allows you to reset the
TV to factory default settings.
• Select
Restore Factory settings
and press
OK
/
►
to enter.
• Use the digit buttons to enter the password.
•
Press
◄/►
to select
OK
and press
OK
to confirm.
• The Initial setup menu appears. Follow the related
Instructions to continue.
There is also information about the TV such as
Current
version
and
Product name
, etc.
HDMI auto switch:
When user Plug in an HDMI signal source:
Auto:
Auto switch your TV to the HDMI Source.
Manual:
A tips will display onscreen to remind user
to select if switch to the HDMI source
Summary of Contents for UG55SMART4K
Page 1: ...OPERATION MANUAL...
Page 20: ......
Page 21: ...2...
Page 22: ...3...
Page 23: ...4 TV controller The on screen NAV menu...
Page 26: ...7...
Page 27: ...8...
Page 28: ...9...
Page 29: ...10...
Page 30: ...11...
Page 31: ...12...
Page 32: ...13...
Page 33: ...14...
Page 34: ...15...
Page 35: ...16...
Page 36: ...17...
Page 37: ...18...
Page 38: ...19...


