background image

• 

Place your water dispenser to a dry place where it won’t be exposed to direct sunlight. 

• 

Position your water dispenser at a distance of 20 cm from the wall. 

• 

Make sure that your water dispenser is balanced. 

• 

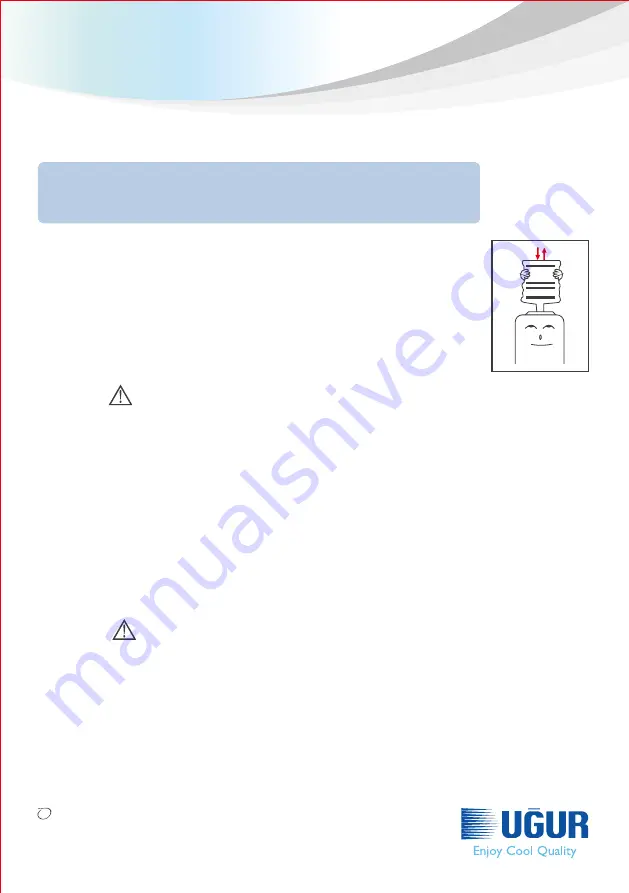
Remove the label of the bottle and place it vertically to the dispenser.

• 

Drain 1 lt. of water from the hot and cold water valves.

• Plug the power cable to the grounding plug and turn on the on/off button. The signal indicators 

  of your dispenser will be turned on. 

• 

 When the water in your bottle is finished, remove it vertically from the dispenser and replace 

  it with a new one.

Caution


• The temperature of the water flowing from the hot water valve of your dispenser is approximately 90°C. Avoid direct 

  contact with hot water. This may cause burns and injuries.

 Do not turn on your dispenser by directly plugging it to the grounding plug or turn it off by unplugging it. This may 

  cause your dispenser to malfunction or fire.

 Its assembly and use is not recommended where water jets are used. 

 Never operate your water dispenser if its power cable is damaged. This may result in your dispenser to malfunction 

  or fire. 

 Please wait for at least 3 minutes after turning off your water dispenser before turning it on. Otherwise, this may

  cause your dispenser to malfunction.

• Do not tilt your USS 20 LX model water dispenser for more than 45°. This may result in malfunctioning of your

  water dispenser. 

 If the power cable is damaged, it should be replaced with a new one by Uğur Authorized Services or an 

  experienced/authorized person in order to prevent any kinds of danger.

Warning


 The thermostat settings of your dispenser are adjusted at factory. Please do not change these parameters. 

• 

If you will not use the hot and cold water sections of your appliance or one of them for a long time, turn off the

  power buttons for saving energy.


Assembly and use of your water dispenser

7

Note


 Your dispenser was manufactured to meet the water required for all kinds of hot and cold beverages. It is designed for 

  use in homes and offices.

 The heat exchange between the hot and cold water is minimized thank to a special heat insulation system in 

  USS 20 LX model water dispensers.

Summary of Contents for USS 20 LX

Page 1: ...USS 20 LX S cak So uk Su Sebili KULLANMA KILAVUZU...

Page 2: ...1...

Page 3: ...ri haricinde farkl bir servise yapt rman z ve ar za olu mas durumunda r n n z garanti kapsam na girmeyecektir 2 De erli M terimiz U ur So utma A tesislerinde b y k bir zenle retilen Su Sebilinizin tan...

Page 4: ...De erli M terimiz Bu kullanma k lavuzu i erisinde dikkat edilmesi gereken noktalar D KKAT UYARI ve NOT ba l klar alt nda belirtilmi tir Bu ba laklar a a da nem derecesine g re tan mlanm t r Herbirini...

Page 5: ...i lemler ve g venlik uyar lar B Genel g r n ve Teknik zellikler C Su Sebilinizin montaj D Su sebilinizin temizlik dezenfekte ve mineral at klar n n tamizlenmesi E Yetkili Servis a rmadan nce yap lmas...

Page 6: ...rmeyiniz Sebilinizin hasar g rmesine ve hayvanlar n l m ne ve yaralanmas na sebeb olabilir Ayr ca yabani ve evcil hayvanlar elektrik tesisat na zarar verme yoluyla yang na sebeb olabilir Su jeti kulla...

Page 7: ...3 G g stergesi 4 Is g stergesi 5 So utucu g stergesi 6 S cak su e mesi 7 S cak su deposu 8 So uk su e mesi 9 Su doldurma g z 10 Kabin 11 S cakl k anahtar 12 So utucu anahtar 13 Kondonsat r 14 G kablo...

Page 8: ...ve s tma kullan m i indir Ba ka ama larla kullan lmaz Not U ur So utma A yukar da yaz l teknik bilgilerizherhangi bir bildirim yapmaks z n de i tirme hakk n sakl tutar Marka Model USS 20 LX klim S n...

Page 9: ...Su jeti kullan lacak yerlerde montaj ve kullan m uygun de ildir Sebilinizi kesinlikle hasara u ram bir al t rma kablosu ile al t rmay n z Sebilinizin hasar g rmesine ve yang na sebeb olabilir Sebilini...

Page 10: ...u ile temizleyiniz Dezenfekte i lemini her ayda yapabilirsiniz Yakla k 4 litre suya 200 gr sitrik asit ekleyip bu zeltiyi cihaza enjekte ediniz S cak su anahtar na bas n z ve 10 dakika s nmas n bekley...

Page 11: ...ze tak n z al t rma anahtarlar n a n z Musluklardan su akm yorsa Damacana bo tur Damacanay yenisi ile de i tiriniz Damacana deste inin a z t kanm olabilir Deste in a z n ve damacana contas n n temizle...

Page 12: ...linde alan nda uzmanla m 250 ye yak n Yetkili Servislerimiz ve U ur a r Merkezimizde bulunan g ler y zl profesyonel personelimiz ile sizlere hizmet vermekteyiz U ur a r Merkezimize 444 44 87 nolu yeni...

Page 13: ...www ugur com tr musteri hizmetleri yetkili servislerimiz G ncel Yetkili Servislerimizin listesine www ugur com tr musteri hizmetleri yetkili servislerimiz web adresimizden ula abilirsiniz 12...

Page 14: ...ile meydana gelecek ar zalar ve hasarlar r n n kullanma k lavuzunda yer alan hususlara ayk r kullan lmas ndan kaynaklanan ar zalar Yukar da belirtilen ar zalar n giderilmesi cret kar l nda yap l r r n...

Page 15: ...USS 20 LX Hot Cold USER S MANUAL Water Dispenser...

Page 16: ...Customer The product you have purchased was produced using materials not containing Asbestos and CFC and compressor oils without PCB additives The gas used in your Hot Cold Water Dispenser is R134 Suc...

Page 17: ...s that should be taken into consideration are given under CAUTION WARNING and NOTE titles Such titles are defined below according to their levels of importance Please carefully read each and every one...

Page 18: ...ispenser and safety warnings B General appearance and technical specifications C Assembly of your water dispenser D Cleaning disinfection of your water dispenser and cleaning the mineral wastes E Thin...

Page 19: ...t from the hot water valve is approximately 90 C Do not directly touch the water This may cause burnings and injuries This appliance is not suitable for installation in an area where a water jet could...

Page 20: ...dicator 6 Hot water valve 7 Hot water chamber 8 Cold water valve 9 Water filling section 10 Cabin 11 Heat key 12 Cooler key 13 Condenser 14 Power cable 15 Water output Note This appliance is intended...

Page 21: ...pliance is only heating or cooling the potable water Do not use for any other purpose Note U ur So utma A is reserved the right to change any of the technical information given above without notice Br...

Page 22: ...ts are used Never operate your water dispenser if its power cable is damaged This may result in your dispenser to malfunction or fire Please wait for at least 3 minutes after turning off your water di...

Page 23: ...Prepare a solution by mixing 200 gr citric acids with 4 lt of water and inject this solution to your appliance Turn on the hot water button and wait for 10 minutes for the water to heat Drain off the...

Page 24: ...ble of your appliance to the plug and turn on the power button If no water runs from the valves The bottle may be empty Replace the bottle with a new one The opening of the bottle support may be block...

Page 25: ...56 316 10 31 B lge M d rl Be yol Fabrikalar Cad No 13 Sefak y STANBUL Tel 0 212 624 32 28 5 Hat Faks 0 212 598 94 26 ugur ugur com tr www ugur com tr Manufacturing Plant Devlet Kara Yolu No 36 Nazilli...

Reviews: