第
90
页
M4220160506CN
UI Robot Technology Co. Ltd.
UIROBOT SCARA Robot
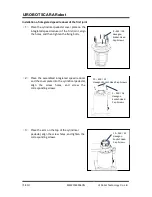
Installation of Integrated Reducer of the Third Joint
and the U1 Synchronous Belt
(
1
)
Place the U1 belt into thejib and align the gears.
(
2
)
Install the ball plunger (M6×12) at the jib to
tighten the belt.
(
3
)
Align the screw holes of jib dust cover, the 3rd
integrated reducer and the jib, secure the 3rd
integrated reducer bolts (M4×12)
(
4
)
Insert the spline screw of the Z-shaft base into
the spline hole of the jib, fix the Z-shaft base
bolts (M4 × 10).
Notice : Spline screw to be placed vertically in
the spline hole, so as not to affect the accuracy
due to damage.
(
5
)
Install the retaining ring (M5×12) of spling
screw.
(
6
)
Secure the lithium battery plate of the 3rd joint
integrated reducer with bolts (M2.5× 12).
(
7
)
Install the upper enclose.
Details are described in “3.2 Upper Encloser”.
(
8
)
Install the user board.
Details are described in “3.1 User Board”.
(
9
)
Power on and adjust the origin point of the 3rd
joint.
Details are described in “8.0 Origin Adjustment”.
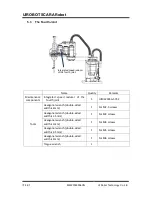
4– M4
×
12
Hexagon
Socket-Head
Cap Screws
1– M6
×
12
Ball Plunger
6 – M4
×
10
Hexagon
Socket-Head
Cap Screws
1– M5
×
12
Hexagonal Socket
2 – M2.5
×
10
Cross Head Screws

