13
User Guide
Dimensions and display quality
When you set up a 3D project, the dimensions and quality of your project depend on how
you plan to use it. You might want to use it as part of a video, include it as a GIF anima-
tion on your Web site, or save it as a still 3D image. Regardless of your plans, try using
smaller dimensions and lower display quality while editing. This allows your computer to
render the project at a faster rate when you are experimenting with different effects and
settings. Then, when you have exactly what you want, increase the dimensions of the
project. Some commands accessible on the Image menu are listed below:
•
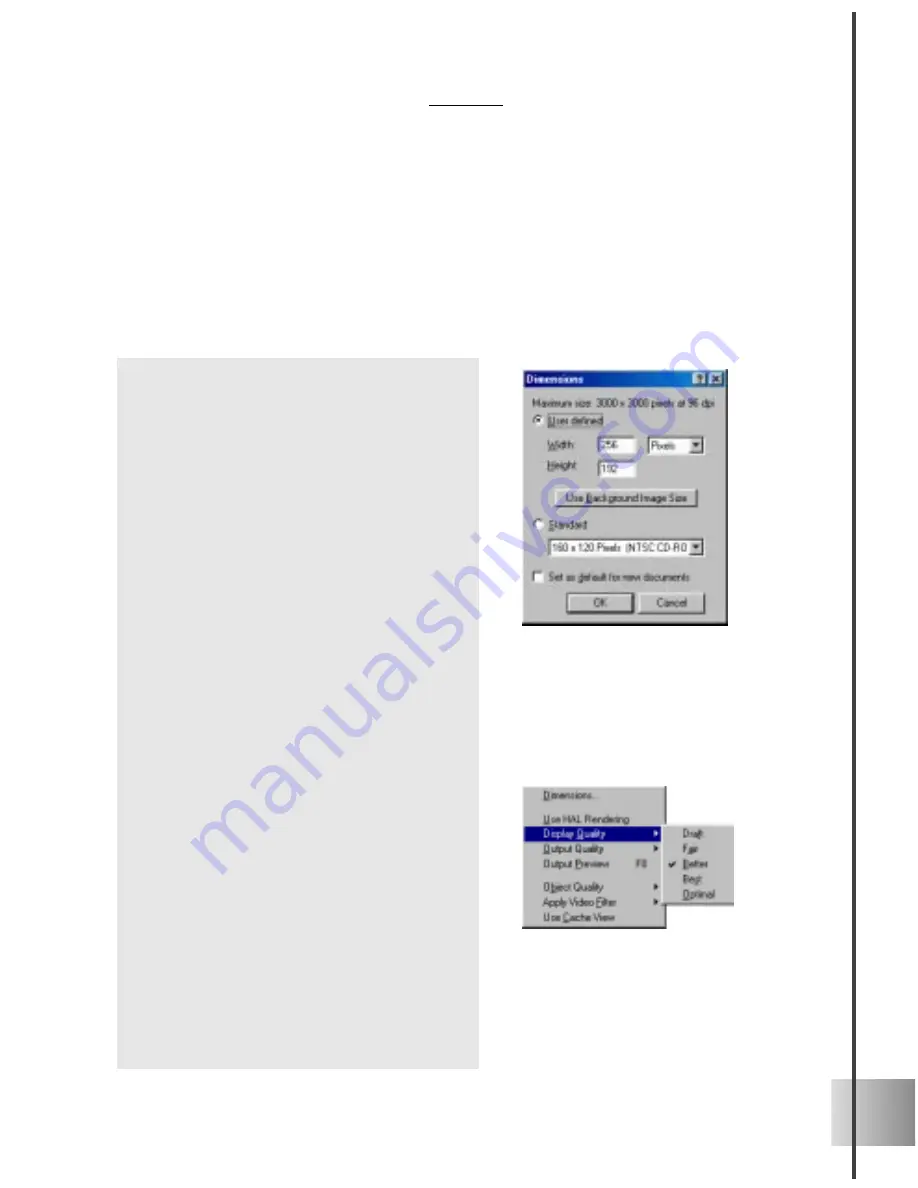
Dimensions Click this command to
access the Dimensions dialog box. The
User defined option lets you customize
the dimensions. If you have inserted
your own image as the background,
click the Use Background Image Size
button to have the dimensions of the
project match the background. If you
plan to output your project for the video
or the Web, the Standard list has a
range of commonly used dimensions.
•
Use HAL Rendering Select this to have
your computer directly access the
DirectX 6.1 Hardware Abstraction Layer
(HAL) to render your project. Selecting
this option enables better performance
with your animations. (Available only if
your display card supports this. Check
your display card’s specifications).
•
Display Quality Choose from several
display qualities, ranging from Draft to
Optimal. However, while you are editing
your project, use a lower display quality
to shorten rendering time. This is
particularly recommended for larger-
sized projects or projects that use
multiple plug-in effects.
•
Output Quality Similar to Display
Quality, this menu lets you select the
quality of your project when you convert
it to its final format as a still image or
an animation sequence.
Summary of Contents for COOL 3D 3.0
Page 1: ... title ...


