background image

60

Ulead COOL 3D 3.0

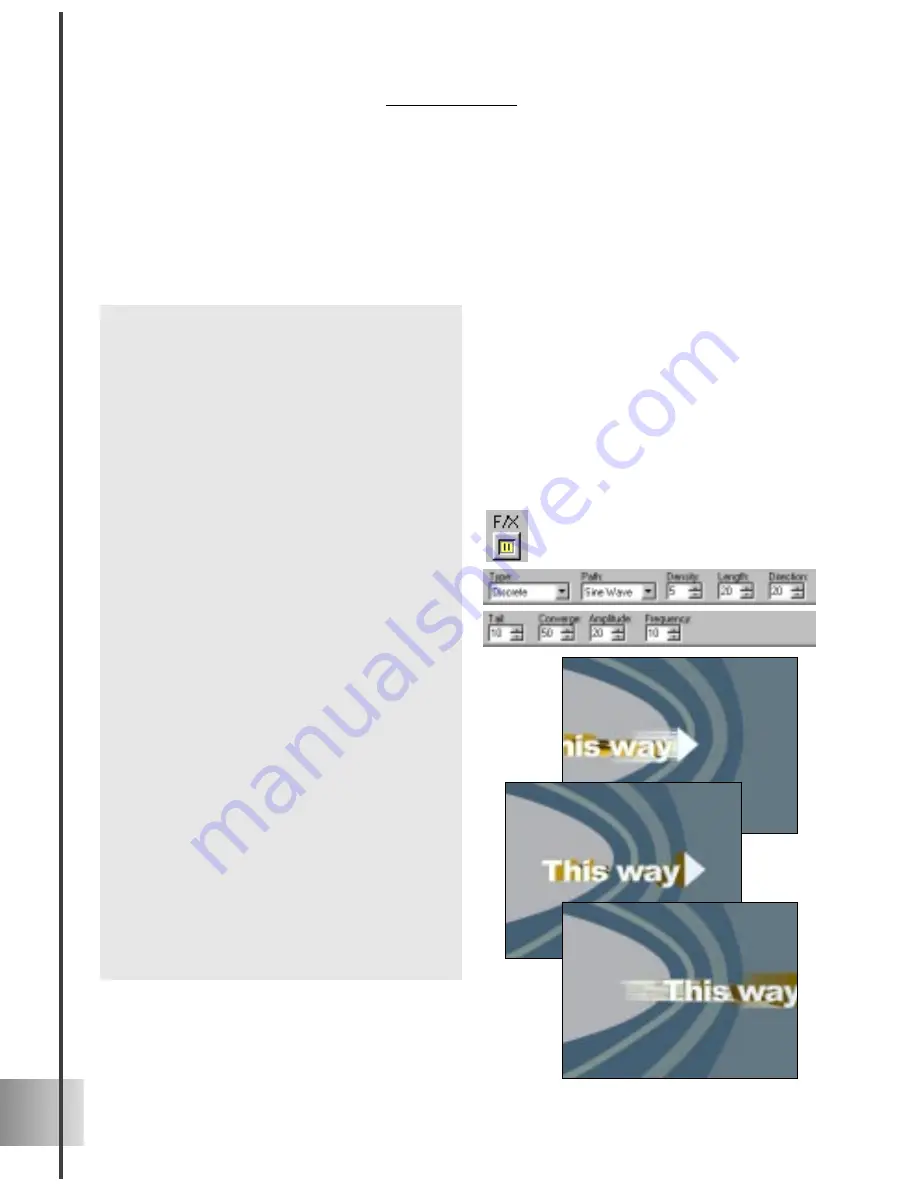
Motion Blur

With this effect, you can make an object look as if it were zipping around at super speeds
bouncing with energy. These and many more whisks of motion are possible with this plug-
in. If you want to try this with an animated project, it is recommend that you use the least
complicated settings for the animation. The following tutorial takes a look at combining
object position with the Motion Blur effect. (Settings: 30 frames, 15 fps)

To apply Motion Blur to an object:

1

Select Position from the Properties
Menu. On the Timeline Control, add key
frames to frames 12, 18, and 30.

2

At frame 1, set the X coordinate to -600.
The Y and Z values should be 0. At
frames 12 and 18, change the X coordi-
nate to 0. At frame 30, change the X
coordinate to 1000.

3

In the EasyPalette file directory, select
Global Effects: Motion Blur. Click the
F/X button on the Attribute Toolbar.
Motion Blur appears on the Properties
Menu.

4

At frame 1, on the Attribute Toolbar,
select Continuous as the Type, and set
the Path to Straight.

5

Set Density to 5, and Length to 20. Set
the Direction to 180, which makes the
lines horizontal.

6

Scroll down to the next level of options
on the Attribute Toolbar. Set Tail to 30
and the Converge value to 0.

7

Add key frames at frames 10, 12, 18, 20,
and 30. They should all have the same
attributes as in frame 1.

8

For frames 12 and 18, change the Tail
length to 0.

9

Click Play to preview the animation.

Summary of Contents for COOL 3D 3.0

Page 1: ... title ...

Page 2: ...X DirectX Media and or other Microsoft products referenced herein are either trademarks or regis tered trademarks of Microsoft Corporation QuickTime and the QuickTime logo are trademarks used under license QuickTime is registered in the U S and other countries Adobe the Adobe logo and Acrobat are trademarks of Adobe Systems Incorporated RealText and RealPlayer are either registered trademarks or t...

Page 3: ... Move 17 Rotate 18 Size 19 Editing object style 20 Color 20 Light 20 Texture 22 Modifying individual faces of an object 23 Basic bevel styles 23 Adding a background 25 Adding and editing 3D graphics and shapes 25 Making basic 3D objects 27 Animation basics 28 Working with key frames and timelines 29 Creating a simple animation 31 Animating light and color 33 Animating with multiple timelines 34 An...

Page 4: ...otion Blur 61 Shadow 61 Path Editor 62 The basics of vector graphics 62 Using the Shape tool 63 Using the Object tool 64 Using the Path tool 65 Using the Freehand tool 66 Adjusting paths 67 Viewing paths and images 68 Tracing and converting raster images 69 Outputting your project 71 Saving your project 71 Creating image files 71 Creating video files 72 Creating animations for the Web 73 GIF anima...

Page 5: ...ernal vector graphics software This feature offers you a multitude of tools for creating and editing shapes and tracing images It even lets you convert simple raster graphics to vector graphics 3D Geometric Shapes The Geometric Toolbar makes it easy to insert and edit simple three dimensional geometric objects into your projects You can put spheres cones cylinders cubes and pyramids into the pictu...

Page 6: ...iew performance With the new playback cache you can now preview your 3D animations with greater speed Click the Help button then move the cursor to the object in ques tion and click again to find out more on that feature Go to the Help Help Topics menu command to get more detailed information on a certain subject If you are a registered user you are entitled to Ulead technical support This can be ...
Page 7: ...llation Wizard will guide you through the steps and the options Running Ulead COOL 3D There are two ways that you can run the program Double click the Ulead COOL 3D icon on your Windows desktop or click the icon on the Quick Launch toolbar Select the Ulead COOL 3D icon from the Ulead COOL 3D program group on the Windows Start menu Getting updates and free downloads Keep apace with the latest in Ul...

Page 8: ...vantage of all the program s increased capabilities and new features The following section should help you quickly familiarize yourself with all of the main functions Geometric Toolbar Standard Toolbar Text Toolbar Animation Toolbar Object Manager Location Toolbar Edit Window EasyPalette EasyPalette file directory Attribute Toolbar Object Toolbar Menu Bar Status Bar ...

Page 9: ...ntrols animation looping modes frame numbers and frame rate See page 28 Location Toolbar Shows the position size rotation light and texture coordinates of the selected 3D object Allows you to enter values yourself or displays the changing values of the object as you drag it in the Edit Window Geometric Toolbar Activated when you insert a basic 3D geomet ric shape Lets you customize its dimensions ...

Page 10: ...file directory of all the aspects that you can apply to your 3D object including plug in effects Click on any item within each category to access dozens of preset effects in the thumbnail pane These can be quickly and easily applied to your project See page 11 Attribute Toolbar Lets you customize many aspects of your projects including plug in effects Once you understand the available options you ...

Page 11: ...and drop the preset into the Edit Window Double click the preset Right click a preset and select Apply from the menu that appears Using the EasyPalette The EasyPalette provides you with the fastest way to create astounding titles and graphics with Ulead COOL 3D With its vast number of presets this is where you can add color and life to your project with just a few clicks The EasyPalette file direc...

Page 12: ... the Animation Toolbar click Play to preview the animated project Compositions Completed animated projects that you can apply to blank projects including special effects See the next section for a tutorial Backgrounds A collection of patterned photographic and solid color back grounds Shapes A group of three dimensional objects inspired by objects familiar to us in daily life Objects A variety of ...

Page 13: ... the background click the Use Background Image Size button to have the dimensions of the project match the background If you plan to output your project for the video or the Web the Standard list has a range of commonly used dimensions Use HAL Rendering Select this to have your computer directly access the DirectX 6 1 Hardware Abstraction Layer HAL to render your project Selecting this option enab...

Page 14: ... by creating a line break in a string of text In the Ulead COOL 3D Text dialog box simply press Enter where you want a line break to occur Adding and editing text When you create your project the first step is to insert an object To add and edit a text object follow the next tutorials For information on adding and editing graphic objects see page 25 Object Quality Specify how smooth the 3D shapes ...

Page 15: ...o use the Object Man ager see the following section To edit a text object 1 Click the Edit Text button The Ulead COOL 3D Text dialog box appears with the selected text object 2 Edit the text in the text box then click OK once you ve made your changes The edited text appears in the Edit Window You can also adjust the character spacing as well as the line spacing and alignment with functions on the ...

Page 16: ...t to be more specific Otherwise it will receive a generic name by default Differentiate between two or more of the same text or graphic objects in a project Otherwise they will receive the same name by default Group multiple objects To edit several objects together as a group select the desired items by clicking them with the mouse while holding either the Shift key for a row of items or the Ctrl ...

Page 17: ...our title in a still composition To begin adjusting your object first click one of these basic positioning controls then either drag the object directly in the Edit Window or get more precise results by entering coordinate values in the Location Toolbar The variables in the Location Toolbar all involve values for X Y and Z which are the three axes in three dimensional space The X and Y axes refer ...

Page 18: ...ct downwards and the Y value decreases Drag the object left and right to see how the X values change on the Location Toolbar As the object moves towards the left the value for X decreases When it moves to the right the value in creases Drag the object along the Z axis by holding the right mouse button while dragging This makes the object come towards you or move away from you If you have not alrea...

Page 19: ...you drag to the right Drag up and down with the mouse and the object rotates backwards away from you and towards you Hold the right mouse button down then drag up and down in the Edit Window The object spins counterclockwise and clockwise Note The axes around which objects rotate are determined by the center point of the object For text objects this often depends on the font used and if the charac...

Page 20: ...le an object is to use one of the presets in Object Style Gallery all of which combine many attributes Or you can control each attribute individu ally with extensive options on the Attribute Toolbar This section shows you how to customize color light texture and bevel attributes Light With Ulead COOL 3D you can adjust different types of light that affect the look of your object Here is a brief des...

Page 21: ...tional Shines a direct beam of light with a constant strength on the object The light source position is based on the angle of rotation around the X and Y axes Point Shines diffused light with variable strength on the object The further the light is from the text the weaker the light appears The light source position is based on its position along the X Y and Z axes 6 Click the Position Light Sour...

Page 22: ...appears browse for an image file that you want to use for your texture BMP or JPG then click Open The image is applied to the object 3 Select a Wrap Mode for your texture This determines how the image is applied to the object For instance if you have an object with a cylindrical shape you might want to choose Cylindrical For shiny or metallic textures using Reflection often produces best results 4...

Page 23: ... applying texture and color in Ulead COOL 3D is that you can apply them to individual faces of your object Click a Bevel Face button on the Standard Toolbar to select the side of the object to edit Then drag a color or texture from the presets to the Edit Window Try applying different colors and textures to the different bevel faces of an object The illustration below shows you this effect when ap...

Page 24: ...Extrusion Precision Determines the fineness of the bevel A higher value creates a more precise bevel This is useful if you have a rounded bevel and want smoother curves Round Round Chiseled Chiseled Chiseled Round Round Chiseled Chiseled Round ...

Page 25: ...use the Image Dimensions menu command click the Use Background Image Size button in the dialog box that pops up and click OK Adding and editing 3D graphics and shapes Everyone wants to use customized graphics in Ulead COOL 3D to create outstanding 3D logos and images With this latest version importing and editing graphic objects has become that much easier There are four ways to do this Insert vec...

Page 26: ...hapes to use in a Ulead COOL 3D project Import these files by using the File Import X Model menu command In the dialog box that appears you can import them as C3D data type without color lighting or texture attributes and then customize its attributes yourself Or you can import them as D3D data type with its inherent color lighting and texture attributes intact Insert symbol type fonts such as Win...

Page 27: ...Geometric Object button If the current icon doesn t display the desired shape click on the bottom right corner to view a menu with other shapes on it Select the shape you want then click the button to insert it The object appears in the Edit Window 2 On the Geometric Toolbar enter values to adjust the dimensions of the object Then select the desired Face buttons to edit Color and Texture attribute...

Page 28: ...th key frames The top line represents the frame by frame position while the bottom line displays any key frames Key frames are those frames in which you specify an attribute or behavior of an object For plug in effect timelines an additional Control Line in red appears between these two lines see page 37 for details Add Delete Key Frame Lets you add or remove a key frame from the Timeline Control ...

Page 29: ... color etc The following describes some basic controls of the Timeline Control Ping Mode Plays the animation forwards and backwards infinitely Loop Mode Plays the animation repeatedly in its normal sequence skipping the last frame Play Stop Plays and stops the animation Show Hide Allows you to display or hide the selected object Use it to hide the object for certain parts of the animation or simpl...

Page 30: ...n as shown in the following illustration Not only can you set the timing within each timeline but you can also control the timing of events between the many timelines by coordinating their key frames as if you were a director telling your various actors what to do and when to do it After you familiarize yourself with timelines and key frames you can also work with multiple objects that have multip...

Page 31: ...the Add Key Frame button to add a key frame 4 Drag the object to the right side of the Edit Window The coordinates on the Location Toolbar change to reflect the position of the object at frame 15 of the animation 5 Click the Play button to view the animation The object should move from the left to right in the Edit Window 6 Save the project by clicking the Save button on the Standard Toolbar This ...

Page 32: ...Edit Window so that it is at the top and center of the window 5 Click Play and notice how the object now moves in a triangular path 6 Now you have key frames at frames 1 7 and 15 of the animation If you want to change the position of the object at any of these key frames click one of the key frame controls Then drag the object to another position Click Play to view the animation 7 Increase the num...

Page 33: ...t color to the object Remember that you can also apply different colors to individual bevel faces 3 Click the Play button to preview the animation To animate light on an object 1 Insert an object and at frame 1 of the animation define the Light settings see pages 20 and 21 2 Add a key frame at the last frame of the timeline then apply a different Light setting to the object You can change the colo...

Page 34: ...ter 200 for the Z coordinate 6 Add a key frame at the end of the Position timeline and then enter 200 for the Z coordinate 7 Preview the animation The object should emerge from the background color and come straight towards you Note If you want to change the color or position for specific key frames make sure you select the relevant property in the Properties Menu first before you edit the key fra...

Page 35: ... Properties Menu displays Orientation On the Location Toolbar make sure that all coordinates are set to 0 4 Move the Timeline Control slider to frame 25 of the animation or enter 25 as the current frame Click the Add Key Frame button to add a key frame 5 Set the X coordinate to 720 then click Play to preview the animation The object should rotate 2 times 6 Insert a new object On the Standard Toolb...

Page 36: ...he Z coordinate At frame 20 set the X and Z coordinates to 100 and 3000 The Y coordinate should remain at 0 6 Click Play to preview the animation The object should move to the right and away from you 7 Insert a second object into the project then select Position from the Properties Menu Add key frames at frames 10 20 and 30 8 Click the Move Object button On the Location Toolbar at frames 1 and 10 ...

Page 37: ...r instance if you change this value at frame 5 then this new value will be changed accordingly in all frames of the animation A Key attribute can vary with individual key frames For example Color is a Key attribute because at frame 1 you can have an object be red then at frame 5 you can set the same object to be green and at frame 10 you can make the object change to red again Plug in effects Plug...

Page 38: ...he Board effect 1 Insert a text or graphic object into the Edit Window In the EasyPalette file directory select Bevel Effects Board The Board presets appear 2 On the Attribute Toolbar select Board from the Bevel Mode list The Attribute Toolbar displays the Board options and the Edit Window displays the object on the default rectangular board To use a different board shape drag a Board preset to th...

Page 39: ...vel Effects Custom Bevel The presets for Custom Bevel appear 2 On the Attribute Toolbar select Custom Bevel from the Bevel Mode list 3 Apply a Custom Bevel preset to the object Each preset represents a single bevel design that is applied to both the front and back faces of the object 4 Scroll down to the next set of attributes Choose a different bevel design for the Front or Back face The object c...

Page 40: ... 3 On the Attribute Toolbar click the Text or Frame button under Target to customize the Text and Frame bevels if desired 4 On the Standard Toolbar select the Rotate Object button Orientation appears on the Properties menu 5 On the Timeline Control add a key frame at frame 30 of the animation On the Location Toolbar enter an X value of 180 This flips the frame directly to its other side 6 Select B...

Page 41: ...elect None for Board Bevel 4 Insert a second object the same as the first to the project In the EasyPalette file directory select Object Style Bevel then select None for Bevel Mode on the Attribute Toolbar In the Edit Window you should see a seamless and flat board 5 On the Object List select Group then rotate the board and object so that they lean backwards allowing you to better view the results...

Page 42: ...lect Imprint from the Bevel Mode list The Attribute Toolbar displays the Imprint options and the Edit Window displays the object on the default rectangular board To use a different board shape drag an Imprint preset to the Edit Window 3 On the Timeline Control add a key frame at frame 30 of the animation 4 At frame 1 on the Attribute Toolbar enter 500 for Extrusion and 1 for Imprint 5 Scroll down ...

Page 43: ... rotation settings Settings 30 frames 15fps To apply the Bend effect to an object 1 In the EasyPalette file directory select Object Effects Bend Click the F X button on the Attribute Toolbar Bend appears on the Properties Menu 2 On the Timeline Control add a key frame at frame 30 3 At frame 1 on the Attribute Toolbar set the Direction of the bend to Y Z and select the Type as Asymmetric Set the Le...

Page 44: ...nd for Sequence select Ran dom 4 Set Ground to 1 This is the minimum distance that the letter will fall in order to bounce Specify 100 for Rebound which makes the letters bounce highest 5 Specify 10 as the Tempo for fastest bouncing speed Set the Variation to 0 This means that the letters will start out in their normal stationary position standing up and facing forward 6 At frame 30 of the animati...

Page 45: ...Palette file directory select Object Effects Distort Click the F X button on the Attribute Toolbar Distort appears on the Properties Menu 2 On the Timeline Control add key frames to frames 15 and 30 3 At frame 1 on the Attribute Toolbar select Individual for Action Sequence and select Y Z as the Plane along which the perspective will be distorted Leave all other distortion variables at their defau...

Page 46: ...This ensures that the explosion effect will not take place right away Add a key frame to frame 30 of the animation 3 At the first frame of the plug in effect frame 5 set the Movement Type to Left the Collapse Type to Ascending and the Action Sequence to Forward Set the Level to 0 and the Rotate value to 30 4 At frame 30 set the Level to 100 for a complete explosion Enter 100 for the Rotate value 5...

Page 47: ...ontrol add a key frame to frame 30 of the animation 3 At frame 1 on the Attribute Toolbar select Figure 8 as the Motion Path Select the Show Path option A model of the path appears in the Edit Window 4 Select Horizontal as the Type of path then set On Path to Stand Set the Wrap Style to Position and enter 100 as the Level 5 Scroll down to the second level of attributes Increase the size of the pat...

Page 48: ...nimation appears on the Proper ties Menu 2 On the Timeline Control add a key frame at frame 30 3 At frame 1 on the Attribute Toolbar select Arc as the Path and enter 25 as the value for Speed 4 Set the Ground to 0 default and enter 75 for the Level to start the object at mid throw Enter 40 as the value for the Angle of the arc 5 At frame 30 set the Level to 0 6 Click Play to preview the Arc anima ...

Page 49: ...he object is wrapped set the Path to V Line to make the object travel vertically then set the Wrap Style to Mesh to mold the object to the surface of the sphere 4 Scroll down to the second level of attributes Enter 10 for all Size coordi nates so that the text is wrapped around a small sphere Set the Level to 0 5 At frame 25 enter 10 for all Size coordinates and enter 200 as the Level so that the ...

Page 50: ...e Toolbar Token Move G appears on the Properties Menu 2 On the Timeline Control add a key frame to frame 30 of the animation 3 At frame 1 on the Attribute Toolbar set the Level of the animation to 0 Action Sequence to Forward Acceleration to None and Overlap to 30 Select the To Origin option to make individual characters return to their original positions upon completing the specified action 4 Scr...

Page 51: ... on the Attribute Toolbar Token Rotate G appears on the Properties Menu 3 On the Timeline Control add a key frame at frame 30 4 At frame 1 on the Attribute Toolbar set the Level of the animation to 0 the Action Sequence to Forward and Acceleration to None 5 Set the Overlap to 90 so that the individual letters move almost immedi ately one after the other Under Rotation Center select Front LT the fr...

Page 52: ...t level of at tributes These are the planes along which objects can be skewed Under Y X Plane enter 1000 and leave all the others at 0 6 At frame 25 set the Level to 100 7 Next animate the position of the object Select Position from the Properties Menu and add key frames at frames 20 and 30 8 At frames 1 and 20 view the coordi nates in the Location Toolbar for Position They should all be set to 0 ...

Page 53: ...ars on the Proper ties Menu 3 On the Timeline Control add key frames to frames 15 and 30 4 At frame 1 of the animation set the Level to 0 Select Random for the Action Sequence 5 Under Acceleration select Normal Set the Overlap to 50 which makes each object begin moving after each previous object has completed half of its motion Select Center as the Scaling Center 6 Scroll down to the next level of...

Page 54: ...oolbar Twist appears on the Properties Menu 3 On the Timeline Control add a key frame at frame 30 4 At frame 1 on the Attribute Toolbar select Left only as the twist Type This twists the object starting with its left side Select Z as the Axis so that the depth of the object is twisted and set the Skew Angle to 0 5 At frame 30 set the Skew Angle to 360 6 On the Standard Toolbar click the Size Objec...

Page 55: ... to control the effect to amazing detail In the following tutorial we ll explode a graphic and have it turn into text To apply a Blast transition 1 Insert a graphic object into the Edit Window Select Transition Effects Blast from the EasyPalette file directory then on the Attribute Toolbar select Blast from the Style list 2 On the Attribute Toolbar at frame 1 clear the Use Original option Then und...

Page 56: ...he target object appears on the screen set the Initial Position of the target object to 300 or until it disap pears off the screen 5 Scroll down to the next set of options on the Attribute Toolbar and select From Left as the Direction in which you want the transition to take place 6 Move the Timeline Control to the last frame of the animation Set the Level to 100 7 Click Play to preview the transi...

Page 57: ... Insert an object to replace the original The object above the original changes in the Edit Window 3 On the Attribute Toolbar at frame 1 set the Bounce value to 30 If the target object is visible set the Initial Position to about 300 or so that it disappears off the screen 4 Move to the last frame of the animation add a key frame and set the Level to 100 5 Insert a new object On the Attribute Tool...

Page 58: ...s tutorial learn how to animate a basic fire effect Settings 30 frames 15 fps To burn an object 1 Select Global Effects Fire in the EasyPalette file directory then click the F X button on the Attribute Toolbar Fire appears on the Properties Menu 2 On the Timeline Control add a key frame to frame 30 3 At frame 1 set the Strength to 10 and the Amplitude to 10 4 Set the Direction to 90 to make the fl...

Page 59: ...dd key frames at frames 5 15 and 20 These should all have the same at tributes as those in frame 1 5 Add key frames controls to frames 7 13 22 and 28 At these key frames set the Width of the glow to 0 This makes the glow disappear 6 Click Play to preview the animation Glow This plug in lets you give any type of aura to fit the mood of the project Make your object radiate with a luminous glow of th...

Page 60: ...e 1 set the X coordinate to 600 The Y and Z values should be 0 At frames 12 and 18 change the X coordi nate to 0 At frame 30 change the X coordinate to 1000 3 In the EasyPalette file directory select Global Effects Motion Blur Click the F X button on the Attribute Toolbar Motion Blur appears on the Properties Menu 4 At frame 1 on the Attribute Toolbar select Continuous as the Type and set the Path...

Page 61: ...ast frame of the animation 3 At frame 1 the X Y and Z coordinates should remain 0 At frame 30 enter 270 for the Y coordinate or enter any other value that makes the object move off the screen 4 Select Global Effects Shadow from the EasyPalette file directory Click the F X button on the Attribute Toolbar Shadow appears on the Properties Menu 5 On the Timeline Control add a key frame to the last fra...

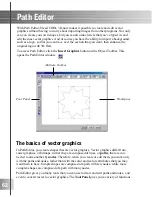
Page 62: ...pens the Path Editor window Attribute Toolbar Tool Panel Workspace The basics of vector graphics In Path Editor you create shapes that are vector graphics Vector graphics differ from raster graphics or bitmaps in that they are composed of lines or paths that are con nected to one another by nodes Therefore when you create or edit them you work only with the paths and nodes rather than with the col...

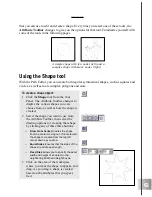
Page 63: ... any of these three buttons Draw From Center Creates the shape from the center moving out If not selected the shape is created from the top left corner down as you draw Equal Sides Ensures that the sides of the shape are all of equal length Fixed Size Allows you to specify the exact width and height of an object in the neighboring Width and Height boxes 3 Click on the area of the workspace where y...

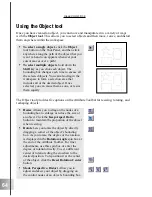
Page 64: ... skew your object by dragging on the control nodes of an object s bounding box Using the Object tool Once you have created an object you can move and manipulate it in a variety of ways with the Object tool This allows you to select objects and then move resize and distort them anywhere within the workspace To select a single object click the Object tool button on the Tool Panel and then click anyw...

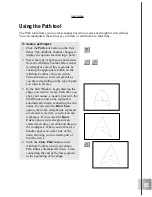
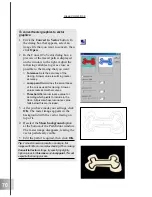
Page 65: ... draw depending on the type of path you want to create 3 In the Edit Window begin drawing the shape you want to create Each time you click your mouse a node is placed in the Edit Window and a line segment is automatically drawn connecting the two nodes If you select the Draw Line option then only straight line segments are created every time you click on the workspace If you select the Draw Curve ...

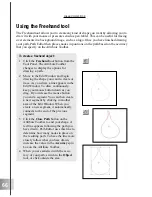
Page 66: ...he Attribute Toolbar to end your shape A red line appears following the path you have drawn Path Editor uses this line to determine how many nodes to place on the resulting path To have the line more closely follow what you have drawn increase the value in the Accuracy spin box on the Attribute Toolbar 4 When you are satisfied with the accu racy of your path switch to the Object tool or click outs...

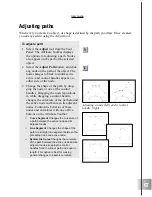
Page 67: ...ge the shape of the path by drag ging the node or one of the control handles Dragging the node repositions it while dragging a control handle changes the curvature of the path around the active node and between its adjacent nodes Control the behavior of these nodes and curvatures with one of five buttons on the Attribute Toolbar Curve Segment Changes the curvature of a path between the active node...

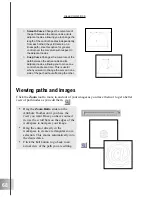
Page 68: ...ndle at a time This is useful when you want to change the curve on one side of the path without affecting the other Drag the Zoom Ratio slider on the Attribute Toolbar until you have the view you want Once you have zoomed in use the scroll bars on the edges of the workspace to navigate your image Drag the cursor directly in the workspace to create a rectangular zoom selection This zooms automatica...

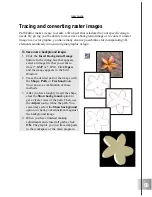
Page 69: ...path Then use the Adjust tool to refine the path You can always select the Show background option to check your adjustments against the background image 4 When you have finished making adjustments and closed all paths click OK The graphic you just traced appears in the workspace of the main program Tracing and converting raster images Path Editor makes it easy to create a 3D object that is tailore...

Page 70: ...tracing A lower value creates smoother curves Threshold Sets a luminance value for deciding which pixels to include in the trace All pixels whose luminance value falls below this are included 3 After you have made your settings click OK The raster image appears in the background with the vector tracing on top of it 4 Deselect the Show background option at the bottom of the Path Editor window The r...

Page 71: ...image at small file sizes depending on the compression you apply to it This is the format most commonly used for Web pages and is most appro priate for graphics and illustrations that are relatively small and do not contain a lot of tonal nuances When saving an image in this format you can choose how many colors you want the engine to recognize A smaller number of colors generally results in small...

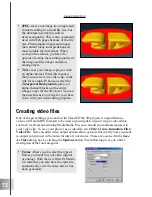
Page 72: ... small file size but the data loss inevitably results in decreased quality This is also commonly used with Web pages because of the file size Photographic images and images that contain many tonal gradations are most suitable for this format When saving in this format you have the options of setting the resulting quality of the image and the image resolution among others TGA saves your image or pr...

Page 73: ...ion of Ulead COOL 3D provides you with extra controls to create a GIF animation that suits your needs Here s an introduction to some of the new features that you can find all of which are accessed by clicking File Create Video Files GIF Animation File Colors Specifies the number of colors to create in the global palette of each frame based on the colors in that image A smaller number of colors hel...

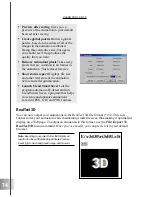
Page 74: ...ixels that are common to all frames in the animation This reduces file size Show status report Displays file size and other vital stats of the animation before and after optimization Launch Ulead SmartSaver Lets the program automatically detect and run Ulead Smart Saver a program that helps you create and optimize animations saved in JPEG GIF and PNG formats RealText 3D You can now output your ani...

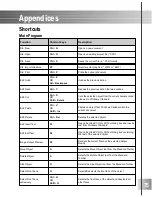
Page 75: ... Pastes an object from Windows Clipboard into the current document Edit Delete Ctrl Del Deletes the selected object Edit Insert Text F3 Opens the Ulead COOL 3D Text dialog box and inserts text from Windows Clipboard Edit Edit Text F4 Opens the Ulead COOL 3D Text dialog box containing the text of the selected object Image Output Preview F8 Renders the current frame at the selected Output Quality Mo...

Page 76: ...Selects the side face of the object and deselects all other faces Select Back Bevel Face R Selects Deselects the back bevel face of the object Select Back Bevel Face exclusively Ctrl R OR Shift R Selects the back bevel face of the object and deselects all other faces Select Back Face T Selects Deselects the back face of the object Select Back Face exclusively Ctrl T OR Shift T Selects the back fac...

Page 77: ...ensional space 17 B background adding 25 Bend plug in 43 Bevel Effects 38 bevel style basic 23 border 24 depth 24 extrusion 24 precision 24 weight 24 Blast plug in 55 Board plug in 38 Bump plug in 56 C cache view 6 14 color 20 animating 33 applying to individual object faces 23 cone 26 Control Line 37 cube 26 Custom Bevel plug in 38 cylinder 26 D Dance plug in 44 dimensions menu command 13 setting...

Page 78: ...ing with 29 L light 20 ambient 20 animating 33 mode 21 positioning 21 specular 20 Location Toolbar 9 M Motion Blur plug in 60 Motion Path plug in 46 N new features 5 nodes 62 O Object Effects 43 Object List 12 15 Object Manager 5 10 15 16 object style color 20 editing 20 light 20 Object Toolbar 9 objects basic movement 17 deleting 16 grouping 16 Object Manager 10 16 renaming 16 rotating 17 selecti...

Page 79: ...ath 46 Path Animation 48 Shadow 61 Surface Animation 49 Token Move G 50 Token Rotate G 51 Token Size G 53 Token Skew G 52 Twist 54 presets applying 11 12 backgrounds 12 basic motion 12 camera 12 compositions 12 shapes 12 Studio presets 11 symbols 12 previewing animations cache view 14 Properties Menu 28 34 pyramid 26 R RealText 3D 74 running Ulead COOL 3D 7 S saving a project 31 saving projects 71...

Page 80: ...tate G 51 Token Size G plug in 53 Token Skew G plug in 52 toolbars Animation Toolbar 9 Attribute Toolbar 10 37 Geometric Toolbar 9 Location Toolbar 9 17 Object Toolbar 9 Standard Toolbar 9 Text Toolbar 10 transforming objects Object tool Path Editor 64 Transition Effects 55 transparency animated GIF 73 transparency GIF 71 transparency TGA 72 Twist plug in 54 U Ulead homepage 6 Ulead SmartSaver 74 ...

Reviews: