background image

Getting started

Video Capture is the program where many of your video creations

begin. Here you can view and capture ‘live’ video from a variety

of different sources such as VCRs, TVs, laserdiscs or camcorders.

Once captured, you can then play back those files or take them

into Video Editor to start constructing your own video project.

Chapter 1

In this chapter you will learn about:

Understanding the basics .........................................................................

p.74

Preparing video for display .......................................................................

p.76

Improving your video signal .....................................................................

p.79

Customizing Video Capture .....................................................................

p.83

Summary of Contents for MEDIASTUDIO PRO 6

Page 1: ...User Guide MediaStudio Pro Ulead Systems Inc January 2000 VERSION 6 0 ...

Page 2: ... trademarks mentioned in this manual are used for identification purposes only and remain the exclusive property of their respective owners Sample files Files provided as samples on the program CD can be used for personal demonstrations productions and presentations No rights are granted for commercial reproduction or redistribution of any sample files Ulead Systems Inc contact information North a...

Page 3: ...g 19 Source window 19 Track control 19 Preview window 19 Full Digital Video DV support 20 Advanced MPEG capture edit and create 20 More new tools 20 Internal changes 21 Tutorials Tutorial 1 Video Capture 25 Capturing Digital Video DV 26 Capturing MPEG 1 or MPEG 2 28 Tutorial 2 Video Editor 29 The basics 30 Creating your first video project 30 Adding clips to your project 31 Working with clips 32 A...

Page 4: ...49 Applying a video filter 49 Cloning an image 50 Creating a video matte 51 Performing advanced techniques 52 Performing an erase effect 52 Performing an advanced power duplication 53 Creating background sets 54 Retouching images 56 Advanced Macros Creating a laser beam effect 57 Advanced cloning Disappearing act 58 Tutorial 4 CG Infinity 59 Performing common techniques 60 Drawing regular shapes 6...

Page 5: ...apture 83 The chapter in review 84 Video Capture Chapter 2 Capturing video 85 Tips for capturing good video and audio 86 Getting the right hardware 86 Using compression 87 Techniques for improving your video captures 87 Techniques for improving your audio captures 88 Capturing video 88 Customizing your capture options 92 Dropped frames 93 Capturing single frames 93 Capturing a color palette 94 Cha...

Page 6: ...ry 110 Storyboarding your clips before Timeline insertion 111 Working with folders 111 Drag and drop 111 Viewing Production Library thumbnails 112 Adding effects to the Production Library 112 Working with the Timeline 113 Inserting clips 113 Inserting video audio and image clips 113 Push Away insertion 114 Inserting title color and silence clips 115 Working with tracks 117 Determining the visibili...

Page 7: ...7 Setting field options for video clips 138 Working with cues 140 Placing project cues 140 Placing clip cues 141 Locating clips 142 Locating an empty time slot 143 Trimming clips 143 Using the Trim window 144 Using the Scissors tool to trim clips 144 Defining trim options 145 Smart Trim 145 Ripple Editing 146 Ripple Editing examples 147 Automatically trimming an inserted clip No Ripple 147 Inserti...

Page 8: ...eating a moving path 177 Creating 3D moving paths 181 Managing keyframes on a moving path 182 Applying audio filters 183 Changing the amplification of an audio clip 184 Adding a soundtrack 184 Creating titles 186 The chapter in review 190 Video Editor Chapter 4 Creating and outputting your files 191 Creating a movie 192 Determining your video save options 193 Performing a batch video creation 198 ...

Page 9: ...Fitting an image in the edit window 227 Working with frames in a project 227 Inserting frames 228 Duplicating frames 229 Deleting frames 229 Replacing frames 229 Customizing Video Paint 231 The chapter in review 236 Video Paint Chapter 2 Painting 237 Working in different display modes 238 Normal mode 238 Ruby Mask mode 238 Onionskin mode 240 No Source Video mode 241 Making selections 242 Understan...

Page 10: ...g your work 264 Performing a flick preview 264 Performing a preview 265 The chapter in review 266 CG Infinity CG Infinity Chapter 1 Getting started 269 Understanding the basics 270 Understanding objects 272 Starting a new CG Infinity project 272 Changing the background of an edit window 273 Changing the view of an edit window 274 Viewing objects 274 Saving your work 275 Creating video and image fi...

Page 11: ...2 Using the Envelope tool 293 Adjusting shapes 294 Creating a moving path 296 Changing the shape of a moving path 297 Changing the size and style of an object over time 298 Changing the speed of an object 299 Timing the movement of objects 300 The chapter in review 302 Audio Editor Audio Editor Chapter 1 Getting started 305 Understanding the basics 306 Playing audio files 308 Creating a new edit w...

Page 12: ...urces 327 Mixing tracks 327 Removing a mixed track 328 Applying special effects 329 Performing a fade 329 Changing speed 330 Performing a stereo pan 331 Reversing a file 331 Performing an echo 332 Performing a cross fade 333 The chapter in review 334 Appendix Background information 337 The world of analog video 338 Inside the video signal 338 How analog video is displayed 339 The world of digital ...

Page 13: ...r anyone wanting to work with and control digital video This soft ware package is ideal for graphic designers multimedia producers Internet developers home video directors and independent filmmak ers With intuitive controls and seamless integration creating video has never been easier or more accessible In this introduction you will learn about Using the MediaStudio Pro documentation p 14 Installi...

Page 14: ...ry We strongly recommend working through the Tutorials section of this manual and checking out the sample projects found in the Samples folder of MediaStudio Pro before really digging into the advanced stuff Once the basics are covered you should be able to begin editing your own movies in just half a day Help As you work you will certainly have many questions that can be quickly answered by acces...

Page 15: ...s More info Once you ve played with the program a little and can already edit clips apply transitions and add a title or two you might want to return to the manual for tips tricks and ideas The companion CD has hundreds of megabytes of samples and additional tutorials The MediaStudio Pro Web site also has a number of additional resources There are also a few private Web sites that have great tutor...

Page 16: ...ser entitles you to product updates and upgrade information as well as technical support You can also instantly register online electronically after installing the program 2 Insert the MediaStudio Pro CD into your CD ROM drive Windows should detect the CD and then automatically run the installtion program If the automatic detection feature is turned off use Windows Explorer to run the SETUP EXE pr...

Page 17: ...ick on the appropriate command in the Start Programs Ulead MediaStudio Pro 6 0 submenu This submenu may differ depending on the choices you made during installation If you are already working in any of these programs the easiest method to run another MediaStudio Pro program is by using the Switch menu located on the right of the Menu bar README In the fast paced world of software change occurs alm...

Page 18: ...e creating a faster more efficient and more stable editing platform For those of you who are veteran MediaStudio Pro users here s a brief look at some of the more significant changes The traditional Windows interface is still highly customizable Floating toolbars and Timelines give you even more flexibility Customizable workspace The new user interface is completely customizable Even the Timeline ...

Page 19: ... Apply button Track control Small changes here and there have led to polished track controls that are easy to use You can lock tracks to protect them from changes temporarily hide mute tracks to make your editing easier and select entire tracks with a click See page 132 Ripple Editing The Ripple Editing aspects of MediaStudio Pro have been vastly improved and include Push Away Insertion of clips R...

Page 20: ... or CD R allows anyone to create their own Video CD VCD MediaStudio Pro lets you create WhiteBook standard MPEG 1 movies that are ready to be written to a VCD See page 207 MediaStudio Pro 6 0 also allows you to create amazing DVD quality movies using the MPEG 2 format which is also used in direct digital satellite television Start by capturing MPEG video straight from your camcorder if your hardwa...

Page 21: ...ort New technologies are constantly emerging but you can be assured that MediaStudio Pro is up to date with full support for DV and new MPEG 1 and MPEG 2 editing Open architecture means that MediaStudio Pro will already be ready to accept third party plug ins and additions The 2GB file limitation is also a thing of the past Advanced SmartTools SmartTools automatically take care of many convenient ...

Page 22: ...MEDIASTUDIO PRO USER GUIDE 22 ...

Page 23: ...Tutorials Tutorials ...

Page 24: ......

Page 25: ...8 Video Capture Video Capture is where you ll begin Hook up your camcorder and you re ready to import video files to your computer for professional editing MediaStudio Pro introduces a number of amazing techno logical innovations including Digital Video DV and native MPEG capture editing and movie creation These new features are the focus of the first tutorial ...

Page 26: ...ur camcorder s manual for specific instructions 2 Run Video Capture 3 From the View menu select Preview You should be able to see the output from your camcorder in the Video Capture Preview window 4 Use the navigation controls to locate the section of video you want to capture 5 Click the Record button This opens the Capture Video dialog box In the Options tab select Auto 6 Click OK to begin captu...

Page 27: ...on page 96 To capture DV by batch 1 Turn on your camcorder and set it to Play mode or VTR mode See your camcorder s manual for specific instructions 2 Run Video Capture 3 From the View menu select Preview You should be able to see the output from your camcorder in the Video Capture Preview window 4 Use the navigation controls to roll the source tape to the location where you want to start 5 Click ...

Page 28: ... the device and set it to Play mode or VTR mode See your device s manual for specific instructions 3 Run Video Capture 4 From the Setup menu select Switch Capture Plug in 5 Select Ulead MPEG VFW Capture Plug in or Ulead MPEG DirectShow Capture Plug in and restart Video Capture 6 From the Capture menu select Video 7 Click the Properties button and choose the type of MPEG you want to capture 8 Captu...

Page 29: ...rograms to create a final video production Here you can insert your files and then arrange them into their playing sequence adding impressive transition effects overlays and moving paths as you go Tutorial 2 In this tutorial you will learn about Creating video projects p 30 Working with clips p 32 Adding special effects p 35 ...

Page 30: ...ect 1 Run Video Editor Click File New 2 In the New dialog box select an Existing project template You can also open this dialog box at any time by clicking the New button 3 Click OK When you save your project you will save it as a DVP file which can be opened only in MediaStudio Pro Selecting a project type is a one time event but it can be a complicated process that depends on what country you ar...

Page 31: ...owse for a video file clip There are a number of sample files on the MediaStudio Pro CD or use a file you have previously captured 3 Click Open 4 Move your cursor to the beginning of the Va track and click How your Timeline should look Try repeating the above procedure with another video clip this time insert ing it into the Vb track just below the first clip Any material placed in lower tracks ap...

Page 32: ...mber of tech niques you can use the following is one of the easiest To trim a video clip 1 Select a video clip on the Timeline by clicking on it 2 Move the cursor to the very right edge of the clip The cursor should change to a double arrow 3 Click and drag the edge to the left to trim it This will shorten the clip in the project and on the Timeline but will not alter the original source clip in a...

Page 33: ...t 1 Insert one clip into Va and another into Vb Make sure the clip in Vb overlaps the one in Va by about a second 2 Go to the Transition Effect folder in the Production Library Click Window Production Library if it is not already visible 3 Browse for the transition effect thumbnail you want to use 4 Drag the effect to the Fx track where the two clips overlap 5 In the dialog box that opens set up t...

Page 34: ...sure those are set up correctly Previewing takes place in the Preview window You can use the controls there to play rewind fast forward or step through your movie It is often the case that you will only want to preview a small portion of your movie like the transition effect you just added on the previous page To perform a partial preview 1 Click Window Preview Window if the Preview window is not ...

Page 35: ... speed of a filter as it moves from the first frame to the last To apply a video filter 1 Select the Video Filter 2D Mapping gallery from the Production Library and drag and drop the Ripple filter onto a clip in the video track of the Timeline The Ripple dialog box opens 2 In the Direction group box select the From center option and in the Frequency group box select the Medium option 3 Set the Lev...

Page 36: ...he overlay tracks V1 V99 2 From the Production Library select the Moving Path 2D Basic gallery 3 Drag and drop the 2D Basic thumbnail onto a clip in a video overlay track of the Timeline The 2D Basic Moving Path dialog box opens 4 Adjust the path in the Motion control box 5 Click the Play button to preview the path 6 Click OK to close the dialog box and apply the moving path Performing a 2D Basic ...

Page 37: ... option to enable the Rolling tab and then select the following options in the Font tab if not already selected Note If you align text in the center it works only on the text within the clip To align the actual clip you need to use a moving path to position it 4 Click the Rolling tab and select the following options if not already selected Direction Up Placed at select Center Start select Off the ...

Page 38: ...tion 3 Drag the control point upward to increase amplification downward to decrease it Place additional control points to determine where to start and end your changes To remove a control point drag it off the top or bottom edge of the clip Note Hold down the SHIFT key while dragging a control point to view a precise volume indication as a percentage and in decibels dB Changing the amplification o...

Page 39: ... such as wipe peel or split screen Below is an example of how to create a split screen To create a split screen effect 1 Insert a clip into Va and another into Vb 2 From the Transition Effect gallery click the Slide folder Then drag the Side thumbnail to the Fx track 3 Set the Transition degree to 50 for the Start keyframe 4 Click the End keyframe and set the Transition degree to the same value as...

Page 40: ...n Library drag and drop the 2D Basic Moving Path thumbnail onto the clip in the overlay track The 2D Basic Moving Path dialog box opens 3 Click the Keep aspect ratio option and enter a new width value of one third the size of the original in the Width spin box for both the start and end keyframes 4 Drag the Start control point to the location where you want the overlay video to appear 5 Click on t...

Page 41: ...distance 1 Create a suitable Rolling title sequence in the V1 track See page 37 2 From the Production Library drag and drop the 2D Advanced Moving Path onto the title clip This opens a dialog box 3 Adjust the Distortion by dragging the green boxes at the corners 4 Click the End keyframe and repeat the distortion Try to make it the same as the Start keyframe 5 Click OK to close the dialog box and a...

Page 42: ... Double click on the audio clip to open it in the Source window Play back the clip and when you hear the sound you wish to synchronize the video clip to press F5 This places a cue on the cue bar above the waveform Click the Apply button and then close the Source window 4 Repeat this procedure to add a cue in the video clip 5 Click the Next Edit Point button or press PageDown repeatedly until the V...

Page 43: ...ping to individual frames of a video project With it you can create such effects as laser blasts background mattes and cloned actors and props Tutorial 3 In this tutorial you will learn about Getting to know Video Paint p 44 Performing common techniques p 49 Performing advanced techniques p 52 ...

Page 44: ... time saver and allows you to perform edits quickly without draining system resources To open a video file for editing 1 Click the Open Video File button on the Standard toolbar to open the Open Video File dialog box and select any video file from the Samples folder of your MediaStudio CD 2 Click the Duration button to open the Duration dialog box 3 Drag the Preview slider to locate the first fram...

Page 45: ...it As you drag a selection marquee appears outlining the area included in the selection When finished move the selection to a new location on the image This selection is now referred to as a floating selection and appears in the Paint Layer 3 To better see the Paint Layer click the No Source Video button on the Standard toolbar The image disappears from view leaving only the background film color ...

Page 46: ...then adjust either the vertical or horizontal slider tabs until the Height and Width spin boxes read 7 Once completed set the Brush Angle to 0 and the Soft Edge to 34 3 In the Options tab set the Application method to Pigment and then click the Freehand button Also set the Transparency and the Wet Control both to 0 if not already set 4 In the Color tab right click the color square and select a col...

Page 47: ...indow 2 Click Edit Power Duplicate to open the Power Duplicate dialog box 3 Select the Paint Layer option in the Source group box and the Apply after current frame option in the Apply group box In the same group box set the duration to cover the number of frames you want your edits to appear over The default is the maximum number of frames in your project 4 Click OK to apply your edits over the sp...

Page 48: ...r macro You can also give it a name and description 4 Click OK The macro is saved to the proper location and the edits are removed from the edit window Note To have the macro play back automatically select the Play macro after recording option in the Preferences dialog box 5 Click the Production Library button on the Standard toolbar and locate the folder you saved the macro to 6 Double click the ...

Page 49: ... to If you want to apply the filter to the entire clip make no selection 2 Select the Video Filter Camera Lens gallery from the Production Library and drag and drop the Kaleidoscope filter onto the edit win dow containing the image you want to apply the effect to The Kaleido scope dialog box opens 3 Drag the View circle on the Original preview image and place it where you want the effect to start ...

Page 50: ... the Brush panel click the Absolute button if it is not already selected 2 Move to the image you want to clone and holding down the Shift key click over the object or feature you want to clone A crosshair pointer appears indicating the area to be cloned 3 Start painting where you want the object or feature to appear As you paint a brush head marquee appears around the crosshair pointer indicating ...

Page 51: ...ck OK The dialog box closes and a new project is created Use the default settings if you do not yet have a Video Editor project to work with 3 Click the Lasso tool on the Tool panel and then click the Anti alias button on the Attribute toolbar 4 Create a selection area with the size you want for your matte and then right click and choose the Soft Edge command from the pop up menu In the dialog box...

Page 52: ...l to open the Fill dialog box 2 Select the color you want to use as the fill from the Color group box and enter 15 in the Transparency spin box 3 Click OK to close the dialog box and apply the fill Once applied power duplicate the fill over the number of frames you want to include in the effect 4 Click the Paint tool on the Tool panel and then select the type of brush you want to use from the Attr...

Page 53: ...tains the edits you want to duplicate and then click Edit Power Duplicate to open the Power Duplicate dialog box 2 Select the Paint Layer option in the Source group box 3 Select the After current frame option in the Apply group box In the Duration spin box enter the number of frames on which the edits will appear The default number represents all frames in the project 4 Move to the Start tab and e...

Page 54: ...ect The Animation Texture dialog box opens displaying various options for controlling the display and movement of a texture 3 Select thumbnail 11 from the Pattern group box and then click on the End keyframe in the Keyframe controller to jump to the last frame in the sequence Click the Lock button so that the Preview image changes 4 Select thumbnail 11 from the Pattern group box again and then cli...

Page 55: ...ng then deselects these areas Keep doing this until all areas of the sea are no longer part of the selection If you need to add areas of the fish to the selection area hold down the A key When finished copy and paste the fish into the edit window containing the image of the sky 5 Switch to the Transformation tool and click the Resize button on the Attribute toolbar A bounding box appears around th...

Page 56: ...brush from the Attribute toolbar 3 In the Shape tab of the Brush panel specify a small brush size with no soft edge and in the Options tab set the blur value to one 4 Zoom in on the edit window containing the background image and begin painting over the edges of the largest fish As you paint notice how the jagged edges are blended into the background Once finished move to the other fish and retouc...

Page 57: ...el click the Straight Line button Set the laser s color in the Color tab and the brush s height and width in the Shape tab 3 Click the Recording button and then click OK The edit window is centered in the workspace 4 In the edit window draw the laser beam from the starting reference point to the ending reference point 5 Click the Recording button again to stop recording The Add To Library dialog b...

Page 58: ... original background in a second edit window background win dow 3 Click the Clone tool on the Tool panel In the Options tab of the Brush Panel click the Frame button and with the SHIFT key click anywhere on the background window 4 In the video window paint over the person you want to disappear 5 Next power duplicate the paint layer of the video window you just cloned across every frame of the vide...

Page 59: ...CG Infinity s tools you can send text and objects flying into the third dimension This tutorial is de signed to give you everything you need to get started at creating your own CG sequences Tutorial 4 In this tutorial you will learn about Performing common techniques p 60 Performing advanced techniques p 66 ...

Page 60: ...oolbar Rectangle select Draw From Center deselect Equal Sides deselect 2 In Preview mode draw a rectangular path within the frame of the edit window and in the Object Style Panel set the fill color to blue with no line color or shadow 3 Switch to the Ellipse option on the Attribute toolbar and create a long elliptical path 4 Using the Object tool position the new path so that its middle starts at ...

Page 61: ...text alignment font or any other characteristics select the text and then choose the appropriate options from the Attribute toolbar 3 Switch to the Envelope tool A red border appears around the text as well as nodes on the corners and edges of the border 4 Drag the nodes to adjust the envelope Each time you select a node two control handles appear which you can adjust independently Keep adjusting ...

Page 62: ...b of the Object Style panel 2 Click the Gradient square to open the Magic Gradient dialog box 3 Click the Edit button in the Palette ramp group box to open the Palette Ramp Editor dialog box and select the CD thumbnail and then click OK The dialog box closes and the color ring in the Magic Gradient dialog box changes to reflect the new palette 4 Drag on the Hue shift to change the hue of the color...

Page 63: ...and node to change the object s perspective 4 Duplicate the object and then click the Resize button on the Attribute toolbar and drag the left side of the object to the right flipping it To make sure it is the same size as the original enter its width in the Width spin box on the Attribute toolbar 5 Switch to the Shape tool and create a rectangular shape the size of the original object filling it ...

Page 64: ...hape 4 Click Edit Duplicate to make a copy of the current object giving it a yellow fill color with no line color Then switch to the Object tool and drag the left side over to the right flipping the object To get the same width enter its original value in the Width spin box When finished place both objects side by side 5 Add four more rectangular objects for the cap left eye left nose and left mou...

Page 65: ...e End control point follows the path of your mouse Releasing your mouse then creates the moving path 3 Click the Play button on the Time Control panel to see how your animation looks If you want to change the position of the control points click the Adjust Moving Path button on the Attribute toolbar and click on the point concerned You may need to click twice before moving a control point dependin...

Page 66: ...rom the background Gradient mattes require a little more work To create a gradient matte 1 Select the tool you wish to create the path with and draw the shape of the matte in the edit window 2 Select the Gradient Transparency button in the General tab of the Object Style panel and click on the Gradient square to open the Gradient Transparency dialog box 3 Move the Start and End sliders to determin...

Page 67: ... two nodes to the left and right of the top node on the larger circle Click the Adjust Path button on the Attribute toolbar and drag the center node upward 4 Click the Cusp node button on the Attribute toolbar and drag the left control handle downward to increase the angle of the curve When happy with the angle do the same to the right control handle 5 Switch to the Object tool and select the Grad...

Page 68: ...ng Delete Remove the darker ones first and then drag the remaining nodes so that the darker colors appear to the left of the circle and the lighter ones to the right When finished click OK and then select the fifteenth button in the Mode group box and drag on the image in the sample window to have the light source appear from the top right Also change the slope value to 200 degrees in the bottom S...

Page 69: ...window 7 Move the slider to the 1 second mark and add a keyframe This is the time you want the object to commence its movement Place your pointer on the object in the edit window and drag it back so that it is in the same place as the Start point Move the slider to the last frame in the Time Control panel and add a keyframe and then move this keyframe back to the 2 second mark This is where the ob...

Page 70: ...enter 68 in the Width spin box Click the Keep Aspect Ratio button to ensure the height changes proportionally After resizing position the object in the center of the edit window frame 6 Click on the letter A and then click on the Start keyframe in the Time Control panel 7 Drag the transparency control point to the top of the transparency graph and then move the slider to the 2 second mark and add ...

Page 71: ...Video Capture Video Capture ...

Page 72: ......

Page 73: ...ent sources such as VCRs TVs laserdiscs or camcorders Once captured you can then play back those files or take them into Video Editor to start constructing your own video project Chapter 1 In this chapter you will learn about Understanding the basics p 74 Preparing video for display p 76 Improving your video signal p 79 Customizing Video Capture p 83 ...

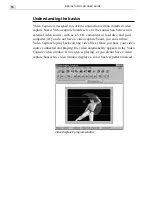
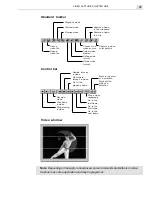
Page 74: ... a VCR camcorder or laserdisc and your computer If you do not have a video capture board you can still use Video Capture to play back existing video files Once you have your video source connected and playing the video automatically appears in the Video Capture video window If no video is playing or you do not have a video capture board the video window displays a color bar test pattern instead Vi...

Page 75: ... Capture a frame to a file Capture a video color palette Rewind through a video Go forward through a video Go to the previous frame Play a video repeatedly Go to the last frame Go to the first frame Go to the next frame Mark in the start of a selection Mark out the start of a selection Record a video Play back a video Stop playing a video Note Depending on the capture board used some commands and ...

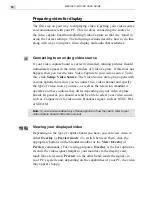
Page 76: ...nnect to a video channel and specify the type of video source you have as well as the television standard it operates on these options may differ depending on your video capture board In general you should at least be able to select your video source such as Composite or S video and a broadcast signal such as NTSC PAL or SECAM Note If you are unsure about any of these options or how they work refe...

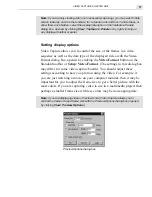
Page 77: ...pened by clicking the Video Format button on the Standard toolbar or Setup Video Format The settings in this dialog box may differ for some video capture boards You should adjust these settings according to how you plan on using the video For example if you are just watching a movie on your computer monitor then it may be important for you to adjust the frame size to get a better picture with the ...

Page 78: ...s captured depends on a combination of factors namely the video source the video capture board and the sound card installed in your computer In general the video capture board handles the capturing of video frames while your sound card captures the audio portion Video Capture then merges this information into the resulting video file To define audio input 1 Click the Audio Format button on the Sta...

Page 79: ...colors do not appear as vibrant or are darker than you expected Such examples indicate that your video capture board and the video source are not properly adjusted or calibrated By having a well calibrated display you can capture and see video particularly color as it was originally recorded Calibrating your display To get the best possible calibration your video source needs to be able to generat...

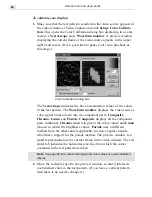
Page 80: ...deo source s color signal broken down into its component parts Composite Chroma Luma and Parade Composite displays all the component parts combined Chroma shown in green the color values and Luma shown in white the brightness values Parade uses a different method from the others and is applicable for video capture boards which have support for the parade method The preview window is a small repres...

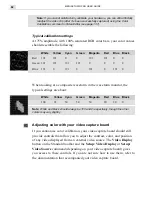
Page 81: ...ion dialog box redraws itself regularly To do this set the Get video frame for every option in the Color Calibration dialog box to 1 second This ensures that at every second the preview test pattern refreshes itself thereby reflecting any adjust ments you make If the test pattern only appears for a short time click the Get Image button after each adjustment to refresh the preview window 5 Adjust t...

Page 82: ...veform monitor the typical settings are about White Yellow Cyan Green Magenta Red Blue Black 100 65 50 50 30 20 20 0 Note White and black should always be 100 and 0 respectively though the other colors may vary slightly Adjusting color with your video capture board If you cannot use color calibration your video capture board should still provide controls that allow you to adjust the contrast color...

Page 83: ...me once the clip finishes playing When clear the video stops on the last frame after playing 3 Display frame numbers when playing shows each frame number in the Status bar as it is being displayed When clear only the starting frame number is shown 4 Display capture options before capturing opens the Capture Video Dialog box every time you click the Record button When clear Video Capture begins rec...

Page 84: ... mode before capturing to get an idea of the resulting quality p 76 When viewing in Preview mode set the frame size and frame rate of the video in the Preview Options dialog box p 77 Calibrate Video Capture to your video source before capturing p 79 Use the File Preferences command to customize the Video Capture working environment p 83 ...

Page 85: ...urce material This can be several minutes of video or simply individual frames that you want to incorporate into other projects you are working on Chapter 2 In this chapter you will learn about Tips for capturing good video and audio p 86 Capturing video p 88 Capturing a color palette p 94 Using a controllable device p 96 ...

Page 86: ...d is the faster video can be digitized and then used by your computer While the video capture board handles video input it is the CPU which handles the delivery The faster the CPU is the more video as data can be processed and thus the better captured video file Once video has been processed by the CPU it is written to your hard drive Most hard drives can only read and write data at approximately ...

Page 87: ...o match the com pression ratios of hardware based compression it is device independent and therefore can be played back on a variety of machines This makes software based compression the ideal choice for video intended for distribution on other machines via CD ROM or the Internet Techniques for improving your video captures Even if you don t have the ideal system for capturing video you can still ...

Page 88: ...at this level is not necessary You may find a mono 11 kHz 8 bit file more practical Also if you are capturing background music then it may not be necessary to capture it at the same time you are capturing the video you can always add it later as an audio track in Video Editor For speech this is possible but it will require more effort later in Video Editor to synchro nize the audio with the video ...

Page 89: ...o Capture begins captur ing immediately using your current settings Capture Video dialog box 3 Specify the desired frame rate in the Frame rate spin box If captur ing full motion video from a drop frame NTSC device specify the fractional frame rate of 29 97 Remember that the higher the frame rate the more demand on your resources and the greater the size of the resulting video file As a guideline ...

Page 90: ... continues capturing until you press the ESC key If you want to perform single frame captures then select the Manual option If you have a controllable device select the Device control option For more on capturing with a controllable device see Using a controllable device page 96 If you select the Manual option you can define aspects of the capture by clicking on the Settings button This opens the ...

Page 91: ...t to Video Editor and drag and drop the file into a video project This is also useful for batch captures as the library creates an icon for each captured file which you can then use to storyboard and arrange before placing your work into a video project 10 Click OK Video Capture begins capturing according to your settings If you chose to capture manually the Manual Capture dialog box opens display...

Page 92: ...video file after capturing plays back each file after capturing Leave this clear if you want to continue viewing your video source after capturing 3 Synchronize video with audio ensures that during capture the video portion maintains correct timing with the audio portion When clear both captures are done independently by your system which may result in bad synchronization between audio and video d...

Page 93: ...y supporting a specified frame rate a message box may appear after capturing detailing how many frames were captured and of those how many were dropped frames This message box is controlled in the Advanced tab of the Video Capture dialog box see above Dropped frames are phantom frames which are created to ensure that the frame rate is maintained Whenever Video Capture or some other device encounte...

Page 94: ...his is suitable for videos featuring a variety of colors such as outdoor shots To retain some color while at the same time saving disk space choose the 8 bit data type which depending on your video capture board is either Grayscale or Indexed 256 Color Indexed 256 Color data types use a predefined color palette to show colors and are best suited for low color videos such as animations and for vide...

Page 95: ...on Next to capture one frame Cancel to end the capturing When the capturing process is completed a palette is generated from the optimum combination of colors based on the captured frames Once defined the color palette is stored in memory until you capture a new color palette or close Video Capture If you wish to save the palette for later use click Palette Save Palette To load it back into a vide...

Page 96: ...file while All frames saves all the frames in the file 5 Specify the desired video attributes in the General Advanced and Compression tabs For more on these options see Determining your video save options in Video Editor page 193 6 Click OK The Video Save Options dialog box closes and you return to the Save Video File dialog box 7 Click OK The dialog box closes and Video Capture saves the file acc...

Page 97: ...type of controllable device you have in the Current device combo box Click Options if you need to define more parameters for the selected device control driver Visit Ulead s web side to know more about recommended settings for different device control drivers 3 Click Setup Switch Capture Plug in and select the appropriate capture plug in Once you have changed to a new plug in restart Video Capture...

Page 98: ...o ensure you have the correct sequences of video You can also load an existing batch file or even a Video Editor DVP file from which to capture Using batch lists in this way allows you to capture exactly the same source each time and is very helpful for creating high resolution files to replace low resolution files you may have been using for editing To view or edit a batch list 1 Click Capture Ba...

Page 99: ...pture them To do this click the Record button on the Control bar or Control Record F5 In the Capture Video dialog box that opens select the Device control option in the Method group box and click OK Video Capture begins capturing from your device using the settings specified in the batch list You can still edit this batch list from the Capture Video dialog box by clicking the Batch button next to ...

Page 100: ...s if you get dropped frames p 93 Preallocate a capture file before capturing p 93 For Indexed Color video capture a color palette p 94 Mark video sequences before capturing them p 97 Use the Capture Batch Settings command to edit a batch list p 98 When using a controllable device capture low resolution files first and then high resolution files when you have completed your video project in Video E...

Page 101: ...Video Editor Video Editor ...

Page 102: ......

Page 103: ...med any effects and transitions you are ready to create a video production which can be saved as a file placed on the Internet distributed on a CD or sent back out to video tape Chapter 1 In this chapter you will learn about Understanding the workplace p 104 Working with video projects p 106 Using the Production Library p 110 Working with the Timeline p 113 Converting files p 122 Customizing Video...

Page 104: ...racks These tracks hold the many different events that occur over time In Video Editor these events are referred to as clips and they combine together to make up a video project The other windows in the Video Editor workplace such as the Production Library and the Preview window are there to help you in the editing process Video clip in the Va track Track buttons Transition effect clip in the Fx t...

Page 105: ...ip in a project Redo an undone action Undo a previous action Create a video file Show and edit Project Settings Open or close the Preview window Open or close the Source window Context Sensitive Online Help Open Ulead Homepage Open or close the Production Library Insert Title Clip Insert Color Clip Insert Silence Clip Insert Image File Insert Audio File Insert Video File Zoom in out Scissors Clip ...

Page 106: ...ips that you place into the Timeline but also defines the properties for the resulting video such as the television standard and the size of the frames used Any clips that you place into the project subsequently adopt those properties regardless of their original attributes To create a new video project 1 Click the New button on the Standard toolbar or File New CTRL N The New dialog box opens disp...

Page 107: ...plate Options dialog box opens up 2 Select and set the attributes for your new template Note For a more detailed explanation of setting up a template see page 108 or refer to Video Editor Help Also it is a good idea to consult the manual of your particular video capture board to see the recommended specifications 3 Click OK The Save New Template dialog box opens up 4 Select Save the current settin...

Page 108: ...he frame rate and the frame size You can also control the number of overlay tracks displayed and view the files currently used by the project see page 117 Notes The number of tabs which appear in the Project Options dialog box depends on which Edit file format you have selected in the Project Settings dialog box The Frame Rate option determines the number of frames for any resulting video file The...

Page 109: ...e and its source files to another PC use the same directory structure as the original to ensure the clips are correctly linked Smart Relink Since a DVP file contains links to potentially hundreds of files on your computer it is not uncommon for these files to occasionally get lost This can happen when you have moved them or maybe edited the files in another program From the File menu select Smart ...

Page 110: ...ail pictures While this is certainly not the most glamourous part of the movie making process spending a short period of time at the beginning of your project setting up and populating the Production Library will save you hours later Placing clips into the Production Library To place clips into the Production Library 1 Click the Production Library button on the Standard toolbar to open up the Prod...

Page 111: ...tly selected gallery appear on the right side of the Production Library window To the left are folders which organize the various thumbnails of the particular gallery You can manage these folders by right clicking on them and choosing a command from the pop up menu that appears This menu offers commands for creating renaming deleting and copying folders You can also save the contents of a folder a...

Page 112: ...low each of the thumbnails If you want to maximize the space available for displaying thumbnails click the Preferences command and in the dialog box that opens clear the Show border option The Search command allows you to search for particular thumbnails while the Sort command allows you to sort them based on their name description or annotation Adding effects to the Production Library In the Prod...

Page 113: ...final video production Clips that have been inserted directly onto the Timeline will also automatically be added to the Production Library s Project gallery Inserting video audio and image clips The easiest way to insert a video audio or image clip into the Timeline is to click the appropriate Insert button on the Timeline toolbar You can also choose its corresponding command from the Insert menu ...

Page 114: ...clicking Insert Project File This places the entire contents of the video project into the Timeline and is particularly helpful if you have broken up larger projects into more manage able portions and are now preparing the final video sequence Push Away insertion Push Away insertion is related to Ripple Editing and controls how inserted clips affect other clips on the Timeline You must be in No Ri...

Page 115: ...ction see page 186 Silence and color clips can be used as placeholder clips which can stand in for other clips you want to insert later For example you may want to start working on a video project but you have yet to acquire all your source files or some may still be in the editing stage You can use a color clip to substitute for an image or video clip and a silence clip for an audio clip that wil...

Page 116: ... and select Color Clip from the pop up menu 2 In the Insert Color Clip dialog box specify the duration of the clip in the Duration spin box 3 Choose the color of the clip by clicking the color square or entering RGB values Click the Pure Color button to quickly insert a solid color clip 4 Click OK Drop the clip into position on a video track If you choose different colors for the start and end key...

Page 117: ...audio tracks when scrolling click the Scroll Lock button at the top of the vertical scroll bar or the View Scroll Lock command The next time you scroll both tracks move in unison Also to control the number of tracks in the Timeline click File Project Settings the Edit button and then enter the number of tracks For details on the track buttons see page 132 Determining the visibility of clips Often ...

Page 118: ...en modified To help improve performance but still retain some visual cues as to the contents of a clip select the Thumbnail mode video only This shows the first and last frames of a video clip separated by the filename of the clip The last mode Filename represents clips by their filenames only with no graphical infor mation This is the fastest mode as it is the quickest to display but offers no vi...

Page 119: ...NTSC standard and at 1 minute each division represents 1 800 frames and so on To change the unit of measurement you have two options Click the Ruler Unit button to open the pop up menu and choose the preferred time unit to do your editing You can also select Zoom In Out single Frame Fit In Window or Previous Zoom to toggle between the previous zoom ratio and the current one Click the Zoom tool and...

Page 120: ...ify the number of commands to appear in custom and cache areas The custom area displays commands you specifically insert into the panel while the cache area automatically tracks the last commands you have used Select ing the Save when program closes option saves your changes whenever you quit Video Editor Leave this clear if you want to save the current configuration Note Custom commands appear at...

Page 121: ...s of type list It is always best to insert the actual project files for any projects you have created in one of these other programs as they have not been rendered or compressed in any way and thus maintain the highest quality Inserting UIS files The UIS file type is a special format that allows you to select a sequence of images to be loaded into a video project with the Insert Video File command...

Page 122: ... the above procedure but is specifi cally designed to bring video files in line with a project s settings Since your project s settings determine the final movie s format any clips you have inserted that are different from this final format will need to be re rendered This time consuming process will be repeated every time you render your movie You can save time by converting the source clips earl...

Page 123: ...u have in Preferences to customize Video Editor 1 Enable undo specifies the maximum levels of undo redo allowed by Video Editor up to 99 As Video Editor allocates more memory for each level of undo redo you may find that too high a level adversely affects performance In such cases restrict the level to 3 4 only You can of course choose not to have undo redo to maximize performance but any editing ...

Page 124: ... attributes of the current Project If you often create video projects using the same attributes then leave this option clear 8 Automatically save every automatically saves the video project at the time interval specified 9 Default background color sets the default background color for any color clips 10 Title safe area margin specifies the margin percentage for displaying any titles in a video pro...

Page 125: ...r more on the frame type see page 139 Select Frame based if your video capture board does not support field based capture or your video files are not field based If you insert a non field based video with this option selected the video will still be treated as field based which will result in duplicated fields when you output the video to tape 3 Double click on video track to insert determines whe...

Page 126: ...a program 2 Associated program indicates the program to open whenever the Edit Open in Associated Program command is selected 3 Include trim information allows a video clip opened in the associated program to display any marked portions that you have created in Video Editor PREFERENCES DIALOG BOX ASSOCIATE TAB 1 3 2 ...

Page 127: ...uch free space you have left on your hard drive 3 Limit hard disk usage to specifies how much memory you want to allocate just for Video Editor s purposes If you are only using Video Editor and want to optimize performance select the maximum amount possible If you are using other programs in the background you may want to limit this to about half If left clear Video Editor uses your system s memor...

Page 128: ...imeline p 111 Edit a thumbnail in the Production Library p 112 Insert video audio and image clips into the Timeline p 113 Insert color title and silence clips into the Timeline p 115 Control the display of the clips with Display Mode p 118 Zoom in and out of clips using the Ruler Unit button and the Zoom button p 119 Use the Quick Command Panel for frequently used tasks p 120 Convert video files i...

Page 129: ...and this chapter is the most important section in this book Chapter 2 In this chapter you will learn Making selections in the Timeline p 130 Working with clips p 133 Working with cues p 140 Locating clips p 142 Trimming clips p 143 Ripple Editing p 146 Ripple Editing examples p 147 Using the Source window p 149 Previewing your work p 153 ...

Page 130: ...ed a clip you can move it or drag on its borders to trim the clip To select all the clips in a particular track click the Track button on the left side of the track If you want to select all the clips in the Timeline select Edit Select All CTRL L Select a clip by clicking on it Select a track by clicking the track button To select multiple clips 1 Select the Clip Selection tool 2 Press and hold th...

Page 131: ...an group them together so that they remain as a unit see page 133 Using the Time Selection tool The Time Selection tool allows you to select a period of time including any clips or portions of clips that occur within that time period To perform a time selection 1 Select the Time Selection tool The pointer now has a Timeline icon under it when placed over the Timeline 2 Drag your mouse over the are...

Page 132: ...ection tool 1 Click the Track Selection tool on the Timeline toolbar 2 Click on a clip The clip along with the rest of the track to the right of the clip is selected Therefore if you click on the first clip in a track you will then select the entire track Note If you press SHIFT while clicking on a clip you will select all clips in all of the tracks in the Timeline to the right of the clip Using t...

Page 133: ...your project and manipulating them is the most important skill you can master The next few pages cover the basics cutting copying pasting and trim ming To cut or copy a selected clip to the Clipboard Click either the Cut or Copy button on the Standard toolbar Select either the Edit Cut or Copy command Hold down CTRL and drag the clip to a different location Use the keyboard shortcuts Cut CTRL X or...

Page 134: ...ip to another This is a very powerful technique that allows you to maintain perfect consistency between clips To paste the attributes of a clip only 1 Select the clip 2 Right click the clip or use the Edit Paste Attributes command 3 From the drop down menu select Paste Attributes Paste Attributes dialog box This will open the Paste Attributes dialog box which allows you to select individual attrib...

Page 135: ...r clips transitions and even project cues for more on cues see page 140 Splitting the audio from video clips Video clips commonly also have audio On the Timeline the accompanying audio clip is placed into the corresponding audio track Va with Aa Vb with Ab and the two clips are locked together as a unit To delete or move either of the clips separately the two must first be split This is useful whe...

Page 136: ...rrect folder or folders MediaStudio Pro includes a feature that works completely transparent meaning that you won t even notice it called Smart Relink If you have moved your files to another drive or folder but have basically maintained their positions relative to one another Smart Relink will automatically find all of the clips in the project that have missing file links and locate the rest of th...

Page 137: ...file at the time of capture otherwise this command has no benefit Note For more on color calibration see the Video Capture section Calibrating your display page 79 Freezing a frame A common technique in video editing is freezing a frame during playback In Video Editor this is done by clicking Clip Freeze Frame To freeze a frame during playback 1 Select a clip and then split the audio from the vide...

Page 138: ... frame 5 was frozen Frame 5 is then repeated frozen until frame 6 is reached Normal playback resumes Freeze after frame was also selected with the value of 11 and the frame is repeated frozen until the end of the clip So this clip freezes at two different points If you want to freeze more frames within this one clip you must first use the Scissors tool to cut your clip into separate clips see page...

Page 139: ...deo capture board used to digitize the original video For more information see the documentation accompanying your video capture board If you cannot determine the correct order switch between the two and render a section of your movie to see which gives you the best results If your video was originally field based but you are editing the video as frame based select the Deinterlace option This help...

Page 140: ...te location on the Timeline A triangular blue cue marker appears on the cue bar Setting cues Working with cues Cues are simply bookmarks for your video project As your projects get larger and more complex you can use cues to quickly jump from one place to another or mark the location of a particular event You can name the cues and add descriptions Cues can be added to the Timeline as a whole proje...

Page 141: ... edges of the Timeline Click View Cue Manager to delete cues rename them or jump to a specific cue Placing clip cues You can also place cues on individual clips In this case the cues are black and appear on the Timeline immediately below the clip These cues cannot be named but can be used as navigation points in the Source window by clicking the Next Previous Edit Point buttons To place clip cues ...

Page 142: ...ip select it under Start Time in the list box 3 Click OK To go to another clip from the same source file click the Find Next button on the Standard toolbar or click Search Find Next F2 Note You can also use the Production Library see page 110 to view all the clips in the current video project and search through text annotated to the clips To jump to a cue or a specific time 1 Click Search Go To 2 ...

Page 143: ...ng movies There are a number of convenient methods for doing this in Video Editor Each of these offers different advantages depending on the type of clip and the opera tions you wish to perform To trim using the Clip Selection tool 1 Click the Clip Selection tool 2 Drag the left or right border of the clip How far you can drag depends on the type of clip and or its duration For example you cannot ...

Page 144: ...ption selected see below only the previous frame is displayed whenever you use the Trim window Using the Scissors tool to trim clips To cut a clip 1 Click the Scissors tool or hold down the S key on your keyboard 2 Click on the place where you want to cut the clip Cutting a clip breaks the clip at the pointer position creating two separate clips that you can then move around the Timeline If you pl...

Page 145: ... the clip back it will reveal the underlying portion of the other clip which is then untrimmed This is useful if you want to merge two clips together and need to see the frames of each clip in the Trim window If the two clips are not adjacent you can only trim the active clip to the duration of the clip slot An example of stitching one clip over another Smart Trim The trimming procedures described...

Page 146: ...ck Ripple editing will move everything including empty space out of the way to make room for the inserted clip but only on the target track Multi Track Ripple editing will move everything including empty space out of the way to make room for the inserted clip moving all clips audio and transitions included on all tracks Notes With any of the Ripple Editing modes selected you cannot trim clips towa...

Page 147: ...ample green avi is again inserted between the red and yellow clips This time Single Track Ripple is selected RippleEditingexamples The following illustrations will help you understand the sometimes complex but extremely important and useful aspects of Ripple Editing Note All of the following examples involve the initial insertion of a clip from outside of the Timeline When moving already inserted ...

Page 148: ...ertion point To insert a clip into another 1 Select Edit Ripple Editing Single or Multi Track 2 Click the Insert Video File button 3 In the Insert Video dialog box select the clip you want to insert As green avi is about to be inserted the part that overlaps the yellow clip turns bluish When the clip is actually inserted the yellow clip and the one second space are moved to the right three seconds...

Page 149: ...erations and place clip specific cues Clips can be dragged to and from the Source window and into the Timeline or Production Library A quick double click will immediately open up a clip in the Source window The Source window itself is made visible by selecting the Source Window button on the Stan dard toolbar or by using the Window Source Window command Once a clip is opened you can use the menu l...

Page 150: ...aded into the Source window 6 Navigation bar See details on the next page 7 Current position displays and allows you to edit the time of the current position of the Jog bar 8 Trim area displays and allows you to edit the current duration of the trim area 9 Menu button displays several options for resizing the Source window importing files viewing the properties of the clip finding the clip in the ...

Page 151: ...the active clip continuously 9 Mark In and Mark Out position the Trim Handles at the current location of the Jog bar and adjust the Trim Area Trimming clips in the Source window The Source window allows you to visually trim any part of an audio or video clip and then update the clip automatically on the Timeline To trim a video clip 1 Locate the first frame that you want to include in your clip an...

Page 152: ...lay boxes can be manually edited Just click on the box and key in the new numbers to automatically readjust the Jog bar and or Trim bar To trim an audio clip 1 Place the red vertical line where you want to begin the trim selection area 2 Select the Mark In button The unselected area changes to a blue waveform on a gray background 3 Repeat steps 1 and 2 with the Mark Out button 4 Click the Apply bu...

Page 153: ...view the output there The Preview window itself is very similar to the Source window see page 149 Where the Source window is used to view trim and add cues to individual clips the Preview window is used to view your project either in full or in part or to add project cues 1 Play pause plays a preview of all the clips in the video project 2 Play the Preview Range plays only the clips in the preview...

Page 154: ...ine the preview range This is also represented as a blue line both in the Preview window and on the Preview bar above the Timeline Click Edit Preview Range and enter specific timecode values to define the preview area After selecting the preview range click the Play the Preview Range SPACEBAR button to begin the preview You can change the size of the Preview window by clicking on the Preview Windo...

Page 155: ...set from File Preferences on the Preview tab Preview files can take up a huge amount of disk space so it is impor tant to set these folders up properly Some times MediaStudio Pro will generate a Not enough disk space error when previewing even though you know you have enough space This error often occurs because you need to specify additional space for these files on another disk Specific preview ...

Page 156: ...eir final positions p 133 Copy and paste an entire clip or its attributes only p 133 Select the Edit Snap command to snap clips to cues or to the edges of other clips p 135 Use cues in the Timeline as well as the Source window to identify and mark areas of interest p 140 Use the Trim window to accurately trim clips p 144 Use the Ripple Editing feature when inserting clips p 146 Use the Source wind...

Page 157: ...run wild as you learn about the most fun and exciting features of Video Editor Chapter 3 In this chapter you will learn about Performing transition effects p 158 Using keyframe controls p 164 Performing a video overlay effect p 166 Working with mattes p 171 Applying video filters p 173 Creating a moving path p 177 Applying audio filters p 183 Creating titles p 186 ...

Page 158: ... the effect To apply a transition effect 1 Place a clip in the Va track and another in the Vb track making sure the clips overlap a little 2 Open the Production Library and select the Transition Effect folder to display its gallery of effects 3 Drag and drop an effect to the Fx track between the overlapping clips 4 The Transition Options dialog box appears Click OK and preview Drag and drop transi...

Page 159: ...plied to the clip 9 Speed control selects the preview play speed 10 Actual image button displays actual video in the sample window 11 Preview button plays the effect with its current settings 12 Transition degree specifies the degree of completion at the current frame 13 X and Y indicate the coordinates for the starting point of the transition The Transition Options dialog box is where you can cus...

Page 160: ...n at the same time Note Double click a previously inserted transition to open the Transition Options dialog box It is automatically opened when you insert a new transition only when the Display Options dialog box option is selected in File Preferences General tab 3 Enter a Border value of 1 Change the color of the border by clicking on the Color square and selecting a color 4 Select one of the two...

Page 161: ...s dozens and dozens of different transition effects to choose from the jump cut with no transition and the crossfade are probably the only two that are commonly used in Hollywood movies Another popular technique is to fade to black at the end of a program or scene To fade to black 1 Place a video clip onto the Va track 2 Create a black color clip see page 115 and drag it onto the Vb track making s...

Page 162: ...get carried away and use them between every clip A fancy transition is not always the best artistic choice however and can at times be distracting Simple jump cuts or fades are often your best choices It is of course trivial to reverse this effect to fade from black at the start of your movie Just make sure that the color clip precedes the video clip in the Timeline and then make sure that you cha...

Page 163: ...p When you click the second clip the audio levels are automatically faded in and out on both clips You can also use this technique in a more general way across all of the overlapping clips in your project After you ve finished all your editing in your project follow the procedure below to crossfade the audio across two entire tracks To perform an audio cross fade between tracks 1 Click the Audio C...

Page 164: ...roce dure below uses the Circle Wipe transition effect dialog box to create a customized transition animated with keyframes To use keyframes to animate a transition effect 1 Place a clip in the Va track and another in the Vb track making sure the clips overlap 2 From the Wipe folder in the Production Library under Transition Effect drag the Circle thumbnail into the Fx track bridging the overlap 3...

Page 165: ...e button To move a keyframe To move any keyframe just drag it to a new location Since keyframes are chronological in nature it is impossible to drag a keyframe beyond a neigh boring keyframe on either side To reverse keyframes 1 Click on any keyframe diamond on the Keyframe Controller 2 Click the Reverse Frame button Note This does not simply reverse the keyframes but actually inverts the entire e...

Page 166: ...e folder drag the PAINT AVI clip onto the V1 track and line it up underneath the clip in the Va track 3 Click the Overlay Options button on the Timeline toolbar or click Clip Overlay Options This command can also be selected from the right click pop up menu The Overlay Options dialog box opens 4 From the Type list choose Color Key 5 On the Overlay clip click on the white area with the Eyedropper 6...

Page 167: ... the source for the overlay 7 Color RGB selects the color to be transparent 8 Advanced control window displays a representation of the threshold cutoff max value min value and gamma value parameters Click any of the parameter handles and drag to adjust 9 External monitor displays a preview on an external monitor if your hardware supports it 10 Blend Opacity controls how much of the overlay clip bl...

Page 168: ...ere are two main types you can choose from color based and mixed based Color based types such as Color Luma Chroma Gray Key and Blue Screen all work by making a specified key color transparent These types also allow you to control the Similarity and Transparency of the effect Mixed based types such as Multiply Add Subtract and Difference determine how the overlaying and underlying clips merge with...

Page 169: ...ent overlays involves using Alpha Channels This technical term simply means an area or areas of an image that have been selected to be transparent in an image or video In many ways an Alpha Channel is the same as a color key and could be based on a color in a clip Many image editing programs allow you to create and save Alpha Channels and it is the technique employed by CG Infinity to control tran...

Page 170: ...contribute to the levels of highlight and shading that appear in an image The Gamma graph is a visual guide which allows you to change these values and thus affect changes in the highlights and shadows as well as change the midrange or midtone values If you move the gamma value higher up the graph you darken the clip whereas moving it lower lightens it You can move the thumbtacks that appear along...

Page 171: ...laying To create an image matte 1 Run your favorite image editing software such as PhotoImpact Video Paint or CG Infinity can also be used and create a rectangle the same size as the frames in your video project 2 Draw an area where you want the video to appear such as a circle or a square 3 Fill this area with a solid color like blue and then fill the background with a contrasting color like gree...

Page 172: ...solid colors that make it easier to identify which areas to show and which to hide For greater control you can use a Grayscale matte which works by using a gradient transparency as a matte where the level of transparency directly corresponds to the level of gray For example lighter grays will be more transparent than darker grays with pure white being 100 transparent and black being completely opa...

Page 173: ...r right click and select Video Filters from the pop up menu 3 Select the filter you want to apply from the Available filters list box and click Add The filter is moved to the Applied filters list box 4 Click OK The Video Filters dialog box closes and the filter is applied to the clip Note If you regularly use the same filter you can define its default at tributes by double clicking its thumb nail ...

Page 174: ...hich shows the result after application of the filter 3 Change the various filter attributes until you get the result you want Remember to adjust both the start and end attributes by clicking on the keyframes The Video Filters dialog box varies according to the selected filter For details about the specifics of each filter click the Help button in that particu lar filter dialog box All of the filt...

Page 175: ...te to a video filter When you apply a video filter it affects the entire frame of a video clip There may be times however when you would prefer it to only affect a certain portion of the clip such as a highlighted area or a specific scene in the background You can do this by first creating an image or video matte see page 51 and then loading the matte into the Video Filters dialog box See the next...

Page 176: ... affected by selecting the Invert option 5 Click OK to return to the Video Filters dialog box 1 Mask window shows a frame from the mask 2 Preview window shows a frame from the selected clip and the parts affected by the filter 3 Type drop down box lets you select the key type to use in the Mask window 4 Mask drop down box lets you select the kind of matte to use 5 Threshold slider determines the s...

Page 177: ...eated with CG Infinity To create a 2D basic moving path 1 Open the Production Library and select the 2D Basic Moving Path folder from the Moving Path gallery 2 Drag the 2D Basic thumbnail onto a clip in an overlay track This opens the Moving Path dialog box see the diagram on following page 3 Click the Start control point S in the Motion Control window and drag the sample clip to the position wher...

Page 178: ...that any changes to a clip s dimensions are reflected equally in the Width and Height boxes 8 Preview allows you to display the moving path before actually applying it 9 Show Background displays the background clip in the frame window 10 External Monitor preview on an external monitor 11 Speed determines the speed of the preview 12 Play performs a preview of the moving path 13 Title Safe Area disp...

Page 179: ...a clip but are restricted by the size of the Motion Control window such as for long title credits By switching the reference of the clip to the top you can then drag the sample clip outside of the frame box and beyond the area of the window The Zoom button opens the Zoom window which displays the Motion Control window in greater magnification A green frame also appears in the Motion Control window...

Page 180: ...d control point and repeat steps 5 and 6 entering exactly the same values 8 Click OK and preview the effect The 2D Advanced Moving Path dialog box is similar to the 2D Basic Moving Path except that you can spin a clip around a central point in two dimensions To create a 2D advanced moving path 1 Select the 2D Advanced thumbnail from the Moving Path gallery and drag it onto a clip 2 Enter a rotatio...

Page 181: ...xes have options for controlling the behavior of the path and the clip itself For example if you select the Clip Angle in the Adjust combo box you can adjust the rotation of the clip on the surface of the sphere or cylinder rotation values can be entered using the rotation dial the plus minus buttons or the entry boxes The X and Y coordinates deter mine the placement of the sphere or cylinder in r...

Page 182: ...r of the of the fixed project frame 3 Drag the Preview slider in the Keyframe Controller halfway between the start and end keyframes 4 Click Add Keyframe and drag the red square the new control point to the bottom of the fixed project frame 5 Drag the End control point E in the Motion Control window to the top right of the fixed project frame Now watch the preview The clip should descend from the ...

Page 183: ... To apply an audio filter 1 Select the audio clip you want to apply the filter to 2 Click the Audio Filters button or Clip Audio Filters or right click the clip and select Audio Filters from the pop up menu This opens the Audio Filters dialog box 3 Select the filter you want to apply from the Avail able filters list and click Add The filter is moved to the Applied filters list 4 Click the Options ...

Page 184: ...the SHIFT key before adjusting the control points you will see values in dB and for the exact amplification Adding a soundtrack Putting background music into your movie is simple but you must carefully control the volume of both the source video and the music audio file to make it work The best source for background music is your personal CD collection as long as your movie is for personal use onl...

Page 185: ... end of the fade in at the beginning of the fade out and at the end of the fade out 4 Drag the two middle control points lower to set the volume Note For greater accuracy in editing zoom in on the clips with the Zoom tool or Ruler Unit button see page 119 It can be faster to simply preview the audio instead of both the audio and the video Create a preview area and click File Create Audio File to t...

Page 186: ...k Insert Title Clip to open the Insert Title Clip dialog box 3 Type the text that you want in your title in the Title text box 4 Click OK and place the clip into an overlay track V1 on the Timeline It is standard at the end of a movie or television show to have what are called rolling credits The following procedure describes one simple way to do this in Video Editor To create rolling credits 1 Cl...

Page 187: ...nal monitor outputs the results to an external monitor if your hardware supports it 8 Background video displays the background video behind the preview Notes When Enable rolling is selected the Shadow feature on the Font tab is disabled If the width of your text in the Preview window exceeds the frame size you need to reduce the size of the font or add a new line To start a new line press CTRL M o...

Page 188: ... and Shadow transpar ency controls how much of the underlying clip shows through 6 Opaque background covers any underlying clips with the title background and Fill color determines its color With the Font tab you can specify the format for the title clip text The changes you make here affect all the text in the Preview window If you want to change the format for certain text you need to insert it ...

Page 189: ...rolling text you can either prolong its duration or decrease it 1 Direction buttons determine the direction of rolling 2 Place at aligns the text 3 Start and Stop specify where the text begins and finishes rolling 4 Duration sets the duration of the clip 5 Repeat sets a number of times for the clip to repeat itself ROLLING TAB OF THE INSERT TITLE CLIP DIALOG BOX 1 2 3 4 5 ...

Page 190: ...ance of effects at different stages p 164 Choose a key type and specify how you want an overlay clip to blend onto the background video p 168 Use mattes to show or hide specific areas in a video p 171 Load an image matte into the Video Filters dialog box to control which area of the video is affected by the filter p 175 Make video clips fly rotate and move in different directions by creating movin...

Page 191: ...mputer or record the movie back to your camcorder Chapter 4 In this chapter you will learn about Creating a movie p 192 Analyzing a video file s data rate p 199 Creating an audio file p 201 Creating an image sequence p 202 Creating an edit decision list EDL file p 203 Outputting to video tape p 205 Creating a VCD p 207 Creating an MPEG 2 on a PC p 208 Working with a digital video camcorder p 209 ...

Page 192: ...mplicated operation See the next section on Determining your video save options to learn more about these options 5 Click OK to accept the current video attributes The Video Save Options dialog box closes and you return to the Create Video File dialog box 6 Click Save Notes Render your video with EXACTLY the same attributes as your captured video The movie should render very quickly and the qualit...

Page 193: ... field based For more on these options see the Setting field options for video clips section page 138 3 Play after creating plays the resulting video file after its creation This can serve as a signal that the rendering has finished 4 Perform SmartRender speeds up the creation process by reusing previously saved video re rendering only the areas modified since you last created the video You must u...

Page 194: ...rack only or both the video and the accompanying audio track To save the audio track only click the File Create Audio File command 2 Frame rate specifies the frame rate to use for the resulting video file For example NTSC video is typically 29 97fps See your capture board s manual for specific frame rate advice 3 Frame size determines the size of each video frame You can choose from a range of pre...

Page 195: ...cases you should leave this option cleared 4 Interleave audio and video evenly distributes video and audio data within the video file Standard AVI files are interleaved at 1 1 which means that each video portion is followed by an audio portion This is the recommended option for files destined to be played back from a CD ROM In most cases you should leave this selected unless you have a reason not ...

Page 196: ...ession scheme to the keyframes specified here 4 Data type determines the number of colors to save the video with In general the lower the number of bits used the smaller the resulting file size 8 bit data types contain 256 colors and are useful for single color animations and for when the video is intended to be played back on a 256 color display mode 16 bit over 64 000 colors and 24 bit over 16 m...

Page 197: ...s a useful method for controlling the frame size of a video without having to resize the actual frames This is important as resizing frames resamples the original video resulting in distortion and loss of quality The downside though is that you need to remove data which may or may not be important Cropping is also good for remov ing unwanted noise that may occur around the edges of a video due to ...

Page 198: ... Once selected click OK The standard Create Video File or Create Audio File dialog box opens 3 In the Create Video File dialog box enter a Name and set up any other Options Click Save when finished The dialog box closes and you return to the Create Multiple Files dialog box Select the next project file you want to render and repeat 4 Click OK The dialog box closes and the video files are created i...

Page 199: ...s to open the Data Rate Analysis dialog box 2 Browse for and select the video file that you want to analyze and then click Analysis The Data Rate Analysis window details the various attributes of the file and shows a graph indicating the size of each frame in the video This graph contains a number of blue frames which indicate keyframes in the video sequence keyframe diamonds are also visible bene...

Page 200: ...rn a clip to its original settings click Restore Note Removing a keyframe doesn t remove the frame itself it only removes the reference to that frame as a keyframe 3 Click Save As to save the new keyframe information to a Key file KEY To apply the key file you need to re render the video file again making sure you specify the key file in the Keyframe control group box in the Video Editor tab of th...

Page 201: ...om the Save as type list 3 Enter a File name 4 Click the Options button to view or edit the specific details of the file in the Audio Options dialog box The Compression tab contains the options you need to specify to determine the quality and thus the size of the audio file Click OK to accept the current audio attributes 5 Click Save You can also append a subject line and a short description to yo...

Page 202: ...equence 1 Click File Create Video File 2 Select Ulead Image Sequence Files UIS and the drive and folder where you want to save the frames of the video 3 Enter a File name 4 Click the Options button to view or edit the properties for each of the image sequence files Note When creating a Ulead image sequence all options in the Video Save Options dialog box are ignored except for those in the Format ...

Page 203: ...d particularly because not all post production companies support the wide array of effects available in Video Editor Note You must post the timecode see the next page onto each of your clips in a video project before creating an EDL To do this you first need to have captured the video from a controllable source with timecode capabilities To create an EDL file 1 Click File Create EDL File to open t...

Page 204: ...rately post timecode you need to have recorded the timecode at the time of capture using a controllable device To post timecode 1 Click Clip Post Timecode to open the Post Timecode dialog box Post Timecode dialog box 2 Type the name of your source video in the Reel name entry box for example Wedding 1 3 Specify the appropriate time to start recording from the source in the Timecode spin box The ti...

Page 205: ...pop up menu to see this information If you have already created an avi file with your project it is easy to print the finished movie to tape Note To output a video to tape you need a video capture board which supports this or a similar device with a VGA to TV converter It is also advisable to have a controllable device that allows you to control the recording from Video Editor To output an avi fil...

Page 206: ...Click File Print To Tape Timeline to open the Select Timeline dialog box 2 Choose whether to output the Entire project or just a selected Preview range 3 Select Options to open the Print To Tape Options dialog box and follow steps 3 and 4 of the outputting an avi file procedures 4 Click OK to close the dialog box and then OK again to begin playing back the sequence The movie then plays back while ...

Page 207: ...diaStudio Pro s Timeline sequentially You can then use Timeline playback to play the files back seamlessly to tape Creating a VCD A VCD is simply a special version of a CD ROM The exciting thing about this format is that it can be read by most newer stand alone DVD players which are becoming very popular The format used on a VCD is MPEG 1 When you want to create a VCD file you need to create a spe...

Page 208: ...files can only be played back on your PC and only with the proper software player In the future it may be possible to create DVDs at home using this format but that is not currently feasible Secondly because MPEG 2 is so powerful it requires a fast CPU or a dedicated MPEG 2 video card not only to create the video files but also to view them a 450MHz CPU is a recommended minimum With that in mind M...

Page 209: ...ed even the very first DV products on the market this latest version now offers comprehensive support for DV in all of its manifestations This includes but is not limited to Type 1 Type 2 PAL NTSC and even the device control of your camcorder To record a movie to your DV camcorder 1 Turn on your camcorder and set it to Play mode or VTR mode See your camcorder s manual for specific instructions 2 C...

Page 210: ... and remove noise from the edges p 197 Use the File Create Multiple Files command to create video files from a number of different projects p 198 Use the File Data Rate Analysis command to analyze a video file and adjust the keyframes to optimize compression p 199 Remember to post timecode when creating an EDL p 203 If outputting to video tape match your video file s attributes to the television s...

Page 211: ...Video Paint Video Paint ...

Page 212: ......

Page 213: ... such as lightning bolts lasers beams virtual sets and mattes You can also use the wide range of natural and particle based painting tools to work on single images for use in other projects such as web pages and presentations Chapter 1 In this chapter you will learn about Understanding the basics p 214 Viewing edit windows p 225 Working with frames in a project p 227 Customizing Video Paint p 231 ...

Page 214: ...of the frames appears as a clip in the Filmstrip panel You can scroll through this panel to view the clip or select a specific frame to work on When you select a frame it opens automatically as an image in an edit window Once an image is displayed in an edit window you can begin to work on it paint or enhance it using various Video Paint tools Video Paint s program window ...

Page 215: ...Paste an image View in Composite mode View in Paint Layer mode Redo an undone action Undo a previous action View in Normal mode View in Onionskin mode View in Ruby Mask mode View in No Source Video mode Production Library Shape Selection tool Lasso tool Magic Wand tool Transform tool Clone tool Zoom control Foreground background colors Zoom tool Grabber tool Painting tool Retouch tool Eyedropper t...

Page 216: ...he top marker indicates the frame s position timecode in the current view while the bottom marker indicates the frame s position relative to the entire clip Markers indicating the position of the current frame in view top and its position relative to the entire clip bottom Adjusting the view of the Filmstrip panel You can change the frames currently displayed in the Filmstrip panel by dragging the...

Page 217: ...eo Paint file UVP UVP files do not save the source video file just the clip information which contains a pointer to the original video file as well as a list of all the edits performed on each frame in the video sequence This serves to keep the file size down and doesn t force you to have to duplicate existing video files When you open a UVP file you need to ensure that the source file is still pr...

Page 218: ...es that make up a video sequence The maximum duration for any file you open is 30 seconds Note Video Paint automatically converts any file you open into its workspace to True Color If you want to constrain your editing to an indexed color palette then load the palette into the Custom tab of the Color panel see page 248 To open a video file 1 Click the Open Video File button on the Standard toolbar...

Page 219: ...o select the frames you are interested in Video Paint saves the project if changes have been made and then reloads it so only the selected frames appear To edit frames outside of the current project use the File Open command and select the frames in the Duration dialog box Note If you want to work on each frame in a large video file such as 30 seconds first open the entire file into Video Paint an...

Page 220: ... video or image file which merges your edits with the original source file To create a video file click File Create Video File This opens the standard Create Video File dialog box which has the same options as those in Video Editor To learn more about these options see the Creating a movie section page 192 If you plan on using your work in a Video Editor project insert the UVP file directly by sel...

Page 221: ...s an image either from Video Paint or any other image editor you can paste it into an edit window To do this click the Paste button on the Standard toolbar or Edit Paste CTRL V Images are pasted at the same location they were cut or copied from If the pasted image was from a frame or other image larger than the active frame then the image is pasted at the top left corner of the current view Anothe...

Page 222: ... Duplicate Last Floating Selection CTRL K or Duplicate Last Paint Layer CTRL L Duplicate Last Floating Selection places a copy of the last active floating selection while Duplicate Last Paint Layer copies every thing present in the last active paint layer To duplicate an action over several frames you need to perform a power duplication Power duplication is much more flexible than the other Duplic...

Page 223: ...pearing before or after the active frame In the Duration spin box indicate how many frames to duplicate over 5 Set the Start and End frame transparency in the Start and End tabs Default is 0 or no transparency You can also specify the X and Y coordinates from where to place each duplicated edits By having different start and end coordinates you can have the duplicated edits appear to move linearly...

Page 224: ...ultiple frame actions option or decrease the number of frames to duplicate over Creating a matte frame 2 and then power duplicating it across the others Placing cues In Video Paint you can place cues at any frame in a project to mark it for later editing or identification To place a cue click the Cue bar located under the Preview bar of the ruler at the appropriate location in the Filmstrip panel ...

Page 225: ...box Viewing edit windows Whenever you open a file the first frame of the sequence appears in an edit window at its original size 1x Video Paint allows you to control the size of this edit window as well as zoom in or out from the image This helps you to see more easily the areas you are editing as well as identify areas for further enhancement Zooming on an image When you edit an image you may wan...

Page 226: ...lso press the and keys to zoom in and out on images regardless of the current tool selected Pressing the Z key while using another tool automatically switches that tool to the Zoom tool Releasing the Z key then switches the tool back Using the Global Viewer When an entire image cannot be displayed within the edit window scroll bars appear allowing you to navigate around the expanded image The Glob...

Page 227: ...w By submenu The maximum zoom level available is deter mined by the size of the image and your current display mode An alternative to the Fit in Window By command is the Fit in Window button on the Attribute toolbar or View Fit in Window This automati cally resizes the image to fit within the edit window at the largest possible size without introducing scroll bars Working with frames in a project ...

Page 228: ... Select the frame in the Filmstrip panel where you want to begin inserting the additional frames 2 Click Frame Insert to open the Insert Frame dialog box Insert Frame dialog box 3 Specify the number of frames to insert in the Insert duration spin box and then select either the Before current frame or After current frame options to determine whether the inserted frames precede or follow the active ...

Page 229: ...rames The Frame Delete command removes a frame or frames from your project shortening the duration accordingly This does not remove them from the actual source file When you click this command the Delete Frame dialog box opens allowing you to specify which frames in the sequence to remove You can enter the timecode of the frames in the Start and End spin boxes or use the Mark In and Mark Out butto...

Page 230: ...ox and then specify what to replace the frames with in the Link with group box The Empty frame option replaces the frames with the current film color while the Source video option uses frames from the source video file starting from the position specified in the Timecode spin box Select the Only preview source video option if you do not want the preview video to display any edits currently in the ...

Page 231: ...e this option clear 2 Levels of undo redo specifies the maximum levels of undo redo allowed by Video Paint up to 99 As Video Paint allocates more memory for each level of undo redo you may find that too high a level adversely affects performance In such cases restrict the level to 3 4 only You can of course choose not to have undo redo to maximize performance but any editing performed is final 3 C...

Page 232: ...sequence to the first frame after it has been played like a CD player When clear the sequence stops on the last frame after playing like coming to the end of a tape in the VCR 7 Play macro after recording plays a macro immediately after recording it Leave this clear if you are content with your macro recording or if you want to test it yourself on another frame PREFERENCES DIALOG BOX PREVIEW TAB T...

Page 233: ...much total disk space is allocated for virtual memory as well as how much space is allocated in RAM for use by all MediaStudio Pro programs 1 Define additional folders for virtual memory allows you to specify the folder used by the MediaStudio Pro programs as additional working space For example when you don t have enough RAM the MediaStudio Pro programs can use extra memory from the hard disk vir...

Page 234: ...ay adapters or the environment in which you work as lighting and temperature can also affect a monitor s performance 1 Hi Color dithering allows you to improve the display of True Color images when you are in Hi Color display mode 2 View images with a common palette displays all images using the system palette This is only enabled when you are in 256 Color display mode and makes your work more eff...

Page 235: ...nitor both of these squares should look approximately the same 2 Examine the two color squares and if the two squares look different adjust the Monitor gamma spin box until the bottom square looks similar to the top square The monitor gamma value can be any number from 0 01 to 7 99 If none of the squares exactly match try and estimate the best match In general your value should fall within 0 8 2 4...

Page 236: ... appearing as an image in an edit window p 214 Control the size of frames in the Filmstrip panel by using the right mouse pop up menu p 216 Open only a few seconds of a video file for speedier editing p 218 Use Power Duplicate to copy edits over multiple frames p 222 Use cues to identify important frames in a project p 224 Calibrate your monitor to get the best possible display of images p 235 ...

Page 237: ...uch and Clone tools to the more common Paintbrush and Transform tools Chapter 2 In this chapter you will learn about Working in different display modes p 238 Making selections p 242 Working with color p 247 Using the painting tools p 251 Transforming selections p 256 Using the Clone tool p 257 Using the Retouch tool p 258 Recording macros p 260 Applying filters p 263 Previewing your work p 264 ...

Page 238: ...arious painting and retouching tasks Ruby Mask mode The Ruby Mask mode is useful when you want to create a video or image matte that protects certain areas of an underlying video from any edits you may perform Mattes are often used in conjunction with Video Editor A good example of this is a hold out matte that is used to remove the matte lines that often occur around objects which have been filme...

Page 239: ...pe tab of the Brush Panel Now when you paint the ruby mask is applied 5 Select the next frame and click Edit Duplicate Last Paint Layer The paint layer from the previous frame is copied to the current frame Once duplicated you can start painting on it as in the previous step 6 Repeat steps 4 and 5 until the matte is complete If the object you are creating the matte over does not move then you only...

Page 240: ...e page 252 3 Click the Onionskin mode button on the Standard toolbar or View Display Mode Onionskin 4 Click View Onionskin Options to open the Onionskin Options dialog box Onionskin Options dialog box 5 Select on which frames to apply the onionskin in the Overlay combo box Use Succeeding if you are editing frames to the right of the active frame toward the last frame or Preceding if you are editin...

Page 241: ...ns have a transparency applied If left clear the transpar ency is applied to the source video plus the paint layer Depending on the type of video this may produce no noticeable effect 9 Click OK The dialog box closes and the settings take effect immedi ately Painting over frames in Onionskin mode No Source Video mode When working on an image it can often get confusing trying to determine where the...

Page 242: ... selection a dotted line appears around the edges of the selected area This dotted line is called the selection marquee The marquee can either be floating containing image data or non floating selecting the source video Floating selections appear in the paint layer of an image and are created whenever you move a selection area perform a transformation on a selection area paste a selection into an ...

Page 243: ...n area the edges blend in slightly with the surrounding background An added feature of selecting in the paint layer is the Shrink button on the Attribute toolbar When you select this button any selection you make snaps to the edges of your edits as long as the edits are included in the selection Selecting regularly shaped areas The Shape tool allows you to select areas of an image based on a prese...

Page 244: ...our mouse allows you to draw precise curved segments clicking your mouse allows you to define straight line segments By combining both drawing techniques you can quickly outline selection areas that contain both irregular and straight segments When you have finished outlining the selection area double click to release the Lasso and Video Paint automatically selects all image data within the bounds...

Page 245: ...ective way to select large solid colored portions of an image such as a blue screen or patches of skin and clothing When you use the Magic Wand tool it operates in one of two modes Line or Area In Line mode dragging your mouse over an image creates a line that calculates the largest and smallest color values of the pixels under the line any values entered in the Similarity spin box are also includ...

Page 246: ...rs thereby selecting the entire image A value of 50 selects neighboring pixels that have values that differ from the pixel you click on by 50 For example if you click on a pixel with values R25 G60 B190 neighboring pixels with values between R0 G10 B140 and R75 G110 B240 are selected Adding to or subtracting from a selection area Once you ve created a selection area you may discover that you left ...

Page 247: ...ion pixel by pixel To move a selection marquee to another frame first copy it and then click Edit Paste As Mask see page 221 Working with color Before you start painting on images you need to select the color you wish to apply In Video Paint you can do this in a number of ways from picking colors out of a palette to selecting colors directly from an image At any time two colors are active the fore...

Page 248: ...lor then replaces the current foreground color If you already know the RGB values of the color you want you can enter them directly in the appropriate RGB spin boxes Note When you run Video Paint for the first time the Color palette is docked to the program window in Compact mode and shows the colors of the default method To see all methods at the one time deselect the View Color Palette Compact c...

Page 249: ... amount of brightness from left to right When you move your mouse over any colors their respective RGB color values are displayed at the bottom of the dialog box and the color itself appears in the left color square If you click and hold your mouse button over a color a saturation bar appears and allows you to select a specific color Releasing your mouse selects the color subse quently displaying ...

Page 250: ... foreground and background squares on the Attribute toolbar The next time you select a color the active color square changes Attribute toolbar of the Eyedropper tool Loading and saving color tables There may be times during your work that you find yourself continually using the same colors with which to paint You can store these colors as color squares on the Attribute toolbar of the Eyedropper to...

Page 251: ...everal frames To view the painting tools click the Paint tool button on the Tool panel The Brush panel opens and all the various brushes are displayed along the Attribute toolbar To apply a paint tool select the brush to use and then click and drag over the areas of the image where you want the paint to appear For greater control over which areas are affected select the area and or zoom into the i...

Page 252: ...l you are using BRUSH PANEL SHAPE TAB 1 Height specifies the height of a brush You can also drag the vertical slider to the right of the preview To keep aspect ratio click the Lock button 2 Width specifies the width of a brush You can also drag the horizontal slider at the bottom of the preview To keep aspect ratio click the Lock button 3 Erase removes previously applied paint from the paint layer...

Page 253: ...etermines how paint is applied to an image Depending on the tool you can choose one of the following Always replaces the original colors with the painted color Hue and Saturation applies only the hue and saturation values of the painted color Hue Only applies only the hue value of the painted color Saturation Only applies only the saturation values of the painted color Luminosity applies only the ...

Page 254: ...e resulting color For example if the resulting color is black the inverse will be white Pigment applies the color which is produced from blending the painted color with the original colors much in the same way an artist creates new colors by mixing paints 2 Freehand defines the drawing mode as Freehand Freehand mode mimics painting by hand applying paint as you move your mouse 3 Straight Line defi...

Page 255: ...alled these options are disabled 2 Spacing determines how close each drop of color is applied as a percentage to the current brush size The higher the value the farther away drops are applied Likewise a lower value applies color closer together For example a value of 100 places each drop of color next to each other creating a dotted line effect whereas a value of 300 places each drop of color at a...

Page 256: ... mode This removes the white from the paint layer revealing the underlying image This is a good technique for creat ing quick video mattes Transforming selections After you ve made a selection area you can change its shape size and orientation using the Transform tool When you click the Transform tool button on the Tool panel the Attribute toolbar changes to show each of the possible transformatio...

Page 257: ...ls you can use to paint with and the Brush panel changes to show the available attributes for the selected tool 2 Hold down the SHIFT key and click your mouse over the area you wish to clone This area is marked with a crosshair and the mouse pointer changes to the clone pointer You can clone from the same image or from another edit window 3 Move to the area on the image where you want the clone to...

Page 258: ...rosshair appears in the top left corner of the image and as you clone the crosshair moves to the exact same location to ensure you are cloning accurately between both the active and target frames Cloning an image from a second edit window to another Using the Retouch tool The Retouch tools are not strictly painting tools in the sense that they do not paint over an image with a selected color Inste...

Page 259: ...ay controls for refining the degree of retouching To learn about cloning over several frames see the Duplicating changes over frames section page 222 Notes Confine the area to retouch by first creating a selection area You need to be in Composite mode before you can start using a Retouch tool Once you have edited an image you can switch to Paint Layer mode to work on just that area Original image ...

Page 260: ...emoves intensity from colors making them lighter Warping distorts an image as you drag your mouse Transparency determines the transparency of the paint as it is applied Wet adds water to the paint making it blend more smoothly with the colors of an image Dry removes water from the paint making it appear more distinct from the colors of an image Smear controls the amount of paint overrun Note The a...

Page 261: ...ctions which are ignored when you play the macro back 3 When finished click the Macro button again to end the recording The Add To Library dialog box opens 4 Select the folder in the Macro gallery where you want to store the macro and then enter a name for the macro in the entry line below the thumbnail image as well as a brief description in the Annotation box 5 Click OK The macro is now saved to...

Page 262: ...g method group box Select Entire image if you want the macro to appear the same on each frame To have the macro animate sequentially over each frame click either the Progressive or Regressive options Progressive starts the playback of the macro from the first stroke of the macro to the last while Regressive starts from the last stroke to the first If you want to determine where the macro should st...

Page 263: ...y find that they take longer to apply depending on your system resources or the type of filter To apply a video filter 1 Drag over the Preview bar in the Filmstrip panel to select the frames you want to apply the filter to If you want to apply the filter to the entire clip make no selection 2 Select the Video Filter gallery from the Production Library and locate the filter you want to apply from o...

Page 264: ...avigator or View Flick SHIFT F The preview is then performed on the image in the edit window Before you perform the preview however you need to set your flick options to determine which area of the image is previewed as well as how many frames to flick through Performing a flick preview To set your flick options 1 Click View Flick Options to open the Flick Options dialog box 2 Specify the number o...

Page 265: ...e a preview file To do this first define your preview options by clicking the Preview Options button on the Standard toolbar or View Preview Options Once the Preview options have been defined drag over the Preview bar on the Filmstrip panel a blue selection line appears and select the frames you want to preview When ready click the Preview Selection button or View Preview ENTER to create the pre v...

Page 266: ...imations p 240 In Composite mode you select areas of an image in Paint Layer mode you select areas of your edits p 243 Use the Eyedropper tool to select colors from an image in an edit window p 250 Save regularly used brush attributes to the Production Library p 252 Perform changes over multiple frames using the macro recorder p 260 Perform a flick preview over a selected area to better see your e...

Page 267: ...CG Infinity CG Infinity ...

Page 268: ......

Page 269: ...cts or as standalone video and image files With CG Infinity you can easily produce television and film quality opening and ending credits as well as an extensive range of both regular and freehand graphical objects Chapter 1 In this chapter you will learn about Understanding the basics p 270 Controlling the alignment of objects p 277 Customizing CG Infinity p 279 ...

Page 270: ...eed to create a new edit window At the center of the edit window is a frame indicating the size of the video frames for your CG project Everything outside the frame is part of the pasteboard area which can be used for storing objects or for placing objects outside of the frame before moving them into view You control the size of the pasteboard in the Preferences dialog box see page 279 While a CG ...

Page 271: ...de Redo an undone action Undo a previous action Bring an object to the front Bring an object forward Send an object backward Send an object to the back Show the Time Control Panel Show the Object Style Panel Show the Production Library Object tool Shape tool Freehand tool Envelope tool Eyedropper tool Zoom control Default object style Adjust tool Path tool Moving Path tool Text tool Zoom tool ...

Page 272: ...ject Once created you can begin adding text and objects and then manipulate them with various drawing tools When you are finished you can create a video file of your work or insert the CG Infinity project into Video Editor as part of a larger project To create a new CG Infinity project 1 Click the New button on the Standard toolbar or File New CTRL N to open the New dialog box 2 Specify the durati...

Page 273: ...source group box You can select a general background color by right clicking on the color square and selecting a color from the pop up menu that appears You can also enter the RGB values for a color directly into the RGB spin boxes To use an existing image or video file click on the appropriate option and then click the Select button When choos ing a video file you can select a specific frame to i...

Page 274: ...e all the toolbars and panels present click View Remove Menu Bar This re moves the title and menu bars of the CG Infinity screen only leaving all other screen elements present You can still use the menu commands with their keyboard shortcut keys To return to the Normal screen mode press the ESC key Viewing objects In CG Infinity you can view objects in one of two modes Preview or Wireframe Preview...

Page 275: ...ave finished working on a CG Infinity project you can create a new video or image file that combines the project s objects with the current background To create a video file click File Create Video File This opens the Create Video File dialog box which has the same options as Video Editor To learn more about these options see the section on Creating a video file page 220 To create an image file cl...

Page 276: ...V This places the object in the center of the current view To paste only certain attributes such as the fill color or shadow click Edit Paste Object Style This opens the Paste Object Style dialog box which allows you to select which attributes to paste Once you click OK the attributes are pasted to all selected objects If no objects are selected this command is disabled Two other paste commands Mo...

Page 277: ... the base reference point X 0 Y 0 at the top left corner of the frame in the edit window You can reset this reference point by dragging the intersecting ruler lines from the Base Point button at the corner of the rulers to any position in the edit window This is especially helpful if you have zoomed in on an object and want to reset your ruler at a new view Note Double clicking the Base Point butt...

Page 278: ...vertical spacing between each point in the grid If you want your objects to snap to grid points or guides select the Snap to distance option and specify the range within which a snap should occur For example a range of 5 pixels pulls an object to a grid point whenever it is placed within 5 pixels of that grid point s position Notes Snap to works on the rectangular area of an object s bounding box ...

Page 279: ...in CG Infinity based on the NTSC or PAL color models Select the appropriate option if you plan on having your video played back on an NTSC or PAL device such as a television If you are designing for monitor display only leave this option clear 2 Levels of undo redo specifies the maximum levels of undo redo allowed by CG Infinity up to 99 As CG Infinity allocates more memory for each level of undo ...

Page 280: ... marquee of a new selection and Touch selects objects that are touched by the marquee of a selection area In most cases use Touch as it allows you to quickly select objects without having to draw a selection over its entirety Inside is useful if you have a lot of overlapping objects and only want to select a specific one without affecting any others The chapter in review Here are some key points a...

Page 281: ...reate these objects by tracing over existing images drawing your own shapes or using the Text tool to create impressive titles and text effects Chapter 2 In this chapter you will learn about Defining an object s style p 282 Creating text and shape objects p 285 Selecting and transforming objects p 290 Adjusting shapes p 294 Creating a moving path p 296 ...

Page 282: ...particularly useful for text objects Leave this clear if you want a sharp edge such as with square or rectangular objects 3 Transparency controls how transparent an object appears The first option Normal Transparency provides an even transparency over the entire object based on the value entered in the neighboring Transparency spin box A value of 0 has no transparency and 100 full transparency The...

Page 283: ... same way as explained in Video Paint see page 248 The third option Gradient fills an object with a special gradient pattern To choose the gradient click the color square to open the Magic Gradient dialog box and select a gradient from one of the available methods The final option Texture fills an object with a special texture pattern To choose this texture click on the color square to open the Ma...

Page 284: ...JECT STYLE PANEL SHADOW TAB 1 Shadow options determine the type of shadow to apply to an object The first option None does not apply any shadow while the second option Drop applies a drop shadow You can specify the position of the shadow in the X and Y spin boxes as well as control its transparency and the amount of soft edge in the Transpar ency and Soft edge spin boxes The third option Glow appl...

Page 285: ...o reflect the new style You can also change the default style by dragging and dropping a style directly from the Style gallery in the Production Library to the graphic on the Tool panel If you wish to apply the default style to another object first select the object and then choose the Use Default Style command from the right mouse pop up menu Object Style Properties dialog box Creating text and s...

Page 286: ...2 Select the font you want to use as well as any other font characteris tics such as size bold and italics You can also specify the alignment of the text as well as the kerning and leading Note Kerning decreases the amount of space between letters in a word making it appear tighter while leading affects the spacing between words on different lines The default 100 uses the font s own leading with l...

Page 287: ...ft corner down as you draw The second option Equal Sides ensures that the sides of the shape are all of equal length If not selected you can draw a shape with variable width and height The final option Fixed Size allows you to specify the exact width and height of an object in the neighboring Width and Height spin boxes Selecting this option disables the Equal Sides option Another option Sides is ...

Page 288: ...ty of shapes with the Shape tool Using the Freehand tool The Freehand tool allows you to create any kind of shape you want by allowing you to draw it with your mouse This is particularly useful for tracing over elements in a background video or image file such as a person s head or a corporate logo Once you have finished drawing your path CG Infinity then places nodes in positions on the path wher...

Page 289: ...ase the value in the Accuracy spin box on the Attribute toolbar 4 When you are satisfied with the accuracy of your path switch to the Object tool or click outside the area to place the shape as an object If you chose an Open Path you need to specify a line width and fill color in the Object Style Options panel to see the path clearly Using the Path tool The Path tool is similar to the Freehand too...

Page 290: ...e Open Path button on the Attribute toolbar This fills the line of the shape only leaving the contents clear To view an open path you need to specify a line width in the Object Style Options panel Selecting and transforming objects Once you have created an object you can move and manipulate it in a variety of ways The easiest is with the Object tool which allows you to select objects and then move...

Page 291: ...al copies Grouping objects is especially useful at the end of a project when you have layered them in their final positions To group objects select them and then click Edit Group To ungroup them select the grouped object and then click Edit Ungroup Layering objects An important part of working with objects is being able to layer them on top of and behind one another to create a variety of effects ...

Page 292: ...ounding box of a selected object Depending on the type of transform you are perform ing these handles appear either on the sides and corners of the bounding box or just the corners To manipulate the actual path of an object you need to use the Adjust tool see page 294 Using the Object tool The Object tool provides five options on the Attribute toolbar for resizing and rotating an object The first ...

Page 293: ...eir form from a particular font By changing the envelope of the text you have much greater flexibility over how the text is warped and distorted For example you could make the text appear as a wave or have it bend in three dimensions To change the envelope of an object 1 Create a text object and then select the Envelope tool from the Tool panel A bounding box appears around the text with nodes on ...

Page 294: ... Adjust tool The Adjust tool is particularly useful if you have traced an object or created your own freehand drawing and need to modify it so that it better takes the shape you want To adjust a path 1 Select the Adjust tool from the Tool panel The Attribute toolbar changes to display the options for adjusting a path Nodes also appear on the path of the selected object You cannot adjust the path o...

Page 295: ... active only if the Curved Node option is selected This option is best for performing general changes to a path s curvature Smooth Node changes the curvature of the path between the preced ing following and active nodes allowing you to change the length of the control handles independently from each other they still remain on a linear path Use this option for greater control over the curvature wit...

Page 296: ... tool and then click Edit Delete DEL If there is no moving path the object is deleted To create a moving path 1 Position the object where you want it to start its movement and then select the Moving Path tool from the Tool panel The Attribute toolbar changes to display the various options available and Start and End nodes appear on the selected object Note Selecting the Moving Path tool should ope...

Page 297: ...same options as the Adjust tool see page 294 To create greater movement you can add nodes anywhere along the path and edit them as you would with the Adjust tool To assign the path of an object as a moving path first select the object and then copy it Now select the object you want to move and click Edit Paste Object as Moving Path The path of the copied object now appears in the center of the sel...

Page 298: ...e Time Control Panel A keyframe is added to the Keyframe slider Keyframes are explained in detail in the Using keyframe controls section page 164 4 Change the style and size of the object using the Object Style Panel as well as the resize buttons on the Attribute toolbar If you are changing the style any changes to the fill color options produces a fade effect from one to the other as long as two ...

Page 299: ...eate a fast motion effect as the object has to cover more ground within the same time period Like wise by moving the object back you create a slow motion effect as the object has less distance to travel within the same time period To change the speed of an object 1 Select the object you want to change with the Moving Path tool The moving path of the object appears 2 Click a keyframe in the Time Co...

Page 300: ...ng File Properties To change the start time of a moving object 1 Select the object you want to change with the Moving Path tool The moving path of the object appears 2 Move the Preview slider in the Time Control Panel to the frame where you want the object to begin its movement and click the Add Keyframe button The object moves to that position on the moving path 3 Drag on the bounding box of the ...

Page 301: ...o end 4 Move the Preview slider to the start or click on the Start Keyframe to return the object back to its beginning position 5 Click the Play button to see the motion of the object Performing minor adjustments in time After laying out all your objects and specifying their various moving paths you may find that you need to go back and adjust the timing of a particular object by a few frames but ...

Page 302: ... the background p 288 Make general path adjustments using the Symmetric node specific adjustments using the Cusp node p 295 Position your objects at their starting point before making a moving path p 296 To have an object follow another paste the other as a moving path p 297 You can create gradient shifts over time if the object shares the same fill type at each keyframe p 298 To change the starti...

Page 303: ...Audio Editor Audio Editor ...

Page 304: ......

Page 305: ...d over your soundtrack With it you can play record and edit the audio components of your video project with drag and drop ease and a click of the mouse Chapter 1 In this chapter you will learn about Understanding the basics p 306 Recording sound p 312 Customizing Audio Editor p 314 ...

Page 306: ... window as a wave form This waveform represents the various positive and negative peaks that a natural sound wave makes If it is a mono file single channel only one waveform is present while stereo files two channels have two waveforms representing the left and right channels accordingly Audio Editor displays sound in this manner to help you visualize the contents of an audio file and make enhanci...

Page 307: ...d Run a mixer program Fit a selection in the window Mark the start and end of a selection Go to next cue Add a cue Go to previous cue Drag and drop file to another program Alternate between the last two views Zoom slider Toolbar Overview strip Edit window Selection area View box Active waveform ...

Page 308: ...o the start of a file click Control Go To Start CTRL HOME To move it to the end click Control Go To End CTRL END If you have created a selection area you can play the contents of the selection by clicking the Play Selection button on the Toolbar or Control Play Selection F2 Creating a new edit window To record sound you first need to create a new edit window to hold that sound If you do not create...

Page 309: ...le twice the size of an 8 bit file Saving files Once you have recorded or made changes to a waveform you need to save it To do this click File Save or Save As CTRL S For previously saved files clicking Save instantly overwrites the existing file with the new data Save As opens the Save Audio File dialog box where you can specify a new name and or destination The Save Audio File dialog box also all...

Page 310: ...ur needs For more on these see the section on Creating a new edit window page 308 Once you click OK the dialog box closes and the waveform is changed accordingly Viewing waveforms When you edit a waveform you may want to see part of it in greater detail or display it in a more compressed format You can do this in three ways click View Zoom In and Zoom Out by dragging the Zoom slider or by dragging...

Page 311: ...iew Note If you have created a selection area you can fit the selection to the edit window by clicking on the Fit Selection In Window button on the Toolbar Controlling the display and time unit of waveforms In the Preferences dialog box see page 315 you can determine the detail with which Audio Editor displays waveforms choosing between a precise scan and a quick scan Precise scans produce a very ...

Page 312: ...ace Saving then updates the file accordingly Recording sound In Audio Editor you can record sound to any open edit window this can be an existing file or a new empty edit window Depending on your system s configuration you can record from a variety of sources such as a CD player MIDI player microphone or MIDI file Before you start recording you need to specify the driver of the external audio sour...

Page 313: ...ultimedia Volume Control 3 Make active the edit window you want to record the sound into and click the Record button on the Toolbar or click Control Record CTRL R A message box appears displaying the current recording level Set Recording Level dialog box 4 Adjust the recording level with the controls on the mixer control panel For better recording quality your peak level should stay close to but n...

Page 314: ...d speakers directly from your hard disk then you would want more than just telephone quality The chart below offers you some ideas of the different types of audio quality possible and how they affect file size Quality Properties File size compressed 10 secs Telephone 11 025 kHz 8 bit Mono 107 kb Radio 22050 kHz 8 bit Mono 215 kb CD 44 100 kHz 16 bit Stereo 1720 kb Customizing Audio Editor You can ...

Page 315: ...ls the detail with which Audio Editor draws waveforms Selecting the Precise scan option produces a very detailed waveform but may take more time to redraw because of the extra information The Quick scan option produces a slightly less accurate waveform but is much quicker at redrawing In most cases the Quick scan option is more than adequate for editing at the seconds level If you want to go to th...

Page 316: ...peakers it will be played back on p 308 Use the Edit Convert To command to change a waveform s properties p 310 Use the Global View panel in the Overview strip to zoom in on a waveform as well as reposition the current view p 311 Set the time measurement unit to SMPTE when working on files for use in video projects p 311 Choose radio quality sound 22 05 kHz mono 8 bit for files destined to be play...

Page 317: ...nificantly easier With a number of advanced audio effects and enhancements Audio Editor will soon have you creating audio files that add impact to your work and multimedia presentations Chapter 2 In this chapter you will learn about Creating selection areas p 318 Working with cues p 319 Sound sweetening p 323 Mixing tracks p 327 Applying special effects p 329 ...

Page 318: ...like to select This method is very useful for creating selections as your ear can hear the sound more clearly than your eye can see it Drag on the waveform in the Overview strip This can only be done if the file has been zoomed on and there is space outside the Global View panel to select Notes To deselect a selection area click anywhere within the waveform or click Edit Select None CTRL K Clickin...

Page 319: ...dicate the starting and ending positions for the area your cursor currently spans which depending on your zoom level may be the same or different The bottom box for stereo files there will be two one for each channel indicates the negative and positive amplitudes in that region Working with cues Cues are the best way to bookmark spots in a waveform that you want to frequently reference or come bac...

Page 320: ...ol Add Cue Placing cues on a waveform Managing cues You can manage cues in waveforms in several ways such as changing their position and description removing them from the edit window and switching between them For example you can Right click the cue handle at the base of the cue line to view its descrip tion Double click the handle to change a cue s name this opens the Change Cue Name dialog box ...

Page 321: ...tor can be viewed in Audio Editor for WAV files only This makes it much easier when editing video as you can identify key areas in an audio track with which to match the appropriate action in the video track Clearing audio data Often when you open or record a waveform there may be areas which you don t want or no longer need In such cases you can remove them from the file by selecting them and cli...

Page 322: ...the duration of the audio file by the duration of the pasted segment Replace overwrites the waveform at the cursor position replacing it with the audio data from the clipboard If the clipboard data is longer than the waveform Audio Editor truncates the excess Mix opens the Paste Mix dialog box which allows you to combine waveforms by adjusting their relative amplitudes A 100 mix means that the dat...

Page 323: ...a number of studio quality filters that correct and enhance or sweeten the sound in your audio files Note If you only want to sweeten a certain portion of an audio file you must select it first otherwise the entire waveform is affected Changing the amplification Amplification refers to how loud or quiet an audio file plays back at Generally you can use your computer s volume controls to adjust thi...

Page 324: ...In some cases you may not see much change to the waveform after normalizing depending on the existing amplification levels Waveform before changing amplification Waveform after changing amplification by 200 Changing pitch An audio file s pitch defines how high or low it sounds A high pitch may be very shrill like a whistle while a low pitch may be very deep like a fog horn To adjust an audio file ...

Page 325: ... amplitude point 0 in a waveform the baseline Silence is useful in audio editing particularly for what it isn t rather than what it does For example silence is responsible for adding and removing time to an audio file and timing is perhaps one of the most important aspects of any audio sequence For example the sound of a door opening must be timed to occur after the sound of the key entering the l...

Page 326: ...g Effect Remove Noise Any sound which occurs within this level is then removed from the waveform As background noise is usually of a low amplitude selecting a 2 5 threshold is often adequate Setting the threshold range too high you run the risk of removing essential data Waveform before removing noise Waveform after removing noise Muting a waveform Often when you are working with waveforms you wil...

Page 327: ... In the DC Offset dialog box you can drag the Offset slider to move the waveform above or below the baseline Moving to the right shifts the baseline up while moving to the left pulls it down This does not affect the amplitude of the file only its waveform representation In this way you can calibrate any mismatched files to have roughly the same baseline before you decide to mix them into the same ...

Page 328: ... files together you may want to remove one of the files from the mixture For example you may be preparing an audio project for a client and after having created a master file they decide they want to remove the voice of one of their managers Initially this seems like an impossible task as all the files have been truly integrated Fortunately the solution is not as difficult as it seems All you need...

Page 329: ... of special affects that you can use to add impact to your audio files and provide enhancements which are difficult to replicate when recording from the original source These can be anything from performing fades to the beginning and ending of a waveform to adding a variety of echo effects such as stadium and resonance Performing a fade Performing fades is a frequent task in audio editing as you o...

Page 330: ...ade starts quickly and fades more slowly For best results it is a good idea to first experiment with a variety of different settings Waveform before applying a fade effect Waveform after applying a Fade In Fade Out effect Changing speed Changing the speed of an audio file is a useful way to increase or decrease its duration as well as for producing interesting distortion effects When you click Eff...

Page 331: ... and end level of 0 results in complete silence while 100 leaves the output unchanged As with the Fade command you can choose between Linear Exponential and Logarithmic changes to help smooth the effect Reversing a file An interesting effect in Audio Editor is the Effect Reverse command which allows you to reverse a file so that it plays in the opposite direction In most cases this will produce an...

Page 332: ...of time that passes before you hear an echo while Decay ac counts for the loss of sound in each repetition Bound determines the next round of repetition and is repeated until the echo fades away entirely Below is a description of the characteristics for each of the echo commands Long Echo has a long delay and a strong decay which results in longer repetitions though it fades away faster Long Repea...

Page 333: ...th list box and then enter a value in the Cross duration spin box in M S ms to determine how much of the two files overlap If you do not specify a duration the second file is added to the end of the active file Once you have an overlap duration select one of the Transformation curve options to specify the type of fade to occur between the two tracks A Linear fade produces a constant fade from one ...

Page 334: ...or creating precise selections p 319 Use cues to mark events in a waveform p 319 Click the Edit Mute command to remove areas without affecting the duration of a waveform p 321 Normalize a waveform before changing its amplification p 323 Quantize a waveform to decrease its file size while retaining audible quality p 325 Select a 2 5 threshold for removing noise p 326 Use the Effect Invert command t...

Page 335: ...Appendix Appendix ...

Page 336: ......

Page 337: ...ehind digital video editing and video in general This means an appreciation of both the analog and digital video worlds and how the sound and moving pictures that make up video move between those worlds Appendix In this chapter you will learn about The world of analog video p 338 The world of digital video p 339 ...

Page 338: ...why you cannot view video recorded in England on a television set in the United States and vice versa without special equip ment Inside the video signal The standard video signal defines color by two factors luminance and chrominance Luminance is the black and white values of color and serve to control the brightness and contrast of the picture whereas chrominance is the colors of the video itself...

Page 339: ...rouble scanning so many lines for each field To compensate for this it was decided to interlace the display scan alternate lines rather than every line For example the first scan would pass over every even line the second every odd As such it took two fields of information to display an actual image This was still quick enough to fool the human eye into believing that it was seeing a continuous an...

Page 340: ...video on CD ROM or over the Internet then your decision on the type of video you will use is determined by the type of machine or medium it will be played back from This is because different machines and mediums have different abilities at moving amounts of video data This ability is referred to as the data rate which measures how much data can be moved within one second Working with the data rate...

Page 341: ...rates require more memory as a greater number of images must be stored and shown each second So if you are producing fast motion video such as recording a sporting event you probably need to retain as high a frame rate as possible But if you are working on a project where there is little or slow movement you might be able to save some space by using a slower frame rate Understanding the frame size...

Page 342: ...Internet Understanding video compression While frame rate frame size and data type all contribute to controlling the transfer rate the real savings come from effective use of compression In general there are two types of compression used in the digital video world spatial intraframe and temporal interframe By combining these methods video files can be saved at a fraction of the size required for t...

Page 343: ...ore sophisticated interframe techniques to save only the differences between keyframes called I frames Currently there are two standards MPEG I and MPEG II MPEG I is designed to produce screen 352x240 24 bit color 30 frames per second video running at approximately 170KB per second MPEG II is designed for full screen 720x480 24 bit color 60 field video running at anywhere between 500KB to 2 MB per...

Page 344: ...age of Cinepak is that it is software based therefore requiring no special hardware so any machine can play it back PC or Mac and screen 320x240 24 bit 15 frames per second video can play back well over double speed CD ROMs It also allows more freedom in controlling keyframes to optimize compression some thing that Video Editor takes good advantage of to get the best playback for the smallest file...

Page 345: ...Index Index ...

Page 346: ...MEDIASTUDIO PRO USER GUIDE 346 ...

Page 347: ...oming AE 310 Audio fading VE 185 Audio filters VE 183 Auto capturing VC 90 Autosnap VP 244 Symbols 3D Moving Paths VE 181 A Adding shadows to an objectCG 284 Adjust tool CG 294 Adjusting an object s path CG 294 Advanced Moving Paths VE 180 Aligning CG objects CG 278 Alpha Channels VE 169 Amplification AE 323 Animation texture TUT3 54 Audio synchronizing TUT2 42 tracks VE 117 Audio amplificationTUT...

Page 348: ... video VC 85 auto VC 90 hardware concerns VC 86 manual VC 90 single frames VC 93 tips VC 86 CG Infinity program CG 269 adjust tool CG 294 basics CG 270 bring to front CG 291 color tab CG 283 customizing CG 279 cutting copying objects CG 275 default object styles CG 285 duplicating CG 276 edit window view CG 274 envelope tool CG 293 freehand tool CG 288 general tab CG 282 grid CG 277 customizing CG...

Page 349: ...VE 136 clearing VE 135 Clip Selection Tool VE 143 color VE 115 VE 116 cues VE 140 VE 141 cutting copying VE 133 deleting VE 135 display mode VE 118 displaying VE 118 editing VE 129 jumping to VE 142 locating VE 142 pasting VE 134 pasting attributes VE 134 placing cues VE 141 relinking VE 136 replacing VE 115 reversing VE 136 Scissors tool VE 144 silence VE 115 Smart Trim VE 145 snapping to VE 135 ...

Page 350: ... 275 selections VP 221 D Data Rate analysisVE 199 VE 200 Data transfer rate VC 86 VE 195 Data type VC 77 VE 196 Decay AE 332 Delay AE 332 Deleting frames VP 229 Deleting clips VE 135 Digital Video DV VE 209 Digitizing video VC 74 Display modes VP 238 No Source Video VP 241 normal VP 238 onionskin VP 240 Ruby Mask VP 238 Displaying clips VE 118 Displaying video VC 76 improving the signal VC 79 opti...

Page 351: ...ing TUT4 62 Grayscale mattes VE 172 Grid CG 277 customizing CG 278 Grouping objects CG 291 Grouping clips VE 133 Guides CG 277 customizing CG 278 H Hardware concerns for capturingVC 86 I Insert Title Clip dialog box VE 187 Font tab VE 188 Rolling tab VE 189 Inserting AE 322 clips VE 113 VE 116 frames VP 228 Push Away insertion VE 114 Inserting clips VE 148 Inserting files into the TimelineTUT2 31 ...

Page 352: ...5 changing across time CG 298 default styles CG 285 defining attributes CG 282 defining style CG 282 dimensions CG 282 freehand CG 288 manipulating TUT4 63 moving CG 292 moving paths CG 296 resizing TUT4 69 shape CG 287 text CG 286 timingTUT4 68 CG 299 CG 300 transforming CG 292 working with CG 281 Onionskin mode VP 240 Output to tape VE 205 Overlay effects VE 166 VE 168 Alpha Channels VE 169 blue...

Page 353: ...drag and drop VE 111 placing clips VE 110 thumbnails VE 112 Projects CG 272 cues VE 140 customizing VE 107 layout VE 109 saving VE 109 new VE 106 VP 219 output VE 191 packaging VE 109 VP 217 rendering VP 220 saving VE 109 settings VE 108 Smart Relink VE 109 templates VE 106 VE 107 saving VE 108 Push Away insertion VE 114 Q Quantizing sound AE 325 Quick Command Panel VE 120 adding commands VE 120 R...

Page 354: ... 325 Silence clips VE 115 Smart Check Convert VE 122 Smart Trim VE 145 Snap to VE 135 Sound amplification AE 323 calibration AE 327 inserting AE 322 mixing AE 322 AE 327 muting AE 321 normalizing AE 324 pitch AE 324 quantizing AE 325 replacing AE 322 retaining AE 321 sweetening AE 323 Sounds bound AE 332 cross fading AE 333 decay AE 332 delay AE 332 echo AE 332 fading AE 329 removing mixed tracks ...

Page 355: ...ity TUT4 60 Video Capture TUT1 28 Video Paint TUT3 49 creating a corporate logo TUT4 64 TUT4 67 creating a new project TUT2 30 creating a picture in pictureTUT2 40 creating a split screen TUT2 39 creating a transition effectTUT2 33 creating a video paint projectTUT3 44 creating and distorting text objects TUT4 61 creating background setsTUT3 54 creating mattesTUT3 51 TUT4 66 cross fading audio TUT...

Page 356: ...C 95 customizing VC 83 VC 92 data transfer rate VC 86 data type VC 77 VC 94 displaying video VC 76 improving the signal VC 79 options VC 77 overlay mode VC 76 preview mode VC 76 dropped frames VC 93 format VC 77 frame size VC 77 luma VC 80 MCI devices VC 96 VC 99 overlay mode VC 76 parade VC 80 pasting color palettes VC 95 preferences VC 83 preview mode VC 76 preview options VC 77 properties VC 95...

Page 357: ...tion VE 170 grouping clips VE 133 insertingVE 113 VE 114 VE 116 jumping to clips VE 142 key frame controls VE 164 layout saving VE 109 locating clips VE 142 locating empty time slotsVE 143 mattes VE 171 moving path dialog box VE 178 moving pathsTUT2 36 TUT2 40 VE 177 output to tape VE 205 overlay effects VE 166 Alpha Channels VE 169 blue screen VE 169 gamma correction VE 170 key types VE 168 matte...

Page 358: ...into the Timeline TUT2 31 previewing your workTUT2 34 rolling credits TUT2 37 scrolling titles into the distance TUT2 41 synchronizing audio videoTUT2 42 transition effects TUT2 33 trimming clips TUT2 32 working with clips TUT2 32 Ulead file types VE 121 Ulead Image Sequence VE 121 uniting VE 135 VCD creation VE 207 video filters TUT2 35 VE 173 zooming VE 119 Video Filter Options dialog boxVE 174 ...

Page 359: ...advanced macro techniquesTUT3 57 advanced power duplicationTUT3 53 advanced techniquesTUT3 52 applying video filters TUT3 49 cloning TUT3 50 common techniquesTUT3 49 creating a project TUT3 44 creating background setsTUT3 54 creating video mattesTUT3 51 customizing paint brushes TUT3 46 editing a frame TUT3 45 erasing TUT3 52 macros TUT3 48 retouching frames TUT3 56 video filters TUT3 49 video mat...

Page 360: ...IO PRO USER GUIDE 360 W Waveform display AE 311 Waveform monitor VC 82 Windows color picker VP 250 Working with CG Infinity objectsCG 281 Working with color VP 247 Z Zoom tool VP 226 Zooming VE 119 VP 225 AE 310 ...

Reviews: