CHAPTER 1: GETTING STARTED 35
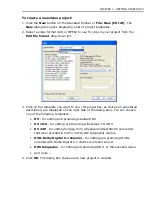
4. If the background of the overlay clip is not removed completely, increase the
Similarity
value until the background is totally transparent.
5. For a smoother overlay effect, apply a soft edge.
6. Repeat steps 2 to 5 to customize the other overlay clips in the template.
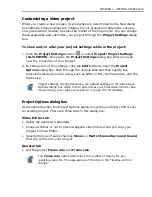
To customize moving path effects:
1. Click on the small triangle icon next to the
Moving Path
item to expand its tree
view and to see the media clips that have moving path effects.
2. Select a clip, for instance, Moving Path Clip 1.
3. To resize the clip dimensions, change the width and height settings.
4. Specify the initial clip position before the moving path effect starts by setting
the
X
and
Y
coordinates.
5. Specify the degree of
Rotation
for the clip.
6. You can also apply a soft edge and add a surrounding border to the clip.
7. Repeat steps 2 to 6 to customize moving path effects for the other clips in the
template.
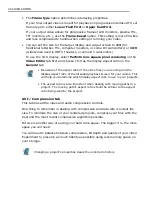
After creating the project segment in Smart Compositor:
When you have completed your work and clicked
OK
in Smart Compositor, insert
the piece you created into your project. It will be inserted as a virtual clip on the
Timeline.
For details on how to edit virtual clips, see
“Working with virtual clips” on page 57
.
Summary of Contents for MEDIASTUDIO PRO 8
Page 1: ...User Guide Ulead Systems Inc September 2005 P N C22 180 110 0A0001 ...
Page 17: ...PART I VIDEO EDITOR ...
Page 44: ...44 VIDEO EDITOR ...
Page 94: ...94 VIDEO EDITOR ...
Page 138: ...138 VIDEO EDITOR ...
Page 172: ...172 VIDEO EDITOR ...
Page 193: ...PART II VIDEO CAPTURE ...
Page 200: ...200 VIDEO CAPTURE DV mode MPEG 2 mode ...
Page 234: ...234 VIDEO CAPTURE ...
Page 235: ...PART III AUDIO EDITOR ...
Page 246: ...246 AUDIO EDITOR ...
Page 267: ...PART IV MORE PROGRAMS ...
Page 296: ...296 MORE PROGRAMS ...
Page 297: ...INDEX ...
Page 308: ...308 ULEAD MEDIASTUDIO PRO X X Axis unit 245 Z Zooming 240 Zooming in out 54 ...


