background image

33

Ulead Photo Explorer User Guide

Modifying digital photo information

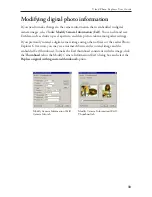
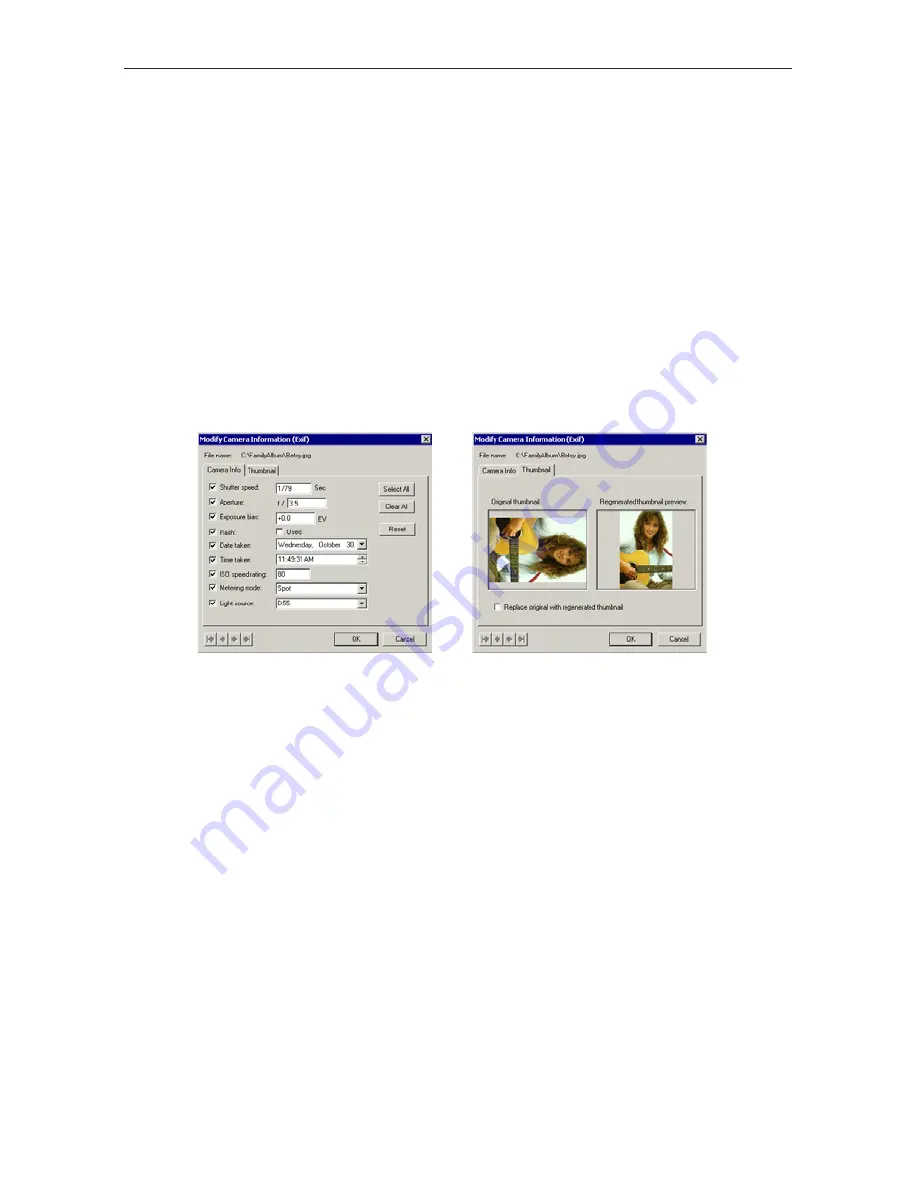
If you need to make changes to the camera information that is embedded in digital
camera images, select 

Tools: Modify Camera Information (Exif)

. You can edit and save

Exif data such as shutter speed, aperture, and date picture taken among other settings.

If you previously rotated a digital camera image using other software or the earlier Photo
Explorer 6.0 version, you may see a mismatch between the rotated image and the
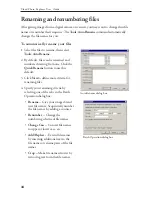
embedded Exif thumbnail. To make the Exif thumbnail consistent with the image, click
the 

Thumbnail

 tab in the Modify Camera Information (Exif ) dialog box and select the

Replace original with regenerated thumbnail

 option.

Modify Camera Information (Exif ) -
Camera Info tab

Modify Camera Information (Exif ) -
Thumbnail tab

Summary of Contents for PHOTO EXPLORER 8.5

Page 1: ...User Guide Ulead Systems Inc March 2004 ...

Page 2: ...property of their respective owners 2004 Ulead Systems This software is based in part on the work of the independent JPEG Group Portions of this program are licensed under U S Patent No 4 558 302 and foreign counterparts 2004 Seiko Epson Corporation All rights reserved PRINT Image Matching is a trademark of Seiko Epson Corporation The PRINT Image Matching logo is a trademark of Seiko Epson Corpora...

Page 3: ...umbnail or list view 17 Speeding up thumbnail display 18 Thumbnail caching 18 Displaying embedded thumbnails in digital camera images 19 Generating thumbnails 19 Browsing for files 20 Previewing files 21 Working with folders and files 22 The Folder Pane 22 About virtual folders 24 Creating a list of favorite folders 25 Managing files 26 Archiving files 27 Working with digital cameras and scanners ...

Page 4: ...un prints you can create 46 Photo prints 46 Thumbnail prints 46 Cards 46 Special Layouts 46 Working with video 47 Capturing and trimming video 47 Capturing snapshots from video 49 Slideshow and other cool stuff 50 Creating a slideshow 50 Adding background music 52 Packaging files 54 Viewing a slideshow 54 Burning slideshow discs 55 For PC viewing 55 For TV viewing 56 Other fun projects you can cre...

Page 5: ...rface Photo Explorer is a must have companion for digital camera scanner and video camera users or for anyone who needs to manage and share digital images and other media Things you can do in Ulead Photo Explorer Here s an overview of what you can do in Ulead Photo Explorer Refer to the chapters in this user guide for more details Welcome to Ulead Photo Explorer Create slideshows Assemble images v...

Page 6: ...iles Print images in various layouts Output single image prints greeting cards or print images in different photo sizes You can also print an index sheet of thumbnails for your image collection Adjust images Make adjustments to images such as straighten rotate crop color balance remove red eye etc Image adjustments can be applied to multiple images at one time ...

Page 7: ...images in larger views by switching to Viewer mode or by opening images in Ulead InstantViewer Capture and trim video Capture video clips from DV camcorders PC cameras WebCams motion cameras or capture boards Later you can trim convert and optimize video clips Output Web thumbnails and Web slideshows Create Web photo albums and Web slideshows ready to be uploaded to the Internet ...

Page 8: ...ves users quick access to all their media files to the functions for editing and adjusting pictures and video and to all the options for sharing their files with family and friends Create Albums Rather than searching through folders to find what they want users can collect images videos or music clips into a central Album to more easily keep track of files Customize these Albums according to speci...

Page 9: ...oject Trim Video Clips Easily snip and trim out unwanted segments from videos or even commercials from recordedTV shows Enhanced in this version of Photo Explorer is the ability to trim out multiple clips from one video at the same time Auto fix Functions Photo Explorer offers one click automatic adjustments Fix common photo problems automatically with Auto Level Adjust Color Enhance and Contrast ...

Page 10: ...nitor recommended 800x600 minimum display resolution Windows compatible pointing device Microsoft Internet Explorer 4 0 or higher Internet connection recommended 16 bit or better sound card and speakers recommended DirectX 8 1 or higher for video functions only Installing and running the program Installing Photo Explorer is easy Simply follow the on screen instructions to complete the installation...

Page 11: ...isplays the files in a selected folder at the right Customizable Toolbar Folder Pane Preview Pane Address Bar Browse Pane Description Bar Slideshow Storyboard What s special about Photo Explorer s Browser is that multimedia files can be shown as visual thumbnails for easier identification Simply click a desired file to immediately get an idea of the file s contents You can preview images and actua...

Page 12: ...creen view of images Navigate through images using the keyboard toolbar buttons menu commands or let Viewer automatically step through the images Copy rename or delete an image file Copy an image for pasting onto your desired image editor Rotate flip edit and then save the changes on the images Create wallpapers and screen savers using your images Photo Explorer s built in Viewer ...

Page 13: ...play images Ulead Instant Viewer windows Note Refer to the section Viewing images on page 37 for more information on these two different types of Viewer Use Ulead Instant Viewer when you want to compare two or more full size images Each image will be opened in a separate window You can also associate files like JPG GIF and BMP image files so that they will automatically display in the Ulead Instan...

Page 14: ...PC J2K JPEG 2000 JPG Exif properties are displayed JPEG JPE PCX PNG PPM PSD PXR RAS SCT TGA UPI WMV Digital camera images Exif information can be edited and saved back to digital camera images Viewable formats Images 001 BMP CLP CUR DCS DCX EPS FAX FPX GIF ICO IFF IMG JP2 JPC JPG Exif properties are displayed JPEG JPE MAC MSP PBM PCD PCX PGM PIC PNG PPM PSD PSP single layer PXR RAS RLE SCI SCT SHG...

Page 15: ...resented Settings specific to your digital camera can also be configured to ensure accuracy in the information that is acquired from your camera Click a category to view and change its settings in the Preferences dialog box The View Menu provides commands that determine the layout of Photo Explorer as well as thumbnail display settings You can also access the Viewer from this menu Use the availabl...

Page 16: ...e order of toolbar buttons select a button in the Current toolbar buttons list and click the Move Up or Move Down button To remove a button select the button in the Current toolbar buttons list and click Remove Click Reset to change the selected toolbar back to its default form To add toolbar buttons 1 Select File Customize Toolbars 2 From the Select toolbar drop down list choose a toolbar 3 In th...

Page 17: ...e in that file is used as the thumbnail If you want to view detailed information of your files change to list viewing mode Select View Thumbnail List Mode to switch between thumbnail and list viewing modes Tips Choose which information you want to display with thumbnails by selecting File Preferences Browser Display options are listed under the Browse Pane display options group in the Preferences ...

Page 18: ... in the Preferences dialog box This allows Photo Explorer to create a separate cache file to store thumbnails for each visited folder To specify where to store cache files select one of these options Save thumbnails in a central cache folder Saves all cache files in a common folder When selected specify the Cache folder to use You can limit this folder to a fixed Cache size or select the No cache ...

Page 19: ...ed in size 160x120 and cannot be further enlarged Also the display quality of the thumbnails may not be as good Generating thumbnails If you have modified images or other media files outside of Photo Explorer your changes may not immediately be reflected in the cache files There may also be unused thumbnails still remaining in the cache files even after their corresponding files have already been ...

Page 20: ...you use them to browse through visited folders Select File Customize Toolbars to add these buttons Create a collection of folders you frequently visit For quicker access to frequently used folders select Favorites Add to Favorites to add them to the Favorites List Or simply drag folders to the list Arrange files in the order that best suits your browsing needs Select View Sort By and choose a sort...

Page 21: ...open folders from the Preview Pane The types of files you can preview include Image files Zoom in to get a larger preview or zoom out to see a more complete view of the image JPEG files with Exif format Many new digital cameras can store extra information such as the date when a photo was taken and camera settings and even include audio You can view such JPEG images in the Preview Pane access the ...

Page 22: ... files and view digital camera Exif information Working with folders and files Folders tab Every time you run Photo Explorer the Folders tab is selected and displays the Folder Tree The FolderTree shows a hierarchical view of all the drives and folders in your computer The FolderTree also displays virtual folders See page 24 for more details Album Calendar tab The Album Calendar tab helps you easi...

Page 23: ...ntly and lets you return to them quickly Favorites tab The Favorites tab displays the Favorites List For quicker access to frequently visited folders add them to the Favorites List See page 25 for details Find tab The Find tab lets you search for files by name rating description or date See page 26 for details ...

Page 24: ...a thumbnail index of CD contents When you insert a CD into your CD ROM drive Photo Explorer automatically detects it and prompts you to scan the CD contents Thumbnails will be generated for images and other digital media found on the CD and will be added to the CD Catalog folder You can browse and search images or media files from the catalog folder without inserting the disc into the CD ROM drive...

Page 25: ...nts of the selected folder To access a favorite folder Click the Favorites tab in the Folder Tree Select Favorites Show Favorites or right click an area on the FolderTree and select Show Favorites Or choose a favorite folder directly from the Favorites Menu Tip A faster way of adding favorite folders is by drag and drop While in Folder Tree view select and drag a folder to the Favorites tab Then d...

Page 26: ...ab in the Folder Pane to perform a file search You can search for files based on file name and location description or date date of file creation or date images were taken with a digital camera Search results will be placed in the Find Results folder and displayed in the Browse Pane Right click any part of the Photo Explorer Browser to open a pop up menu and access commonly used commands The avail...

Page 27: ...like any normal folder To archive files into a zip folder select files in the Browse Pane and then select File Add to Zip To add files to an existing zip folder simply drag and drop more files to the folder You can also copy paste or delete files in a zip folder If you edited image files in a zip folder the changes will be saved to their corresponding files in the folder Drag files onto a zip fold...

Page 28: ...n inserted memory card By default Ulead AutoDetector is always launched and enabled in the system tray of theTaskbar every time you start your computer You can enable or disable it anytime from the WindowsTaskbar Working with digital cameras and scanners Ulead AutoDetector Open Digital Camera Wizard Opens the Digital Camera Wizard dialog box which allows you to easily get images from your digital ...

Page 29: ...er in your digital camera or removes everything in your memory card drive Click the Configure button to open the Select Image Source dialog box and choose the source device in which to delete images There are three options for choosing the imaging device Digital camera Allows you to select your digital camera model If your camera is not listed select Generic Camera drive or card reader Select this...

Page 30: ...ames 5 Click the Start button to transfer images Getting images from a TWAIN device Most scanners and digital cameras come withTWAIN software that allows transfer of images to your computer Make sure that theTWAIN software for your device has already been installed before you start getting images To get images using the TWAIN software 1 Create a new folder for saving the images 2 Select File TWAIN...

Page 31: ... your camera and allows you to take better photos Take note that the focal length setting which measures the zoom setting for the camera lens in digital cameras are different from conventional film cameras The reason is since the CCD the device used to collect light in the digital camera is much smaller than a film camera all the lenses and their focal lengths are smaller too Note Photo Explorer o...

Page 32: ... cannot be identified automatically Photo Explorer will show an asterisk beside the zoom value for example Zoom Focal length 41mm equiv In these cases you will need to enter the appropriate Conversion factor in the Preferences dialog box Camera and Exif category You must also clear the Recognize camera whenever possible option to disable auto detection and use the value you have entered Tips In Pr...

Page 33: ... among other settings If you previously rotated a digital camera image using other software or the earlier Photo Explorer 6 0 version you may see a mismatch between the rotated image and the embedded Exif thumbnail To make the Exif thumbnail consistent with the image click the Thumbnail tab in the Modify Camera Information Exif dialog box and select the Replace original with regenerated thumbnail ...

Page 34: ...he Quick Rename button to use this default 3 Click New to define more criteria for renaming files 4 Specify your renaming criteria by selecting one of the tabs in the Batch Operation dialog box Rename Give your images brand new file names Sequentially number the file names by adding a counter Renumber Change the numbering scheme of file names Change Case Convert file names to upper or lower case e...

Page 35: ...y one criterion at a time in the Batch Operation dialog box Once you have defined the settings for a criterion click OK The list in the Auto Rename dialog box shows all the file renaming criteria you have defined The renaming process starts from the top criterion to the bottom File name list before and after renaming files Batch file renaming operations 5 To set more conditions for renaming files ...

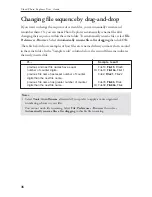
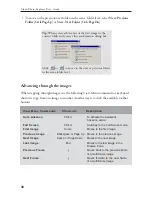
Page 36: ...e next file name previous file name has greater number of counter File35 File36 File4 digits than the next file name Or File39 File39a File4 Changing file sequence by drag and drop If you want to change the sequence of certain files you can manually rename and renumber them Or you can make Photo Explorer automatically rename files after changing their sequence within the same folder To automatical...

Page 37: ...e Viewer s file list will be set to the content of the current folder You can then step through the images in the folder If you select multiple files in the Browse Pane and select View OpenViewer or when you drag and drop multiple files from Windows Explorer directly into the Viewer Pane the Viewer s file list will contain the selected files You will be able to step through those files only When y...

Page 38: ...A To activate the Automatic Advance action Full Screen Ctrl U Switches to the Full Screen mode First Image Home Moves to the first image Previous Image Backspace or Page Up Moves to the previous image Next Image Space or Page Down Moves to the next image Last Image End Moves to the last image in the Browse Pane Previous Frame Moves back to the previous frame of a multi frame image Next Frame Moves...

Page 39: ...tons to change the viewing size of an image Viewer Pane Shortcuts Description Shift Click Zooms in Shift Click Drag Zooms in a specific area Shift Scrollwheel Zooms in or out Ctrl Scrollwheel Zooms in or out Shift Space Switches back to previous zoom level Z Click Zooms in Z Right click Zooms out Z Shift Click Zooms out Z Click Drag Zooms in a specific area Z Shift Click Drag Zooms out Z Scrollwhe...

Page 40: ...u see the desired view in the window If you used the shortcut click once when you have the desired area Using the Ulead Instant Viewer Ulead Instant Viewer is very much like Photo Explorer s built in Viewer except that it allows image viewing only and does not provide any image editing tools Use the Instant Viewer when you want to visually compare full size images A separate window opens to displa...

Page 41: ...ile names If you associated image file formats with Photo Explorer when you installed the software the Ulead Instant Viewer becomes the default image viewer Viewer Pane Shortcuts Description Right click Displays the context menu Scrollwheel Go to next previous image View Menu Commands Shortcuts Description Auto Advance Ctrl A To activate the Automatic Advance action Full Screen Ctrl U Switches to ...

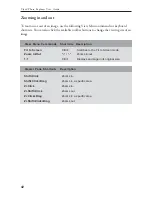
Page 42: ...ize Viewer Pane Shortcuts Description Shift Click Zooms in Shift Click Drag Zooms in a specific area Z Click Zooms in Z Shift Click Zooms out Z Click Drag Zooms in a specific area Z Shift Click Drag Zooms out Zooming in and out To zoom in or out of an image use the following View Menu commands or keyboard shortcuts You can also click the available toolbar buttons to change the viewing size of an i...

Page 43: ...t Tools Convert Image Files to transform images into other file formats Auto fix is an automated solution to common image problems that require level color brightness and contrast adjustments Rotate commands let you turn images left or right in a fixed 90 or 180 degree angle Flip commands create mirror images by turning them upside down Flip Vertically or inside out Flip Horizontally Adjust Image ...

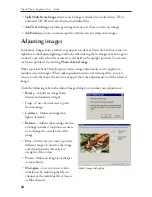
Page 44: ...tensity or strength of the colors Focus Makes an image look sharper or more blurry Histogram Lets you correct color imbalances by adjusting the Master channel or the individual Red Green or Blue channel Adjusting images Sometimes images from a camera may appear too dark or their color did not come out right due to inadequate lighting conditions when taking them Images may also appear crooked espec...

Page 45: ...ove Red Eye dialog box for more information Sample result Note Select the Create white background only option in the dialog box if you intend to print the images For sending by e mail select the other options to convert the images to black and white file formats similar to fax documents and come up with even smaller file sizes Enhancing images that contain text If you have some digital camera phot...

Page 46: ...ual photo prints with a photo printer Choose to print images in actual or custom sizes or print them in standard sizes 3 5 4 5 6 8 or 2 wallet size Thumbnail prints Print a complete catalog of all the images in a folder by printing them as thumbnails Specify how many thumbnails to print per row and column on a page and choose the information to print with the thumbnails Cards Print a half fold or ...

Page 47: ...re card installed in your computer Analog video cameras also require the use of a video capture card Make sure that the capture card driver has been properly installed before you start capturing Use a capture card that supports the DirectShow driver Tip Capturing at 15 fps should be good enough to have a continuous motion video especially when the video dimensions are small To capture a video clip...

Page 48: ...o the live video display Note Select Video Convert Video File or Video Convert and Send Video File to save your video files into smaller sized file formats To trim a video file select the video file in the Browse Pane then choose from Trimming a segment Select Video TrimVideo File Drag the Jog Bar to mark the beginning of the segment then click Start Drag again and then click End Trimming multiple...

Page 49: ...ots from live video and save each as a separate image file When capturing you can choose Single Image Capture This lets you capture one particular scene that you want Capture image sequence This automatically captures one snapshot after every specified time For instance you can capture one image after every 10 seconds ...

Page 50: ...annotations Video files Popular video file formats such as AVI MOV and MPEG Sound files WAV AU and MP3 files Here s how to create a slideshow 1 Select Tools Slideshow to open the Slideshow Storyboard and create a new project 2 Select and drag the thumbnails of image and video files to the storyboard You can drag thumbnails from different folders 3 To change the sequence of thumbnails just drag the...

Page 51: ...ndividually and click the Slide Options button 7 To specify descriptive information about the selected image type your text in the Description window 8 Select Enable sound annotation to add sound to the current image Then select one of the following types of sound to be added Embedded sound This option is enabled only when the selected photo contains embedded sound Select this option to use its em...

Page 52: ...ou can also add background music to the slideshow See Adding background music below for more details 11 Click Save Next time you want to make changes just open the UES project file again in the Slideshow Storyboard Note A UES project file stores information such as file sequence file names and their location as well as slideshow options The actual image video and sound files are not saved in the p...

Page 53: ...select Arrange Music Order If an image was added with sound annotation you may want to pause the background music especially if the sound annotation does not blend well with the music Right click the music clip and select Disable Background Music to temporarily pause the background music If the duration of a music clip is shorter than the total duration of the range of images which it was applied ...

Page 54: ...d copying them to the same location To copy the slideshow files to the same location 1 Select Package Slideshow on the storyboard toolbar 2 Enter the slideshow project file name UES You can enter the same file name or specify another name 3 Select the drive and folder where to copy the slideshow project file and multimedia files into 4 Click OK to copy the files to the specified location Viewing a...

Page 55: ... an auto executable CD that will automatically run the slideshow when it is inserted into the CD ROM drive A slideshow player Uesviewer exe will be included on the CD To burn Photo Explorer slideshow on CD 1 In the storyboard toolbar click Burn PC Slideshow 2 To create an auto executable CD make sure the Make CD start automatically when inserted into drive option is selected 3 Specify the Disc vol...

Page 56: ...ools Burn TV Slideshow depending on your desired output format Other fun projects you can create Photo Explorer allows you to create interesting projects for your desktop Sample wallpaper Sample calendar Wallpaper Use your favorite image as your Windows desktop wallpaper Here s how 1 Select an image file then click Tools Wallpaper 2 Select Enable wallpaper 3 Choose to display the image at the Cent...

Page 57: ...through a screen saver A screen saver is automatically activated whenever the computer has been inactive for a specified length of time In Photo Explorer you can use a slideshow project as your screen saver Click the Screen Saver button on the storyboard toolbar to set a slideshow to be the screen saver See page 50 for details Note To activate the wallpaper calendar or screen saver which you creat...

Page 58: ... desired files from a selected Web site and quickly downloads them to your computer Creating thumbnails for the Web If you want to create your own image gallery and post it on the Internet an easy way to do it is to use the Internet Output Web Thumbnails command This command generates simple Web pages in just a few minutes complete with an index of thumbnails and pages for displaying images The ba...

Page 59: ... a Web slideshow do not add video and audio files to your slideshow project Add image files only Tip You can also click Internet Output Web Slideshow to output selected image files into a Web slideshow For details on Web page layout options click the Help button on the Web Page Output dialog box 3 Click each tab except for theThumbnail Page tab in the Web Page Output dialog box to select layout op...

Page 60: ...files for you If a Web page contains links you can customize Photo Explorer to follow the links and go deeper into the Web site when searching for files to download Select Internet Scan Internet for Images for downloading files Photo Explorer guides you through the process in seven 7 easy steps 1 Enter the HTTP address of the Web page from which to start the download Specify how many Levels deep t...

Reviews: