VIDEOSTUDIO HELP
Table of Contents
|
Index
Back
22
• Properties:
Displays information about the currently selected clip.
• Save Trimmed Video:
Applies any trimming modifications to a clip and
saves it to a new video file.
• Save as Still Image:
Saves the displayed video frame as an image file
(*.jpg or *.bmp).
• Export:
Provides you with a number of ways to export and share a video
file. A video file can be exported to a Web page, converted to an
executable greeting card, and sent by e-mail. It can be exported to Ulead
DVD-VR Wizard for burning to DVD-RAM. You can also directly
output a video file to your DV camcorder and record it onto a DV tape.
• Playback Speed:
Launches the
Playback Speed
dialog box where you
can adjust the pace of your clip.
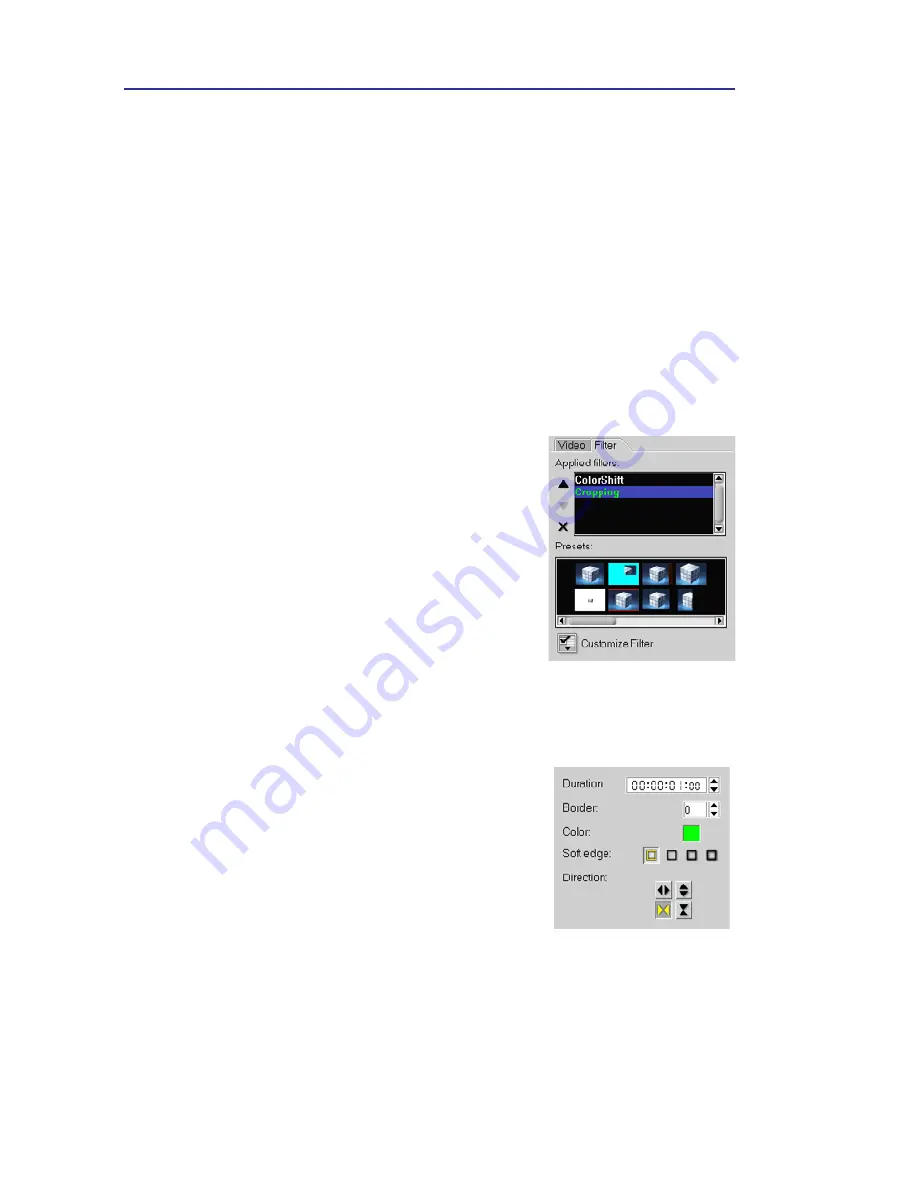
Filter tab
• Applied filters:
Displays a list of video filters
that have been applied to a clip.
• Remove:
Deletes previously applied filters
from your clip.
• Customize Filter:
Allows you to specify your
preferred settings for your selected filter.
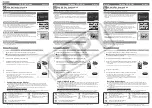
Effect Options Panel
The contents of the
Options Panel
under the
Effect Step
varies with
the type of transition effect selected.
• Duration:
Shows the duration of the applied
effect on the selected clip in
hours:minutes:seconds:frames. You can adjust
the duration by changing the timecode values.
• Border:
Determines the thickness of the
border. Enter
0
to remove the border.
• Color:
Determines the hue of the transition
effect’s border or flap.
• Soft edge:
Specifies how well you want the transition effect to blend
with the clips. A Strong soft edge results in a less pronounced transition,
thus creating a smooth progression from one clip to another. This option
works best for irregular shapes and angles.
• Direction:
Specifies the direction of a transition effect. (This is only
applicable to some of the transition effects.)


