5
H IG H L E V E L
H IG H L E V E L
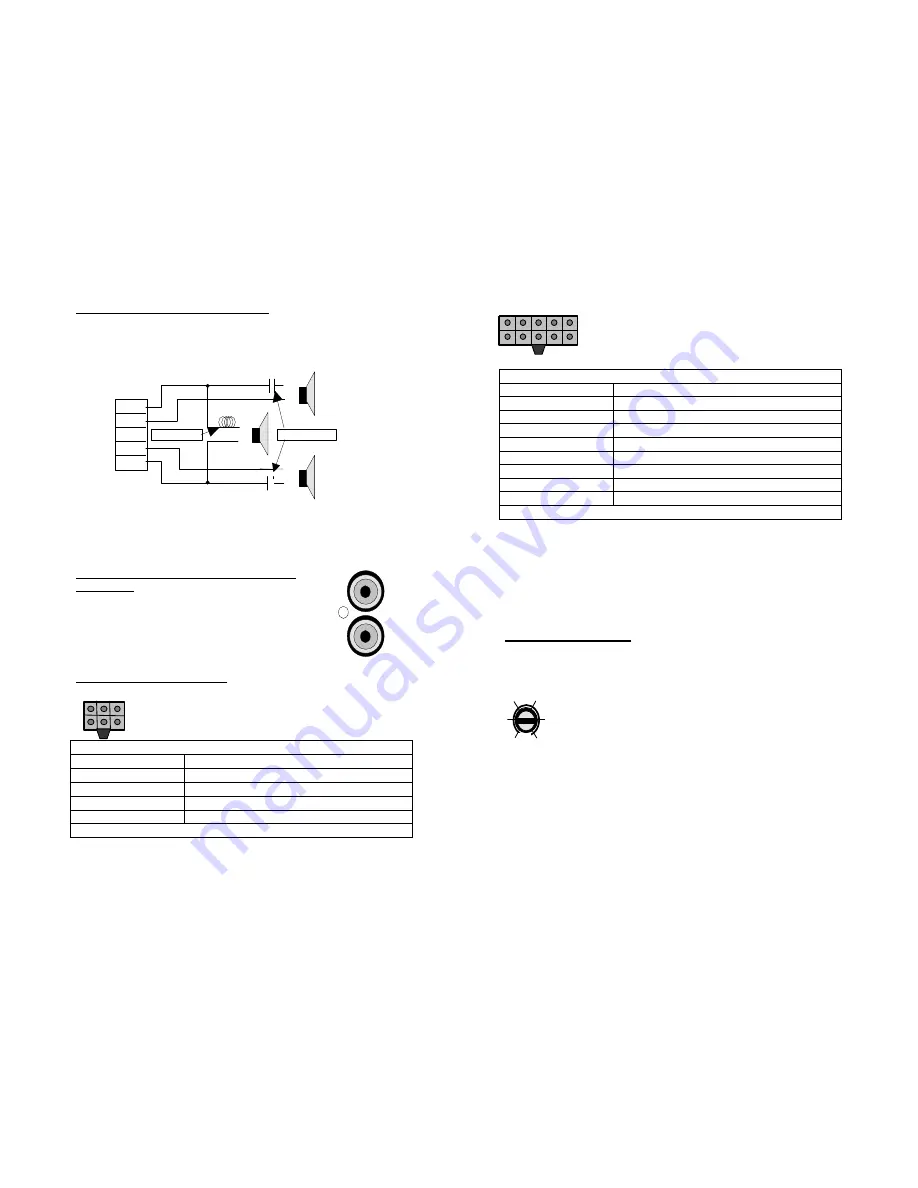
2+1 MODE WIRING DIAGRAM-
Use 100 Volt, non-polar capacitors, and connect them in series with the
stereo speakers as shown in the diagram. Connect the inductor in series
with the mono speaker as shown in the diagram. Be sure the inductor is
rated to handle the power of your amplifier.
1.5 Installation- Input
Connections
Low Level, High Impedance, Gold Plated RCA
Input Jacks-
For connecting to a source providing preamp level
outputs. Use heavy duty RCA patch cords designed for
mobile applications . Run the patch cables carefully,
maintaining as much distance as possible from power,
speaker, and accessory wiring. Make sure the RCA
plugs fit tightly for a secure connection.
Speaker Level Input Connector-
Use the supplied wiring harness to connect the speaker
outputs from the source unit(AM/FM/CD/DVD or Cassette)
to the
“HIGH LEVEL
” input.
Wiring Harness Color Code- 2 Channel
White Wire
A
Channel Positive( + )
White/Black Wire
A
Channel Negative( - )
Gray Wire
B
Channel Positive( + )
Gray/Black Wire
B
Channel Negative( - )
Black Wire
Ground
No Other Connection
(+)
(
-
)
(+)
(
-
)
(+)
(
-
)
(A+)
(A-)
(B+)
(B-)
CAPACITORS
INDUCTOR
A
A
B
B
IN P U T
IN P U T
6
Wiring Harness Color Code- 4 Channel
White Wire
Channel A Positive( + )
White/Black Wire
Channel A Negative( - )
Gray Wire
Channel B Positive( + )
Gray/Black Wire
Channel B Negative( - )
Green Wire
Channel C Positive( + )
Green/Black Wire
Channel C Negative( - )
Violet Wire
Channel D Positive( + )
Violet/Black Wire
Channel D Negative( - )
Black Wire
Ground
No Other Connection
1.6 Installation- Check all Connections
Recheck all connections before reconnecting the negative(-) battery cable.
Insert the correct value fuse in the fuse holder at the battery before
attempting to turn on the system.
2. Operation
2.1 Operation- Input Level adjustments
Adjust the input level for the marked channel(s) with a small
screwdriver through the opening marked
“LEVEL”
. Turn
CW
(clockwise) to increase the level,
CCW
(counterclockwise)
to decrease. Amplifiers will run cooler and produce less
system noise at lower level settings.
Consult an experienced installation specialist for assistance in balancing
the levels in multi-amplifier systems, or systems with signal processing
accessories.
L E V E L
L E V E L
M IN M A X
M IN M A X
H I G H L E V E L
H I G H L E V E L


