32 GB
Start-up / Operation / Cleaning / Storage / Warranty and service information
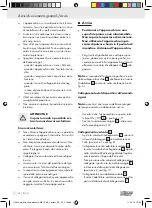
General Safety Information / Start-up
- for cleaning or maintenance;
- if the power cable is damaged;
- if foreign objects enter the device or you notice
unusual noise.
Only use accessories supplied and recom-
mended by the manufacturer.
Do not attempt to repair the device yourself.
CAUTION:
How to avoid accidents and
injuries from electric shock:
Electrical safety:
Do not use the device if the switch cannot be
switched on and off. Have a defective switch
replaced.
Do not carry the device by the cable. Do not
unplug from the socket by the cable. Protect the
cable from heat, oil and sharp edges.
Only connect the connection cable to the ciga-
rette lighter socket in the car.
Follow the instructions of your automaker on
using the cigarette lighter socket.
If the cable is damaged, immediately unplug from
the cigarette lighter socket.
The connection cable on this device cannot be
replaced. Dispose of the device if the cable is
damaged.
Start-up
Place the device on a level, non-flam-
mable surface. Never cover the vents.
Do not operate the device in dusty
environments. Doing so poses a fire
hazard and could damage the device.
For inflatables with counterpressure (e.g. partly
filled car tyre): Switch on the device before con-
necting the car valve
7
to the tyre.
Note:
Depending on the inflatable you can use the
connection valve
7
directly or along with the included
valve adapters
10
(see Fig. A).
Connecting to the cigarette lighter socket:
Note:
Verify the socket of the cigarette lighter in your
vehicle has an adequately sized fuse.
Verify the device is switched off: on / off switch
6
to position “0“.
Plug the cigarette lighter plug
5
into the socket
of the 12 V cigarette lighter.
Connecting the connection valve
7
:
Open the connection valve
7
: tensioning
lever
8
vertical (Position 1, see Fig. B).
Connecting without valve adapter
10
:
- Insert the open connection valve
7
into the
valve of the inflatable (if necessary, first re-
move valve cover of the inflatable).
- Hold the connection valve and close: push
tensioning lever
8
toward connection valve
(position 2, see Fig. C).
Connecting with valve adapter
10
:
- Push the respective valve adapter into the open-
ing in the connection valve
7
.
- Secure the valve adapter into the connection
valve
7
: push tensioning lever
8
toward
connection valve (Position 2).
- Insert the valve adapter into the valve on the
inflatable (if necessary, first remove valve cover
of the inflatable).
Switching on / off:
Switch the device on: on / off switch
6
to
position “I“.
Once the desired filling pressure has been
reached, switch the device off: on / off switch
6
to position “0“.
Remove the cigarette lighter plug
5
.
Removing the connetion valve:
Connecting without valve adapter
10
: Open
the tensioning lever
8
for the connection lever
7
and remove from the valve of the inflatable.
Connecting with valve adapter
10
:
Remove the valve adapter from the valve of the
inflatable. Open the tensioning lever
8
of the
connection valve
7
and remove the valve
adapter.
113044_uls_Mini-Kompressor UMK 10 B2_Content_DE_AT_CH.indd 32
11.06.15 16:55


