2
TABLE OF CONTENTS
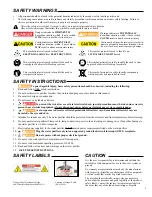
SAFETY WARNINGS ...........................................................................................................................................................3
SAFETY INSTRUCTIONS ..................................................................................................................................................3
SAFETY LABELING ............................................................................................................................................................3
CAUTION ...............................................................................................................................................................................3
PRODUCT APPLICATION .................................................................................................................................................4
C
onstruCtion
........................................................................................................................................................................................
4
P
rinCiPle
of
o
Peration
........................................................................................................................................................................
4
l
imitation
of
u
se
..................................................................................................................................................................................
4
W
ater
Q
uality
.....................................................................................................................................................................................
4
u
nPaCking
..............................................................................................................................................................................................
5
INSTALLATION ...................................................................................................................................................................5
l
oCation
.............................................................................................................................................................................5
D
imensional
D
ata
...............................................................................................................................................................6
r
eCommenDeD
i
nstallation
.............................................................................................................................................7-9
g
rounD
k
it
i
nstallation
.................................................................................................................................................10
MAINTENANCE .................................................................................................................................................................10
i
nsPeCtion
......................................................................................................................................................................... 11
Q
uartz
s
leeve
i
nstallation
, C
leaning
or
r
ePlaCement
................................................................................................
11
r
ePlaCement
of
B
roken
Q
uartz
s
leeve
..........................................................................................................................
12
l
amP
i
nstallation
r
ePlaCement
......................................................................................................................................13
D
isPosal
of
m
erCury
a
DDeD
l
amP
..................................................................................................................................13
OPTIONAL ACCESSORIES .............................................................................................................................................13
TROUBLESHOOTING ......................................................................................................................................................14
TECHNICAL SPECIFICATIONS .....................................................................................................................................14
REPLACEMENT PARTS ...................................................................................................................................................15
USER ASSISTANCE ...........................................................................................................................................................16
PRODUCT REGISTRATION ............................................................................................................................................16
WARRANTY ........................................................................................................................................................................16
P
atent
n
otiCe
...................................................................................................................................................................16
These instructions generally describe the installation, operation and maintenance of the
Ultimate
TM
line of water purifiers,
Models U4, U7, U9 and U15. Questions that are not specifically answered by these instructions should be directed to the Factory.
Atlantic Ultraviolet Corporation
®
takes all possible precautions when packaging equipment to prevent damage. Carefully inspect
and report all damage upon receipt of product. Do not install damaged equipment.
Follow all instructions on all labels and tags. Carefully inspect all packing materials before discarding to prevent the loss of
accessories, mounting hardware, spare parts or instructions.
The information and recommendations contained in this publication are based upon data
collected by the Atlantic Ultraviolet Corporation
®
and are believed to be correct. However, no
guarantee or warranty of any kind, expressed or implied, is made with respect to the information
contained herein. Specifications and information are subject to change without notice.


