www.ultraoptics.com
page 20
Replacing the coating filter
1. Open the front service panel
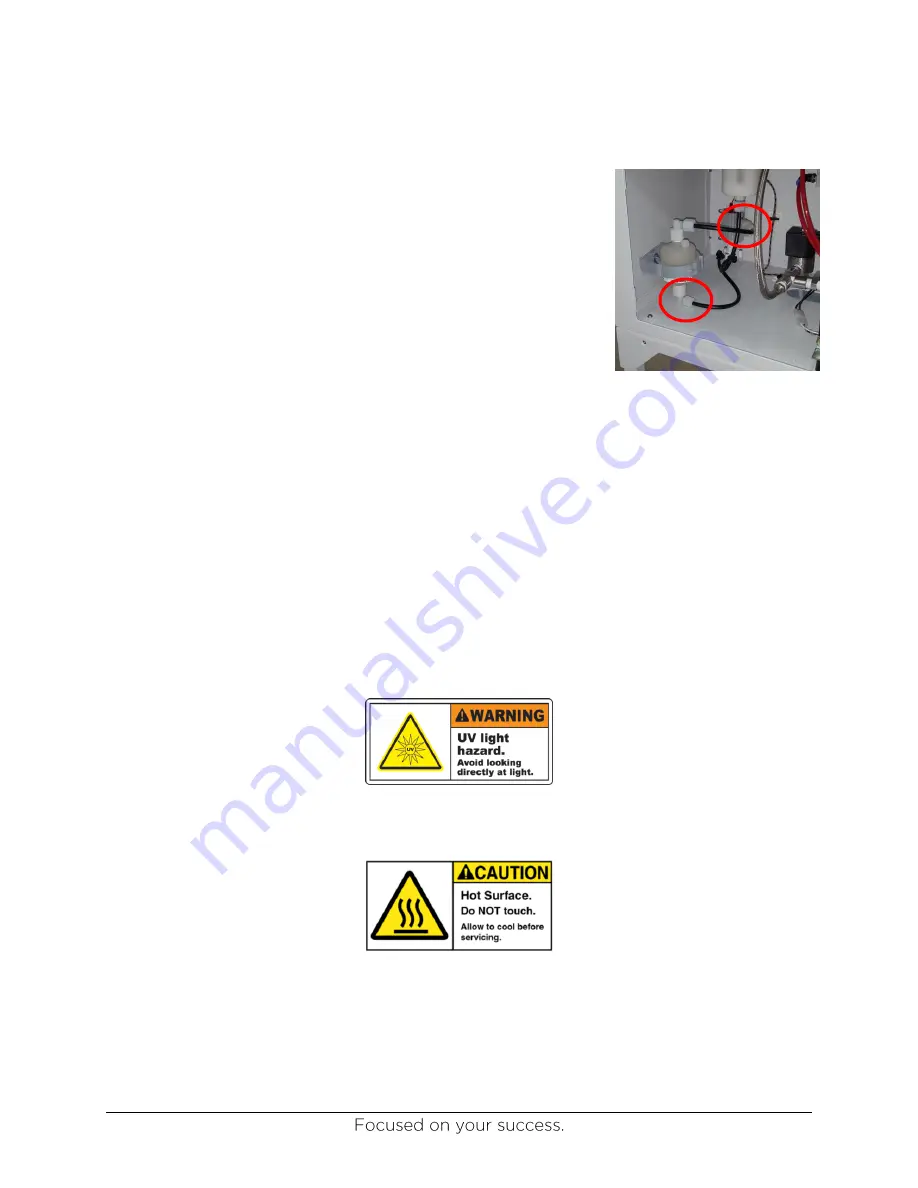
2. Disconnect the nut on the elbow on the bottom of the
reservoir, see top red circle in Figure 10
3. Insert loose nut and tubing into a clean container
4. Select MACHINE SET UP
5. Select COAT ON/OFF and the system will pump coating
through the loose nut and tubing into the container
6. When there is no more coating coming out of the tube,
select COAT ON/OFF to stop the pump
7. Disconnect the nut on the elbow on the bottom of the filter.
Allow coating to drain out of the elbow into the container.
8. Place Teflon tape on threads of the new coating filter, taking
care to not put tape on the first thread.
9. Reconnect fittings that were removed in steps #2 and #7.
10. Pour new coating into coating bowl and check for leaks
11. Re-prime the system using the following steps and check for leaks:
a. Select COAT ON/OFF and the system will pump coating into the filter. While the
pump is running, slowly crack the bleed valve on top of the filter to remove air.
Allow pump to run for five to ten minutes to release any air from the system.
b. If the filter is free of air, run a few sample lenses to ensure there are no streaks
or defects.
Lens retrieval from UV light module
It is very important to take great care and not look into the UV curing light as severe eye
damage can result!
The UV light module gets very hot during use. It is very important to take great care and
allow sufficient time to cool down before working on or near it.
1. Remove any remaining lenses from the spindle arm suction cups by holding onto the
lens and then selecting the ON/OFF button
Figure 10 - Coating filter
fittings


