background image

www.ultraoptics.com 


 page 13 

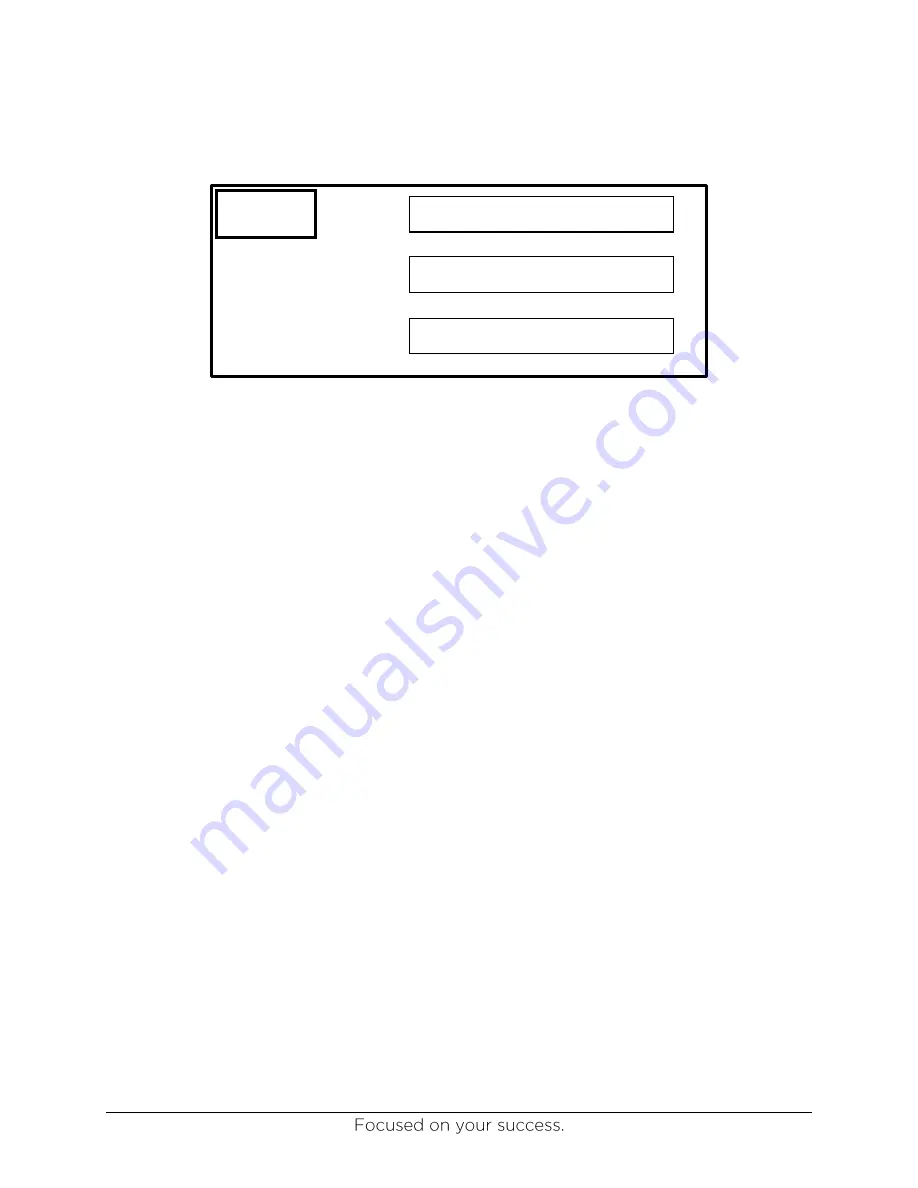
Diagnostics Screen 


MENU 

– Selecting this button will return to the Main Screen. 

VACUUM 

– Selecting this button will bring up the Vacuum Test Screen. 

POSITION 

– Selecting this button will bring up the Position Test Screen. 

ALARM HISTORY 

– Selecting this button will bring up the Alarm History screen.


VACUUM 

MENU 

POSITION 

ALARM HISTORY 

HMI Rev. X.XX 
PLC Rev. X.XX 

Summary of Contents for Rx

Page 1: ...www ultraoptics com ...

Page 2: ...ment Thank You The employee owners of Ultra Optics wish to thank you for your business If after reading this manual you are not confident in carrying out any task please call Ultra Optics technical service team at 763 488 6030 between the hours of 7 00 am 7 00 pm cst Monday Friday Symbols Symbols and statements used throughout this manual include Text following this symbol needs extra attention NO...

Page 3: ...e component manufacturer for the most accurate and current information regarding that item and its particular use Any information in the component manufacturer s manual shall take precedence over information contained in this manual Additional Copies Additional copies of this manual are available by contacting Ultra Optics by phone at 763 488 6030 or by visiting our website at www ultraoptics com ...

Page 4: ...eaning of the lens This water jet could cause injury if directed on skin WARNING Air jet drying Compressed air is blown at the lens surface to dry it after being washed This compressed air could entrain particles and cause damage to the eyes WARNING Moving components The machine contains several moving components that could cause pinch points WARNING Chemicals1 The chemicals used can cause skin an...

Page 5: ...on cup remove all remaining lenses from the remaining spindles turn off the power and retrieve the lens accordingly Take proper caution as various surfaces may be hot The machine should be checked for any visible damage during each shift Any changes including changes in operation behavior must be reported to the supervisor The Rx is intended to run with an operator present at all times It is not i...

Page 6: ...Load Unload 2 Wash process 3 Dry process 3 Coating application 3 Cure process 4 System Operation 5 Start up Procedure 5 HMI Screens 5 Lamp Warm Up Screen 5 Main Screen 6 Single Lens Cycle Screen 7 Two Lens Cycle Screen 8 Machine Set up Screen 9 System Detail Screen 11 Lamp Removal Screen 12 Diagnostics Screen 13 Vacuum Test Screen 14 Position Test Page 15 Lamp Cool Down Screen 15 Maintenance 16 Pr...

Page 7: ...g 21 Changing Filters 22 Replace Air Filter Packs 22 Replacing Consumable Parts 22 Light Module 22 Spindle Suction Cups 23 Replacing sensors 23 Prox Sensors Index and Lamp Home and Extend 23 Lift cylinder up and down sensor 23 Vacuum Sensor 23 Replacing the Spindle Motor Assembly 24 Air Regulator Adjustment 24 Electrical Panel Layout Information 25 Common Replacement Parts 29 Coating Troubleshooti...

Page 8: ... quick connect Deionized Water Consumption of 7 6 L hr at periodic rates of 0 3 L min of deionized water flow rate with 1 megaohm resistivity2 The machine is supplied with a reservoir that needs to be periodically filled by the user The pH value should be greater than 4 9 and less than 9 1 Water Drain The machine is supplied with a drain reservoir that needs to be periodically dumped by the user M...

Page 9: ... UV curing system is an integral part of the Rx s operation eliminating the need to transport a freshly coated and wet lens manually to an external curing system Lens Load Unload Before being loaded into the Rx the lens should be washed by hand with a small amount of isopropyl alcohol IPA or Ultra Optics Lens Cleaner When the lens is clean center the front side of the lens onto the suction cup and...

Page 10: ...h the dump valve The system PLC monitors all system sequencing to control the water pump and solenoid valves Dry process After the wash process is complete the machine will initiate the drying process The lens is dried by use of compressed air In the drying station the air nozzle is articulated in a manner that ensures a complete drying of the entire lens surface Similar to the wash process the le...

Page 11: ...ds are controlled by the system PLC This process is shown schematically in the following diagram Figure 5 Coating system schematic Cure process The Rx is designed to cure Ultra Optics line of UV based coatings After the lens has completed the coating application cycle the lift cylinder will raise the arm assembly which will then rotate and drop down into the curing station An ultra violet lamp res...

Page 12: ...re on page 18 6 Run test to be sure the lens is getting completely dry by following procedure on page 19 HMI Screens Lamp Warm Up Screen This is the first screen that will appear upon power up of the machine A five minute UV lamp warm up timer will start and its progress in will be indicated by the progress bar Once the warm up is complete the screen will advance to the Main Screen If needed touch...

Page 13: ...ting this button will bring up the TWO LENS screen Two spindles will be utilized during this cycle MACHINE SET UP Selecting this button will bring up the SET UP screen SYSTEM DETAILS Selecting this button will bring up the SYSTEM DETAILS screen DIAGNOSTICS Selecting this button will bring up the DIAGNOSTICS screen SINGLE LENS CYCLE TWO LENS CYCLE MACHINE SET UP SYSTEM DETAILS DIAGNOSTICS ...

Page 14: ...he coating is applied the spindle arm assembly will lift up index to the next position and the lens will go down into the curing station and the curing cycle will start 6 When the curing is complete the spindle arm assembly will lift up and index bringing the lens back to the position it was in when placing the lens into the machine in step 2 7 Place hand on lens and depress the foot switch to rel...

Page 15: ...ndle arm assembly will drop down a The coating cycle will start on the first lens and the wash cycle will start on the second lens 7 When this cycle is complete the spindle arm assembly will lift up index to the next position a The first lens will now be in the curing position b The second lens will now be in the coating positon 8 When this cycle is complete the spindle arm assembly will lift up i...

Page 16: ...nce must be followed to activate the wash prime 1 Select VACUUM button vacuum will turn on 2 Place lens on suction cup that is above the wash bowl as shown in Figure 6 on page 7 3 Select WASH PRIME button spindle will lower and high pressure pump will start 4 Select DUMP VALVE button this will release pressure and allow to prime wash 5 Select WASH PRIME button high pressure pump will stop and spin...

Page 17: ...onds while in the Main Menu or after all lenses have been removed while in any production screen To ensure proper operation all doors must be closed and all alarms must be cleared In addition you must be in the Main Menu Screen or a Production Cycle screen to allow spindles to move for this function Failure to do so could result in the coating hardening within the bowl and reservoir Selecting this...

Page 18: ...ge 18 COAT SPIN OFF Selecting this button with COAT SPEED button ON allows adjustment of coat spin off speeds with the COAT SPIN OFF potentiometer as shown in Figure 8 SPINDLE 1 WASH Selecting this button with COAT SPEED button ON allows adjustment of the wash speed with the WASH SPEED potentiometer as shown in Figure 8 NOTE The same procedures can be followed to set the speeds for spindle 2 MENU ...

Page 19: ...ill return to the Main Screen LAMP REMOVE Selecting this button will put the lamp in position for removal LAMP HOME Selecting this button will put the lamp back in the home position LAMP HOMED Must be selected to leave the Lamp Removal Screen UV Lamp MENU LAMP HOMED LAMP REMOVE ...

Page 20: ...o the Main Screen VACUUM Selecting this button will bring up the Vacuum Test Screen POSITION Selecting this button will bring up the Position Test Screen ALARM HISTORY Selecting this button will bring up the Alarm History screen VACUUM MENU POSITION ALARM HISTORY HMI Rev X XX PLC Rev X XX ...

Page 21: ...n each spindle for testing vacuum Example When a lens is placed on spindle 1 a vacuum signal 1 will display spindle 1 vacuum Spindle 2 should also respond accordingly INDEX Selecting this button will rotate the spindles to the front position for easy access HOME INDEX Selecting this button will return spindles to home position HOME DONE MENU HOME INDEX INDEX 18 18 VACUUM 2 VACUUM 1 VAC 2 VAC 1 ...

Page 22: ... will return you to the Diagnostics Screen Lamp Cool Down Screen This screen will appear if the machine power is shut off or the lamp door is opened This screen allows the lamp module to properly cool down before the warm up screen appears LAMP COOL DOWN LAMP HOME LAMP EXT LAMP DOOR FOOT PDL CYL UP CYL DWN INDEX HOME INDEX POS MAINT DOOR LIGHT CRT VAC 1 VAC 2 MENU ...

Page 23: ...nd deck area Use a lint free rag to wipe out wash bowl and top of deck area Clean wash bowl and coating bowl screen Use a lint free rag dampen with 99 IPA Check the level of de ionized water in the reservoir Refill as needed Check the level of waste water in the reservoir Empty reservoir as needed Check coating level in reservoir Refill as needed such that the coating level is above the halfway ma...

Page 24: ...50 Change coating filter See page 20 in this manual for proper procedure Change water filter in reservoir Change air dryer filters Part 1428 Maintenance Procedures Setting spindle speeds The following procedure should be used to check and adjust the spindle speeds to the following settings Wash speed 1800 RPM Coating speed 400 RPM Coating spin off speed 2000 RPM 1600 RPM if using AST 1TM coating T...

Page 25: ... the speed 6 Select SPINDLE 1 WASH to turn it off and select COAT SPIN OFF 7 Depress the tachometer power button and aim its light at the blue deflector cup and check the speed a Adjust the speed to 2000 RPM by turning the potentiometer located behind the side access service door clockwise to increase or counter clockwise to decrease the speed 8 Repeat these steps for spindle 2 Adjusting the curin...

Page 26: ...or 45 seconds 5 Select DUMP VALVE and see if the pump is primed If it is primed the pump will make a pulsing sound at a regular timing of about two pulses per second Allow it to run for 15 seconds a If the pump is not primed pulses are much faster than two per second or they are not a regular constant speed then select DUMP VALVE again and wait for 45 seconds and repeat step 5 b If the pump is pri...

Page 27: ...eps 2 and 7 10 Pour new coating into coating bowl and check for leaks 11 Re prime the system using the following steps and check for leaks a Select COAT ON OFF and the system will pump coating into the filter While the pump is running slowly crack the bleed valve on top of the filter to remove air Allow pump to run for five to ten minutes to release any air from the system b If the filter is free ...

Page 28: ... tubes should now be disconnected 3 The coating reservoir can now be unscrewed and removed from the coating bowl for easy cleaning 4 Once the coating reservoir is removed from the machine flush it with acetone and allow it to dry Ensure any debris in the coating reservoir has been removed If not flush again 5 Unscrew and discard coating filter 6 Wipe out coating bowl using a clean lint free cloth ...

Page 29: ...monthly Hepa Filter 1 Disconnect power cable from filter unit to the top of the machine 2 Remove filter unit from machine 3 Remove 4 self tapping screws holding filter onto filter unit 4 Place sealing foam around top edge of new HEPA filter 5 Place filter unit on top of new HEPA filter 6 Screw in self tapping screws through filter unit into new HEPA filter 7 Place filter unit into machine 8 Connec...

Page 30: ... to the left to remove 4 Thread new suction cup onto chuck shaft Replacing sensors Prox Sensors Index and Lamp Home and Extend 1 Disconnect Signal cable 2 Loosen jam nut 3 Unscrew sensor 4 Replace with new sensor and jam nut 5 Adjust sensor depth until it is 2mm away from flagging mechanism 6 Tighten jam nut 7 Reconnect signal cable Lift cylinder up and down sensor 1 Make a mark on the lift cylind...

Page 31: ...hreads if needed 8 Slide the new assembly in to the arm making sure to line up the bottom of the vacuum elbow with the bottom of the spindle swing arm 9 Tighten the bolt on the front tip of the spindle swing arm 10 Reconnect the vacuum tubing to the back of the spindle 11 Reconnect the spindle motor power cable on the back of the spindle 12 Reattach the suction cup Air Regulator Adjustment 1 Locat...

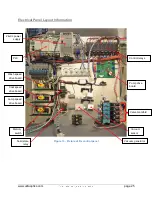
Page 32: ... Information Figure 13 Picture of Rx control panel Valve manifold Pump drive board Control relays Vacuum generator Vacuum sensor PLC 24vdc power supply Wash speed drive board Coat speed drive board Lamp speed drive board Mercury switch Solid state relay ...

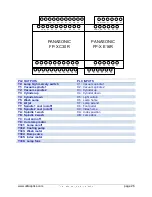
Page 33: ...dle 1 coat on off X8 Foot pedal Y8 Spindle 2 coat on off X9 Index home YA Spindle 1 wash XA Index position YB Spindle 2 wash XB Lamp door YC Coat spin off YD Cure lamp motor Y301 Lamp on off Y302 Coating pump Y303 Wash motor Y304 Dump valve Y305 Index motor Y306 Lamp fans PANASONIC FP X C30R PANASONIC FP X E16R XE XC XA X8 X6 X4 X2 X0 COM XF XD XB X9 X7 X5 X1 X3 COM YD YB C4 Y8 Y6 Y5 C2 Y3 C1 C0 Y...

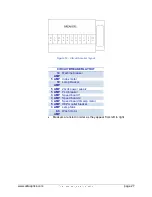
Page 34: ... Machine breaker 5 AMP Index motor 10 AMP Lamp breaker 5 AMP 24vdc power supply 5 AMP PLC breaker 3 AMP Speed board 1 3 AMP Speed board 2 3 AMP Speed board 3 Lamp motor 5 AMP HEPA outlet breaker 3 AMP Lamp fans 0 5 AMP Wash motor Breakers are listed in order as they appear from left to right ...

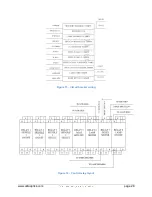
Page 35: ...www ultraoptics com page 28 Figure 15 Circuit breaker wiring Figure 16 Control relay layout ...

Page 36: ...ach CONSUMABLES AND SUPPLIES Part Number Description Unit 1389 Nitrile gloves 8ml Small 1 Box 50 1390 Nitrile gloves 8ml Medium 1 Box 50 1391 Nitrile gloves 8ml Large 1 Box 50 1396 Nitrile gloves 8ml X Large 1 Box 50 1333 Kim Wipes 1 Box 50 1010 C IPA Squirt bottle w OSHA label 1 Each 01084 UV NV scratch resistant coating 1 Bottle UV 87 scratch resistant coating 1 Bottle UV NQ scratch resistant co...

Page 37: ...s that appear to have indented the lens If these pits are always in the same position check to ensure spindle is spinning at the correct speeds and or even spinning at all The indentations may be caused from the wash tip always returning to the same position on the lens while spindle is not spinning Pits on the outer edge of the lens and or in clumps may be caused by either the Air jet pressure di...

Page 38: ...ikely debris on the lens Check your cleaning procedures ensure wash tip is free and clear of debris and wash pump is working properly It there is a glob of coating left on the center of the lens Make sure spindle is spinning Check for loose wires on spindle motor Check and or replace bearings in vacuum chuck assembly ...

Page 39: ...n The Cylinder Up sensor is ON but the Cylinder Down solenoid and switch is ON Arm Down switch is ON Arm is up The Cylinder Down sensor is ON but the Cylinder Up solenoid and switch is ON Index switch is ON during Index The Index proximity switch was ON during the Index Cycle WARNING ALARMS These alarms are displayed on the Operator s screen but do not interrupt or abort the lens cycle Machine Not...

Page 40: ...Nitrile gloves small 1 box 50 1390 Nitrile gloves medium 1 box 50 1391 Nitrile gloves large 1 box 50 1396 Nitrile gloves XL 1 box 50 1333 Kim wipes 1 box 50 1010 C IPA squirt bottle w OSHA label Each 3404 UOC Coating filter Each 4404 UOC 5 micron filter Each 1428 Air dryer filter pack Each 1050 Suction cup clear cleated coater Each 1052 Water deflector Each 1063UO UOC UV light module 200 00 credit...

Page 41: ...r s design the warranty is limited to each separate component and not upon any such combination Any modification or alterations of the equipment or any substitution or addition of components not furnished by or authorized by the Corporation shall at the option of the Corporation void this limited express warranty THE CORPORATION MAKES NO OTHER WARRANTY OF ANY KIND WHATEVER EXPRESS OR IMPLIED AND A...

Page 42: ... any person or person s property arising directly or indirectly in connection with the operation of the equipment if the Purchaser I fails to observe each and every obligation set forth in this paragraph ill fails to purchase the safety devices and guards recommended by the Corporation ill fails to maintain in good working order such safety devices and guards iv adds omits modifies or substitutes ...

Reviews: