background image

2

110522-1

Cooler Installation

Installing Casters


Note: 

 The installation kit 

includes (2) swivel cast-
ers with brake, (2) swivel 
casters without brake, (16) 
tinnerman nuts and (16) 
1/4-20 x 1/2 screws.

• Place the unit on its side.  

Place the tinnerman nuts on 
the caster bracket on the bot-
tom pan as shown in fi gure 
1.  

• Attach the casters to the 

brackets with the screws provided.

Operation

Manual Control Units

• 

Pump setting.

  The rotary switch has 6 settings.  The “Pump” 

setting will operate the pump without the blower.  For best results 
turn the switch to “Pump” for a few minutes to wet the pads before 
operating the fan.

• 

High and low cool settings.

  The “High Cool” and “Low Cool” set-

tings operate both the pump and the blower.  Turn the unit to “Low 
Cool” when possible.  This lower speed allows the air to stay longer 
in the wet pads and therefore increases it’s cooling effi ciency.

• 

High and low vent settings.

  The “High Vent” and “Low Vent” 

settings operate the blower without the pump.  This is useful on 
cool nights or at times when just a fan is desired.  

Remote Control Units

These units may be controlled using the 3 buttons on the front panel 
of the cooler or with the remote control.

• PUMP button.

  Pressing this button toggles the pump on and off.  

When the LED is lit, the pump is running.  For best results turn 
on the pump for a few minutes to wet the pads before operating 
the fan.  The pump must be on while operating the fan for cooling.  
You may also want the pump turned off at times when just a fan is 
desired.

• FAN button.

  Pressing this button will cycle the fan through High 

Speed / Low Speed / Off.  The LED’s on the front of the control 
indicate wether the fan is on high speed, low speed or off (no LED’s 
lit).  

Note:  There will be a 2 second delay between a button press 

and the operation of the fan.

• ON/OFF button.

  Pressing this button while the pump or fan is on 

will turn everything off.  Pressing it again while in the off state will 
return the fan and pump to their previous operating settings.  When 
fi rst plugging in the cooler or after power has been interrupted, 
pressing the On/Off button will start the cooler in the default state 
which is with the pump on and the fan on high.

• Remote Control.

  To operate the cooler with the remote you must 

be within 20 feet and in sight of the cooler.  Aim the remote at the 
front panel.  The buttons on the remote control have the same func-
tions as the buttons on the front panel of the cooler.  The remote 
uses two AAA alkaline batteries which are included.  A holder for 
mounting on a wall is also included with the unit.  

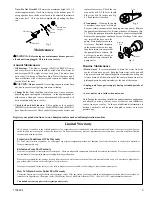
Connecting Water

• 

Install drain assembly.

  Place the 

nipple through the hole in the pan, 
with the rubber washer between the 
pan and the head of the drain nipple 
(Fig. 2). Thread nut onto nipple and 
draw up tight against bottom of pan.  
Thread the drain cap to the nipple and 
tighten water tight.

• 

Install fl oat valve.

  Refer to fi gure 3.  Install the valve in the pro-

vided hole in the corner post ((R)M301A, (R)M401A) or louvered 
side (M201A) using the provided washer and nut.  Install the 
included garden hose adapter to the fl oat as shown if  attaching a 
garden hose to the unit.  A 1/4 inch water line may also be used to 
supply a continuous amount of water to the unit.

• 

Fill pan with water.

  You may fi ll the pan manually for up to 3 

hours of cooling.  For automatic fi lling you may attach a garden 
hose to the garden hose adapter or a 1/4 inch water line to the fl oat 
valve.

Fig. 1

Bottom Pan

Nipple

Rubber Washer

Nut

Drain Cap

Fig. 2

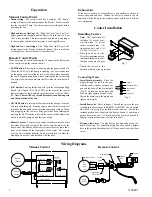
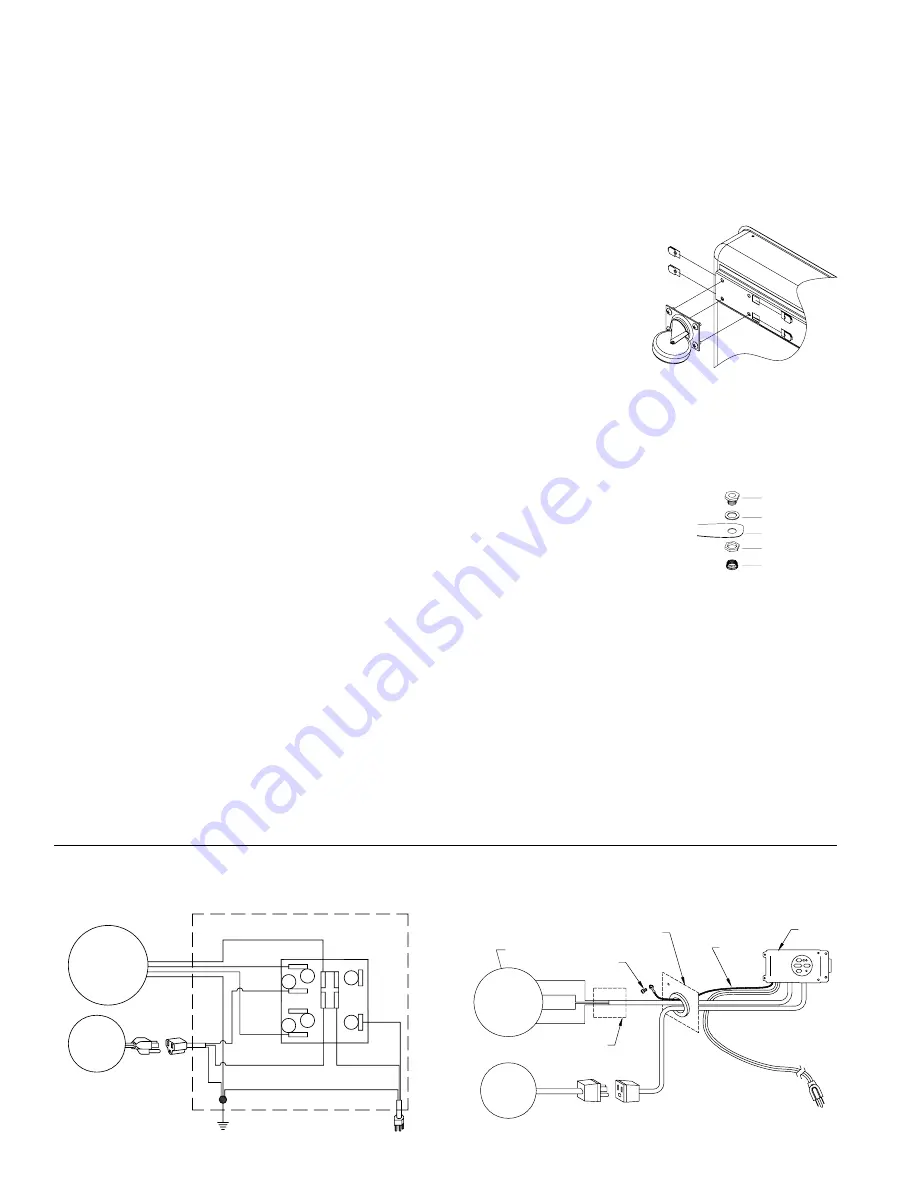
Wiring Diagrams

White-Com.

Black-Hi

Black

Blower 

Motor

Pump 

Motor

Red-Lo

White-Com.

Green-Ground

Green

Switch

A

B

1

2

3

4

Ribbed-Com.

Plain

Green

Exhaust Air

If the unit is used in an enclosed area, open windows or doors to 
ensure adequate exhaust.  Without an outlet to exhaust the air, 
humidity will build up in the enclosed space and the unit will not 
cool adequately.

Manual Control

Remote Control

Hi
Low

Gnd
Com.

Black
Red
Green

White

Ground 
Wire

Blower Motor

Pump 

Motor

Blower Panel

Control

Ground 

Screw

Junction Box 

(RM301A)

Summary of Contents for M201A

Page 1: ...like refrigeration systems which recirculate the air an evaporative cooler continually brings in fresh air while exhausting old air You are completely replacing the air every 2 to 4 minutes by opening windows or doors or a combination of both The air is always fresh not stale laden with smoke and odors as happens with refrigerated air conditioning Vea el Español en el interior 110522 1 1 09 www ch...

Page 2: ...in the off state will return the fan and pump to their previous operating settings When first plugging in the cooler or after power has been interrupted pressing the On Off button will start the cooler in the default state which is with the pump on and the fan on high Remote Control To operate the cooler with the remote you must be within 20 feet and in sight of the cooler Aim the remote at the fr...

Page 3: ... the length of the season At the beginning and at mid season a clean pad is more absorbent and efficient and will deliver substantially more cool air Check belt and belt tension This applies only to models R M401Awhich are belt driven Models M201Aand R M301A have direct drive motors Check the belt for any cracks or wear and Float Body Float Rod Washer Nut Garden Hose Adapter Fig 3 Note Do Not Over...

Page 4: ...oles Replace or clean pump Troubleshooting Motor cycles on and off Noisy Excessive humidity in house Musty or unpleasant odor Water drain ing from cooler 1 Low voltage 2 Excessive belt tension 3 Blower shaft tight or locked 4 Bearings dry 1 Bearings dry 2 Wheel rubbing blower housing 3 Loose parts 1 Inadequate exhaust 1 Stale or stagnate water in cooler 2 Pads mildewed or clogged 3 Pads not wettin...

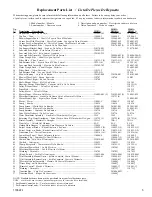
Page 5: ... Distributor Assembly Sistema Del Distribuidor De Agua 3D 1 3D 2 3D 3 35 Retaining Clip Water Distributor Retén Plástico Para El Distribuidor De Agua 110723 5 110723 6 110723 6 36 Drain Assembly Montaje De Desagüe 3DA 1 3DA 1 3DA 1 37 Float Valve Válvula Del Flotador FL C FL C FL C 38 Garden Hose Adapter Adaptador Para Manguera De Jardín 110824 110824 110824 39 Swivel Caster w Brake Rueda Giratori...

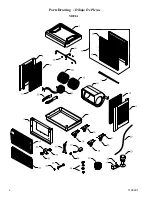
Page 6: ...6 110522 1 Parts Drawing Dibujo De Piezas M201A ...

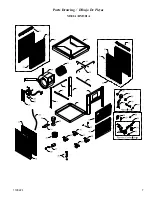
Page 7: ...7 110522 1 Parts Drawing Dibujo De Piezas M301A RM301A ...

Page 8: ...sólo con corriente alterna de 120 voltios 60 Hz ciclos 4 El motor y la bomba están conectados con la tierra y se apagarán automáticamente en caso de sobrecalentamiento Los motores volverán a funcionar cuando se enfrían 5 Enchufe una bomba del enfriador evaporativo solamente y nada más al receptáculo de la bomba ADVERTENCIA Para reducir el riesgo de incendio o toques eléctricos no use este ventilad...

Page 9: ...sición PUMP El interruptor tiene seis posiciones Ajuste el interruptor a la posición PUMP bomba para poner en marcha la bomba sin el ventilador Para mejor resultado ponga en marcha la bomba por unos cuantos minutos para mojar los filtros antes de poner en marcha el ventilador Los posiciones HIGH COOLy LOWCOOL Ajuste el interruptor a la posición HIGH COOL o LOW COOL para poner en marcha el ventilad...

Page 10: ...enimiento ADVERTENCIA Antes de hacer cualquier mantenimiento compruebe que la unidad esté apagada y desconectada de la electricidad Esto es por su seguridad Mantenimiento Anual Lubrique los cojinetes Los cojinetes de la rueda M401A y RM401Asolamente y el motor del ventilador deben ser lubricados usando unas gotas de un aceite no detergente de densidad 20 30 una vez al año No obstante los motores s...

Page 11: ... rueda están secos 4 Motor parado 1 Insuficiente abertura para que salga el aire 2 Poca tensión en la correa 3 Filtros obstruidos 1 El agotamiento del aire es inadecuado 2 Los filtros no están mojados Filtros obstruidos Filtros agujereados Agujeros de los canales obstruidos Bomba no funciona 1 Revise la corriente Cambie el fusible Restablecer el cortacircuito Reemplace el cable 2 Ajuste la tensión...

Reviews: