background image

14

Positioning

• 

Keep the CO alarm away from excessive exposure to dust, dirt, chemicals, or grease. 
Units placed in kitchens, garages, boiler rooms and similar locations should be cleaned 
regularly. Dust, grease and household chemicals can affect the sensor.

• 

Keep out of damp and humid areas such as bathrooms. Avoid spraying aerosols near 
the CO alarm.

• 

Do not install in areas where the temperature is below -10°C or hotter than 40°C.

•  Do not place behind curtains or furniture, within cupboards, or in other enclosed or 

obstructed spaces. CO must be able to reach the sensor.

• 

Do not install directly above a sink or other water source.

Installation

WARNING:

 The label on the alarm must not be removed as it shows important 

information about the product.

NOTE:

 This alarm should be installed by a competent person.

Summary of Contents for UBCO1

Page 1: ...TEST SILENCE Carbon Monoxide Alarm UBCO1 10 Year Lifespan Carbon Monoxide Alarm USER MANUAL UBCO1 CARBON MONOXIDE ALARM Green Power Yellow Fault Red Alarm ...

Page 2: ...e CO information 6 7 Alarm silence mode 8 Do not disturb mode 9 Alarm signals 10 Status indicators 11 Positioning 12 14 Installation 14 16 Maintenance 17 20 Troubleshooting 20 22 What to do if the alarm sounds 22 24 Warranty information 24 25 Contact information 26 ...

Page 3: ...carbon monoxide in any way and it can be generated by a variety of household appliances such as fireplaces boilers and gas cookers An electronic carbon monoxide alarm is the only way to be warned of the presence of this deadly gas in the home This user guide contains important information on starting operation and using the devise Store this user guide in a safe place for future reference These in...

Page 4: ...mperature 20 to 50 C Humidity 10 to 95 non condensing Operating Current Standby 20μA Alarm 30mA Alarm Volume 85dB at 3m 3 2 0 5KHz pulsing alarm Alarm Response Times At 30ppm After 120 minutes At 50ppm Between 60 to 90 minutes At 100ppm Between 10 to 40 minutes At 300ppm Less than 3 minutes Alarm Silence Duration Approx 10 minutes Do Not Disturb Time Approx 9 hours Certified to BS EN 50291 1 2018 ...

Page 5: ...ping installing in caravans motorhomes or boats The alarm will not protect against the risk of carbon monoxide poisoning when the battery has drained Installation of the alarm should not be used as a substitute for proper installation use and maintenance of fuel burning appliances including appropriate ventilation and exhaust systems This CO alarm is designed to detect carbon monoxide gas from any...

Page 6: ...heaters fireplaces fuel powered tools and operating a grill in an enclosed space The human body is unable to sense carbon monoxide in any way but the gas replaces oxygen in the blood when breathed in preventing the proper supply of oxygen throughout the body and brain Depending on the concentration and exposure time CO can kill in minutes or cause permanent damage and disabilities Indications of c...

Page 7: ...eat rate Extreme Exposure Unconsciousness cardiorespiratory failure death The dangers of carbon monoxide poisoning vary with the concentration of CO in the air and the duration of exposure As a result of this the Standard EN 50291 1 2018 governing domestic carbon monoxide alarms defines the following alarm response requirements 30ppm Without alarm before 120 minutes 50ppm Alarm triggered between 6...

Page 8: ...m sound for approximately 10 minutes The red LED will continue to flash as in alarm mode to indicate that the alarm has been silenced The alarm will automatically reset after approximately 10 minutes If after this period it is still detecting carbon monoxide at 50ppm or greater then the alarm will sound again The alarm silence mode can NOT be repeated NOTE The audible alarm signal cannot be silenc...

Page 9: ...y or end of life warning see the Status Indicators section it can be silenced for up to 9 hours by pressing the TEST SILENCE button The yellow LED will continue to flash to indicate an active fault has been silenced This feature is designed to allow the fault signal to be silenced overnight and allows occupants to sleep peacefully It does not repair any fault or resolve any issues with the carbon ...

Page 10: ...wer volume to avoid startling occupants Alarm Signals 1 Chirp 4 times with red LED flash 2 Pause 5s 3 Repeated unit it stops detecting CO Alarm 1 Chirp 4 times with red LED flash 2 Pause 5s 3 Repeated until the button is released Test ...

Page 11: ...he yellow LED fault indicator flashing If the alarm is faulty it will chirp twice every 8 seconds with the yellow LED fault indicator flashing At the alarm s end of life it will chirp 3 times every 40 seconds with the yellow LED fault indicator flashing If the alarm is sounding to indicate dangerous exposure to carbon monoxide the alarm will behave as described in the Alarm Signals section When a ...

Page 12: ...has a flue running through it The recommended position for the unit should be at least 1 8 meters about 6 feet above the floor level The following suggestions are intended to help you with the placement and installation of your CO alarm and may not suit all premises or occupants Ensure the alarm is installed correctly for your house layout appliances and risks to occupants Place out of the reach o...

Page 13: ...allows for optimum monitoring of the red and green indicator lights Ensure that all vents of the unit are unobstructed Do not install in dead air spaces such as within 300mm from corners of walls ceilings or supporting beams or within peaks of vaulted ceilings Do not install in turbulent air from ceiling fans or ventilation systems or directly above sources of heat such as radiators Do not install...

Page 14: ...ooms Avoid spraying aerosols near the CO alarm Do not install in areas where the temperature is below 10 C or hotter than 40 C Do not place behind curtains or furniture within cupboards or in other enclosed or obstructed spaces CO must be able to reach the sensor Do not install directly above a sink or other water source Installation WARNING The label on the alarm must not be removed as it shows i...

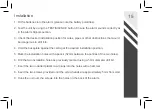
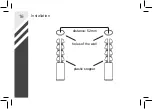
Page 15: ...rous to drill into 4 Hold the baseplate against the ceiling at the desired installation position 5 Mark the installation holes with a pencil 52mm between the centres of the two holes 6 Drill the two installation holes as previously marked using a 5mm diameter drill bit 7 Insert the two included plastic rawl plugs into the holes with a hammer 8 Insert the two screws provided until the screw heads a...

Page 16: ...16 Installation distance 52mm holes of the wall plastic stopper ...

Page 17: ...rm does not sound the batteries may be flat please follow the Battery Replacement guidance below and then test the alarm again If the alarm still fails to react to the test button please read the Troubleshooting section of this manual WARNING The test button accurately tests the alarm s components and functions Do not expose the alarm to smoke or an open flame You may contaminate and damage the se...

Page 18: ...ous protection from carbon monoxide poisoning When using household cleaning supplies aerosols including air fresheners hair spray and deodorant or similar contaminants are used nearby the area should be ventilated so the alarm is not exposed to fumes WARNING The following substances can affect the sensor and may cause false actions methane propane isobutene isopropanol ethylene benzene toluene eth...

Page 19: ...After inserting the batteries all three LEDs will light up briefly and the alarm will beep The green LED will then flash once per second for 60 seconds then transition to standby operation a If not remove the batteries and put them in again or try different batteries 5 Close the battery compartment 6 Hook the unit over the screws into the holes on the back of the alarm 7 Test the unit by using the...

Page 20: ...atteries Repairing WARNING Opening up dismantling or tampering with the alarm in any way other than described in the Maintenance Battery Replacement section puts the user at risk of electrocution and may cause the unit to malfunction Do not attempt to repair the alarm yourself dismantling the alarm will invalidate your warranty If the alarm is not operating properly but is still under warranty con...

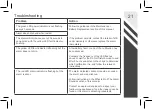
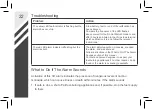
Page 21: ... flashing but the alarm does not chirp A low battery fault or end of life notification has been silenced Compare the frequency of the LED flashes above or wait for the Do Not Disturb mode to end after 9 hours and listen to the chirps to determine which notification it is and follow the relevant instructions The red LED alarm indicator is flashing but the alarm is silent The alarm detected carbon m...

Page 22: ... life notification has been silenced Compare the frequency of the LED flashes above or wait for the Do Not Disturb mode to end after 9 hours and listen to the chirps to determine which notification it is and follow the relevant instructions The red LED alarm indicator is flashing but the alarm is silent The alarm detected carbon monoxide sounded the alarm and was silenced Follow instructions in th...

Page 23: ...ot re enter the premises 4 If anyone is suffering from the symptoms or effects of carbon monoxide poisoning seek medical advice immediately 5 Contact the relevant authority or association for your fuel type using their emergency contact number Relevant telephone numbers for UK residents are a National Gas Emergency Service 0800 111 999 b Oftec oil 0845 658 5080 c HETAS solid fuel 0845 634 5626 6 I...

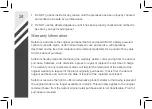
Page 24: ...purchase Safelincs hereby warrants that during the warranty period commencing from the date of purchase Safelincs at its discretion agrees to repair or replace the unit free of charge The warranty on any replacement alarm will last for the remainder of the period of the original warranty in respect of the alarm originally purchased that is from the date of original purchase and not from the date o...

Page 25: ...lied warranty of fitness for a particular purpose is limited in duration to five years This warranty does not affect your statutory rights Except for death or personal injury Safelincs shall not be liable for any loss of use damage cost or expense relating to this product or for any indirect or consequential loss damages or costs incurred by you or any other user of this product Returning Your Ala...

Page 26: ...26 Contact Information 33 West Street Alford Lincolnshire LN13 9FX United Kingdom 0800 978 8262 support ultra fire co uk www ultra fire co uk ...

Page 27: ...27 Notes 2022 Safelincs All Rights Reserved DOC 1507 Version 1 3 ...

Reviews: