PN 30A255 June 2014 Rev A
13
UNPACKING
Check that the container is upright. Use an outward prying motion –
DO NOT USE A HAMMER
- to remove the carton.
Check the fryer for visible damage; if such damage has occurred do not refuse shipment, but contact the carrier and file the
appropriate freight claims.
INSTALLING
Roll the assembled fryer into the building, to its operating location.
LEVELING
1.
When the fryer is placed in its operating location check to be sure it is level. If not, loosen the casters and insert the appro-
priate number of shim plates between leg and caster plates then retighten the caster bolts.
2.
If the floor is smooth and level, adjust to the high corner and measure with a spirit level. If the floor is uneven or has a
decided slope, level the unit with metal shims.
3.
Leveling will assure that each vat contains the same amount of shortening when checked at the shortening level mark on
the rear wall of the fryer vat.
NOTE:
A caster may not return exactly to the same position after being moved, which may require re-leveling after each move.
ELECTRICAL CONNECTION
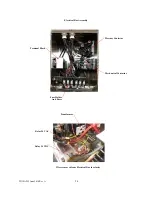
Each Model F-E21-14 Electric Fryer is wired internally to operate on 208 or 240 volt 3 phase electrical power as shown on the
fryer. The 208 or 240 volt 3 phase circuit of the fryer is internally wired to the Fryer Electrical Box Assy which is to be used to
connect to the building power source. It is ESSENTIAL that the 208 or 240 volt electrical receptacle is located within 8 feet of
the fryer location and that provisions are made so that the fryer can be moved to service fryer from the rear. Electrical connec-
tions to the fryer should be made by a licensed electrician and they must conform to the NATIONAL ELECTRICAL CODE as
well as to local electrical codes and/or ordinances.
To avoid electrical hazards and assure proper operation of the electric fryer, the following precautions should be oserved
during installation:
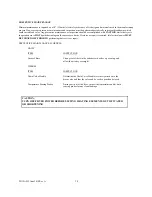
MATCH
VOLTAGE
Before connecting electrical power, insure the line voltage matches the voltage rating on the fryer.
CIRCUIT
BREAKERS
The fryer must be connected to a circuit having shunt-trip circuit breakers sized in accordance with requirements of
the National Electrical Code as well as local codes and ordinances.
GROUNDING
The
fryer
MUST
be grounded to the building ground system according to the National Electrical
Code and local codes/ordinances.
F
IRE PROTECTION
The fryer should be installed beneath a powered exhaust hood which complies with NFPA96 standards
that is equipped with an approved Fire Suppression System designed to automatically shut-off all sources of electrical
power to the fryer in case of a vat fire
.
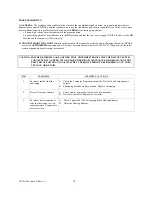
CLEARANCES
The Model F-E21-14 Electric Fryer
MUST
be kept free and clear of all combustibles. The
MINIMUM
clearances from combustible and non-combustible construction is 6" (152 mm) from the sides and 6" (152 mm) from
the rear of the fryer. The fryer may be installed on combustible floors.
WARNING: IMPROPER INSTALLATION, ADJUSTMENT, ALTERATION, SERVICE OR MAINTENANCE CAN
CAUSE PROPERTY DAMAGE, INJURY OR DEATH. READ THE INSTALLATION, OPERATING
AND MAINTENANCE INSTRUCTIONS THOROUGHLY BEFORE INSTALLING OR SERVICING
THIS EQUIPMENT.
Summary of Contents for F-E21-14
Page 4: ...GENERAL INFORMATION PN 30A255 June 2014 Rev A 4...
Page 5: ...PN 30A255 June 2014 Rev A 5...
Page 10: ...PRE INSTALLATION PN 30A255 June 2014 Rev A 10...
Page 12: ...RECEIVING AND INSTALLING PN 30A255 June 2014 Rev A 12...
Page 15: ...INITIAL START UP PN 30A255 June 2014 Rev A 15...
Page 17: ...PREVENTIVE MAINTENANCE AND TROUBLESHOOTING PN 30A255 June 2014 Rev A 17...
Page 20: ...CLEANING PN 30A255 June 2014 Rev A 20...
Page 22: ...PN 30A255 June 2014 Rev A 22 FRYER OPERATION...
Page 27: ...PN 30A255 June2014 Rev A 27 TECHNICAL ASSISTANCE ORDERING INFORMATION...
Page 29: ...PN 30A255 June 2014 Rev A 29 RECOMMENDED SPARE PARTS...
Page 31: ...PN 30A255 June 2014 Rev A 31 PARTS IDENTIFICATION...
Page 34: ...PN 30A255 June 2014 Rev A 34 WIRING DIAGRAM...
Page 35: ...PN 30A255 June 2014 Rev A 35...
Page 36: ...PN 30A255 June 2014 Rev A 36 ACCEPTABLE ALTERNATE AND REQUIRED HI LIMIT CONSTRUCTION...


