10
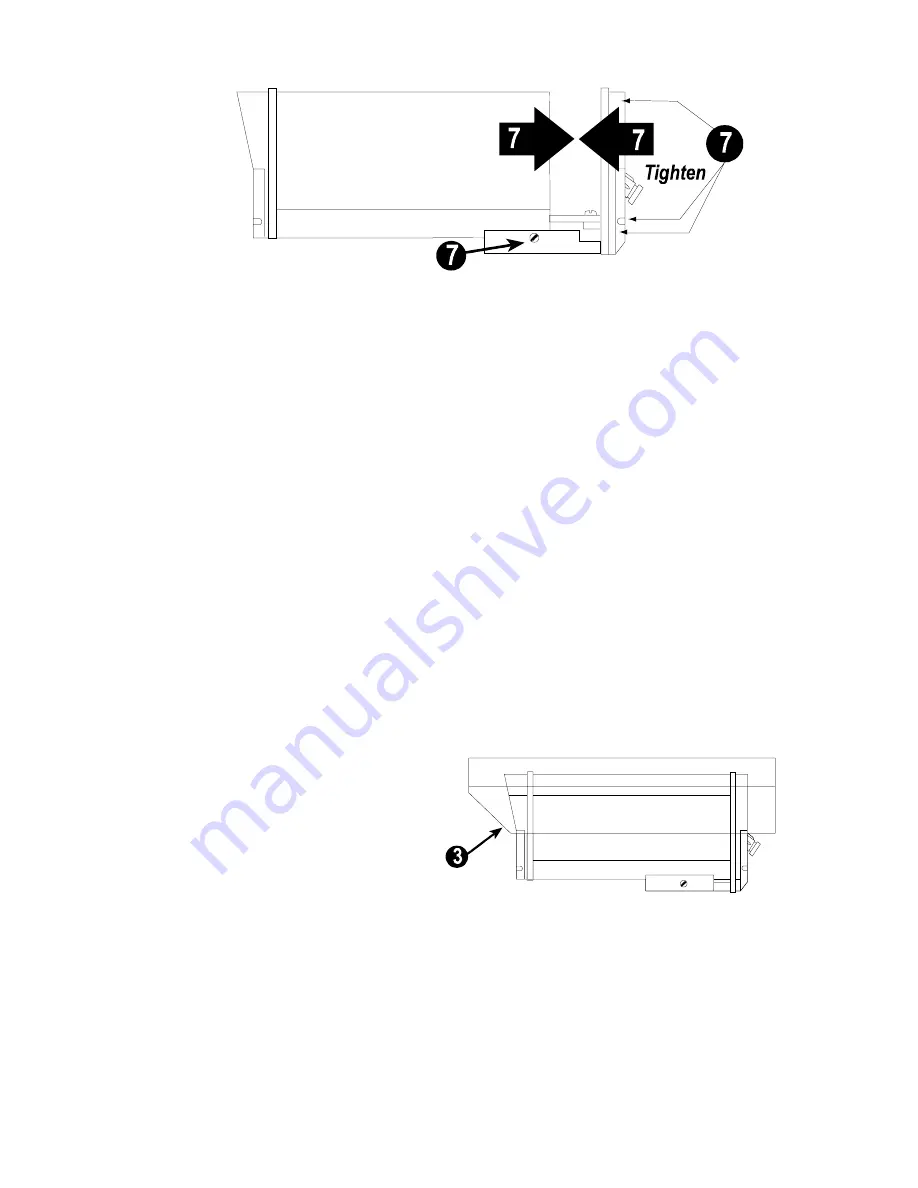
7. Reassemble the housing unit by sliding the body of the
housing completely across the base, being careful not to
disrupt any electrical connections. Secure the assembly by
tightening the three Phillips panhead screws through the rear
of the housing into the housing body. (If you installed a
blower unit into the assembly, remember to slide the small
black rubber gaskets over the tips of the screws.) Tighten the
set screws.
(See Figure 13)
8. If applicable, reinstall the sunshield by snapping the
sunshield back onto the housing unit.
2.5
HEG14-SS SUNSHIELD INSTALLATION
This section contains instructions for installing the sunshield for
the HEG series housing. While this is sold as an add-on
component for the HEG14, it is also available in a preassembled
package. The HEG14-01 includes a housing and a sunshield.
The HEG14-02 includes a housing, sunshield and heater. The
HEG14-03 includes a housing, sunshield, heater and blower.
1. After the camera
has been installed
and the housing
has been
reassembled
(See Camera
Mounting for HEG
Series Housings
on page
8), install the sunshield by snapping it onto the top of the housing
unit.
(See Figure 14)
2. To mount the completed assembly, consult the next section,
UL-WB+BJ & UL-WBM Wall Bracket Mounting.
FIGURE 14
FIGURE 13


