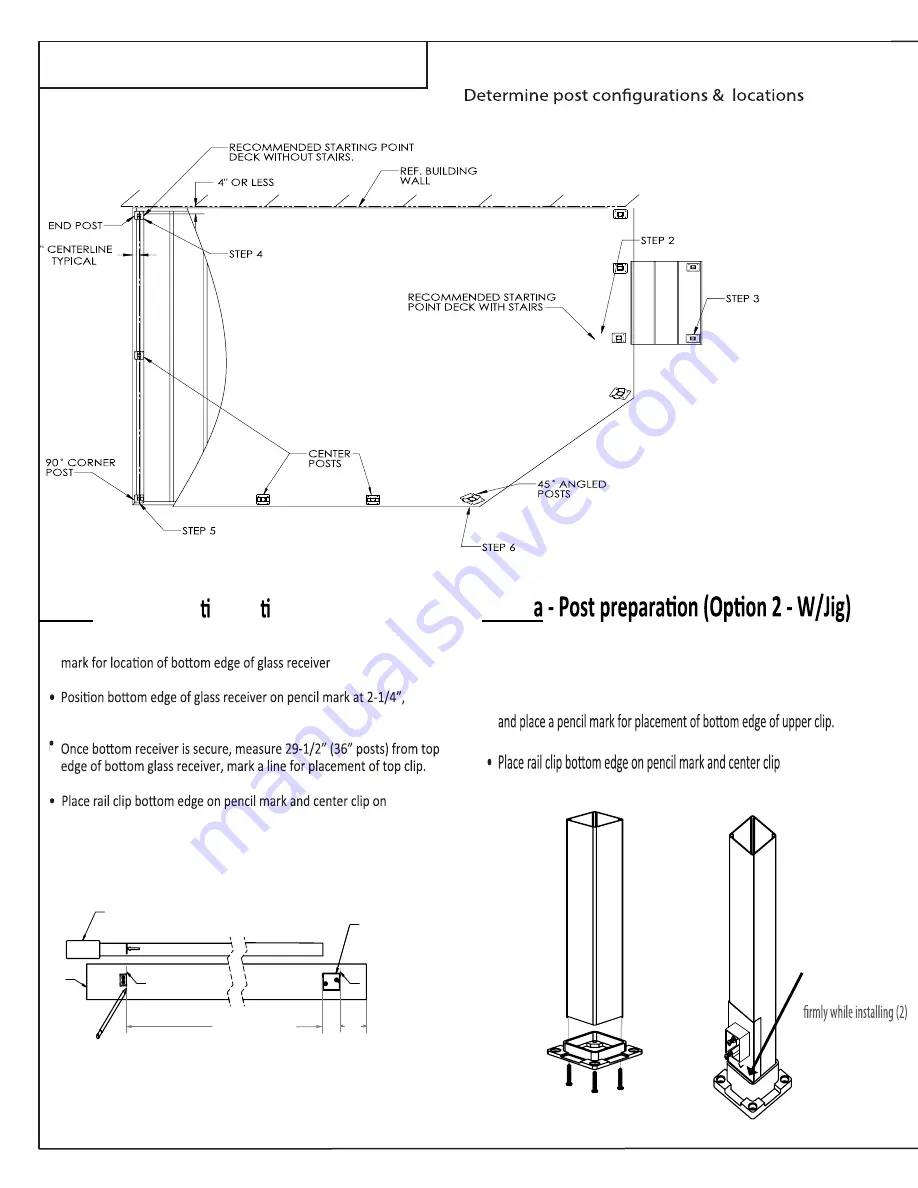
Full Glass Panel View
TOP VIEW
Step 2 -
Post prepara on (Op on 1 - No Jig)
Step 2
• Measure 2-1/4” from end of post extrusion and place a pencil
center receiver on post and secure with 2-#10 x 1-1/2” TEK screws.
post, secure with 2-#8x3/4” TEK Screws.
• Secure base plate to post extrusion with 4-#14x3” screws
(Dia. #3).
• Secure base plate to extrusion (Dia. #3)
• Install lower receiver to appropriate post face using Jig (Dia. #4)
• Meaure 29.5” from the top edge of the lower receiver (Dia. #2)
on post, secure with 2-#8x3/4” TEK Screws.
29-1/2" for 36” Height
35-1/2” for 42” Height
3" SQ.
POST
TAPE
MEASURE
LINE MARK
BOTTOM
GLASS
RECEIVER
29 1/2”
2-1/4”
LINE MARK
Rest Jig on Base Plate
Arrow Down
Place receiver in hole hold
1-1/2” TEK Screws
Base to post, using
4x #14 x 3” screws
Step 1
(i.e. end, center, corner, etc.) Dia. #1.
Dia. #1
Dia. #2
Dia. #3
Dia. #4
(Dia. #3).


