Installing your Sensor
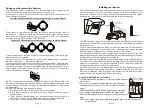
90-120 cm
above ground
This PIR operates using an Infra-red Sensor which works by detecting sudden
movements of a Heat Source (for example a person or vehicle passing through
the field of view).
The PIR has a typical detection range of 15 metres (which can be reduced) for a
single person passing by, this could be further if the sensor was looking towards
a herd of cattle, a large vehicle or constant stream of vehicles etc).
The sensitivity of the P IR can be reduced by adjusting the jumpers in the PI R
together with the option of adjusting the filter jumpers (which changes the speed
of detection), please refer to page 8 of this manual.
We also recommend installing the sensor looking away from a sudden Sun Rise
or Sun Set to avoid possible false alarms.A simple way to avoid detecting large
objects or a sudden sun rise is by aiming the PI R at 45 – 60% back down the
driveway (see illustration of page 7 of this manual).
It may be necessary in a few applications to aim the PI R towards the ground
slightly to avoid detecting large objects in the distance, although this could then
be prone to detecting large ground animals therefore we would recommend
trying to change the angle of the PI R first. ‘Sensitivity ’
It is recommended that the motion sensor be mounted at least 3 feet (0.9m)
from the ground on a sturdy, non-metal surface (i.e. a wall or stiff post)
(as
metal can interfere with wireless transmission)
pointed toward the target
sensing area.
with the “eye” pointed toward the target sensing area.
Helpful Tip! Multiple Receiver Conflicts
If you are experiencing interference, or you have multiple receivers
and/or over 16
sensors, and they utilize the same signal code, you will need to
manually change the code in one or more of your sensor units. To
do this:
REMOVE the battery. PRESS and HOLD the button inside the
sensor battery compartment before INSERT the battery again.
When the LED flash five times, a new signal code has been gener-
ated.
NOTE: The recoded sensor(s) will need to be re-paired with a receiver. See Section D
for instructions.
Hold Test Button
for 5 seconds.
Page 3
Pairing your Sensors with a Receiver
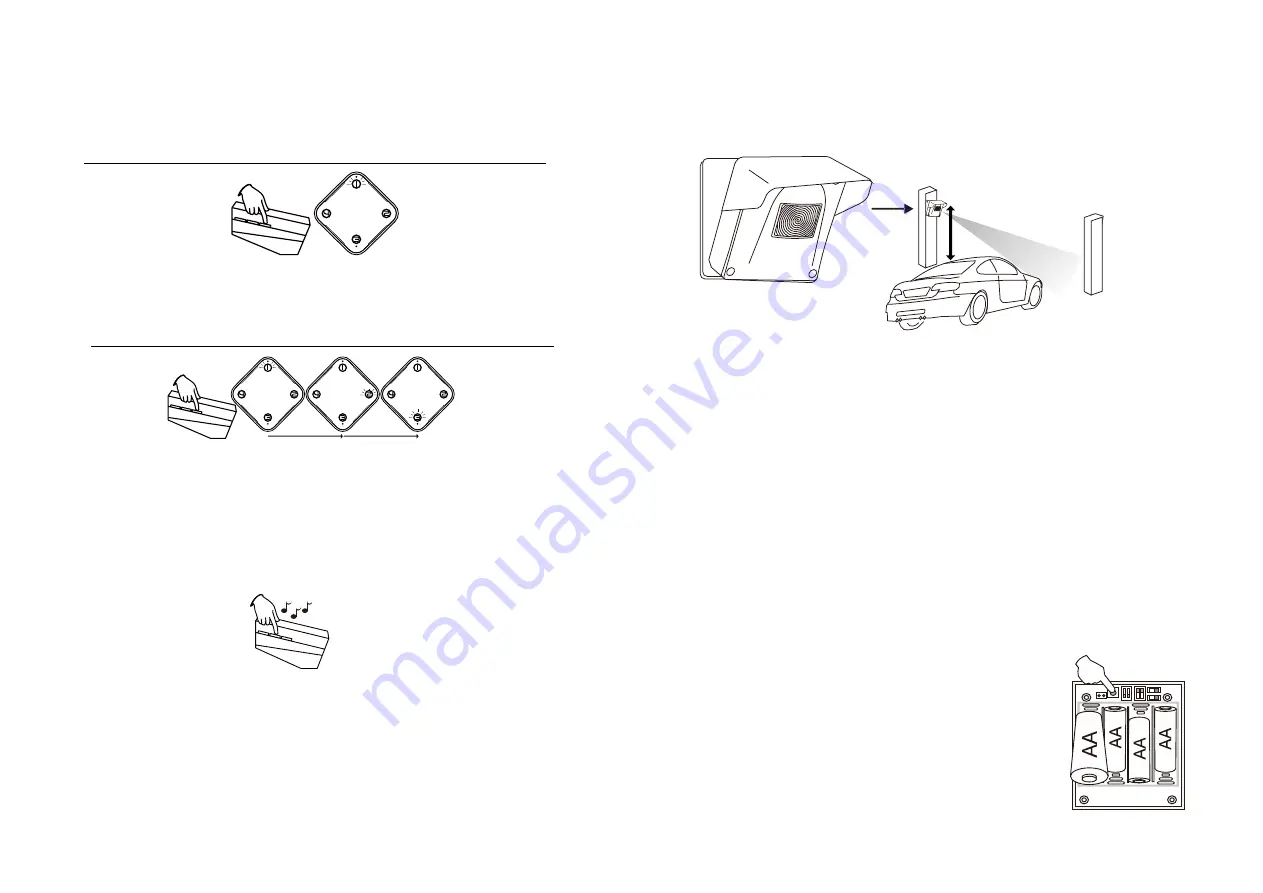
You have 20-30 seconds to move on to the next stage to avoid a timeout
You have 20-30 seconds to move on to the next stage to avoid a timeout
Your sensor(s) need to be paired with a receiver before your system can be
used. Follow these steps to pair sensor(s) with a receiver unit.
Press and hold “Learn” on the receiver for 3 seconds to enter Learn Mode. The
Zone 1 indicator will flash.
Press “Next” to light the zone indicator you wish to pair your sensor with. (If
pairing Zone 1, skip this step.) Each zone’s indicator will light when selected.
Each zone can be paired with up to four (4) sensors. NOTE: If all spaces are
occupied, all zone L EDs will flash THREE TI MES.
3. Keep pressing the “Melody” button to choose the melody you wish to play
when the sensor is triggered.
There are a total of 32 melodies to choose from. Melody select sequence:
Melody 1 > Melody 2 > ... > Melody 32 > Melody 1...
To complete the process, activate the sensor you wish to pair by slowly walking
past or waving your hand at least one foot from the eye. The sensor eye will
light when activated. The receiver will BEEP when successfully paired. To exit
Learn Mode, press “Next” until all zone indicators turn off. (or switch the
receiver off and back on again)
NOTE: If the sensor has already been paired there will be NO SOUND. The
indicator of the already paired zone will flash, then the indicator of the new zone
chosen in Step 2 will relight. You need to select a different zone to complete the
pairing process.
Helpful Tip! Clearing All the Sensors in a Zone
1. Press and hold “Learn” for 3 seconds to enter Learn Mode.
2. Press “Next” to select which zone you wish to unpair. (If clearing Zone 1,
skip this step)
3. Press and hold “Pause/Reset” for 3 seconds to unpair all the sensors in
that zone. The receiver will BEEP when the zone has been unpaired.
4. Press “Next” until all indicators are off to exit Learn Mode.
Page 2


