background image

Chapter 7: Field Service Components

00.053.101, Revision C SonixMDP/SP/OP Service Manual

7-8

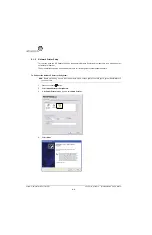
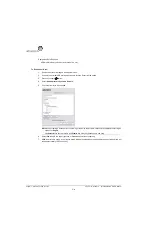
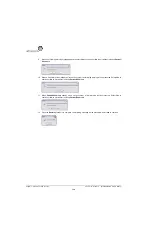
7.

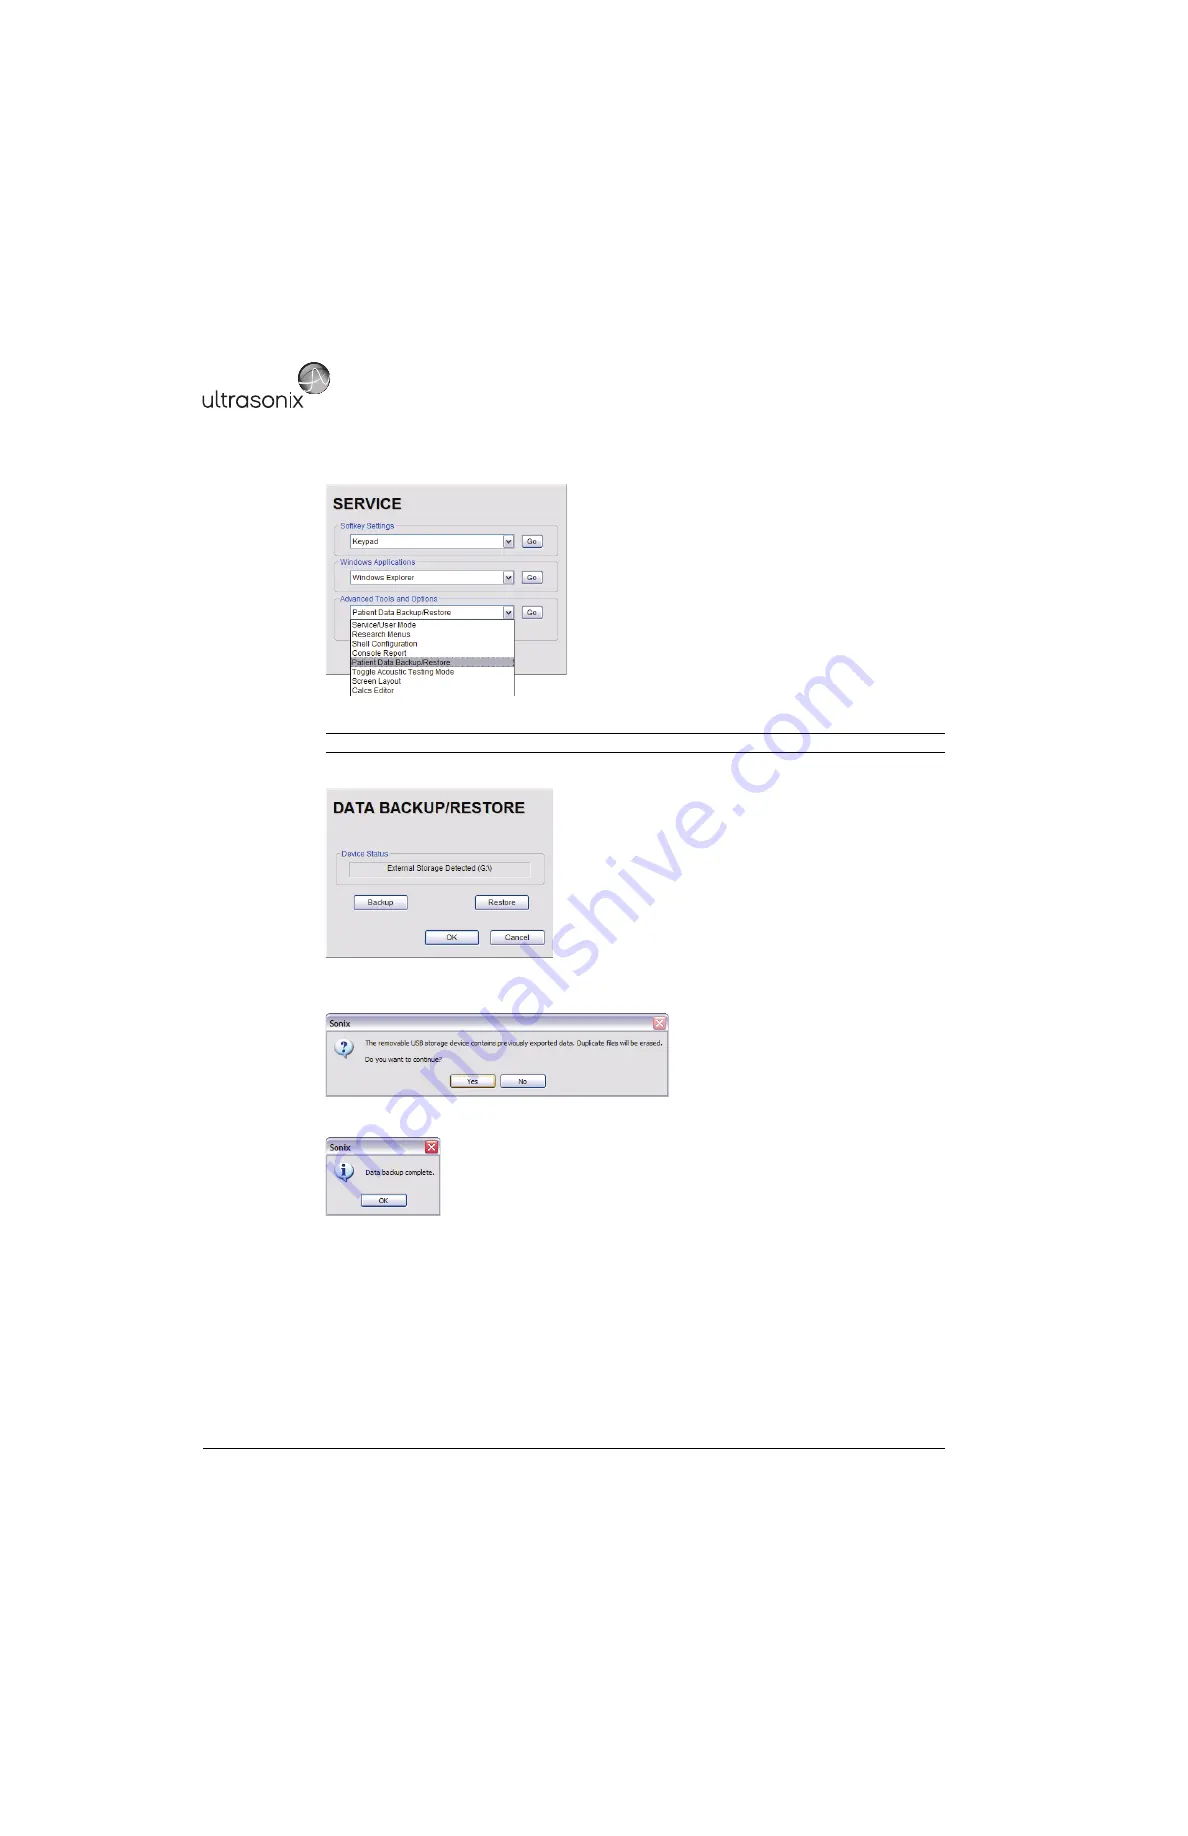
From the 

Advanced Tools and Options

 drop-down menu, select 

Patient Data Backup/Restore

8.

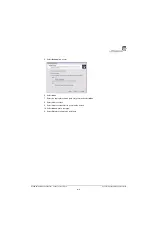
Select 

Go

9.

Select 

Backup

10.

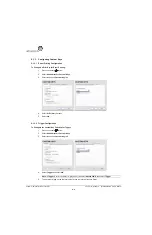
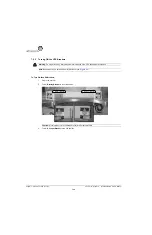
If the USB device already contains patient data, the following message will be displayed. Select 

OK

 to continue

or 

Cancel

 to exit without creating a backup. 

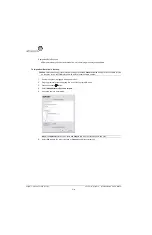
11.

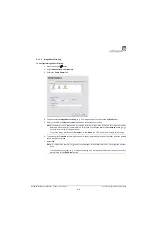
Once the procedure is complete, the following message will be presented. Select 

OK

 to continue. 

Note:

 The system will auto-detect the USB storage device. 

Summary of Contents for SonixMDP

Page 1: ...SonixMDP SP OP Ultrasound System Service Manual...

Page 2: ......

Page 3: ...asonix Medical Corporation 130 4311 Viking Way Richmond BC V6V 2K9 Canada www ultrasonix com 1 866 437 9508 1 604 279 8550 1 778 296 3860 Support 2013 Ultrasonix Medical Corporation 00 053 101 Revisio...

Page 4: ......

Page 5: ...2 3 1 2 1 Instrument Input Power Rating 3 2 3 1 3 Electrostatic Discharge 3 3 3 1 4 Electromagnetic and Radio Frequency Interference 3 3 3 1 5 Wiring Requirements 3 4 3 1 5 1 Main AC Connection 3 4 3...

Page 6: ...up Exporting Patient Data via the Service Mode Option 7 7 7 1 6 Restoring Importing Patient Data via the Service Mode Option 7 9 7 2 TURNING THE UPS BREAKERS ON AND OFF 7 11 7 2 1 Determining Whether...

Page 7: ...PTER 9 NETWORK CONFIGURATION 9 1 9 1 NETWORK 9 1 9 1 1 Ethernet LAN Network Configuration 9 3 9 1 1 1 Ethernet LAN Communication Test 9 3 9 1 2 Dialup Network Configuration If Available 9 4 9 1 2 1 Di...

Page 8: ...NG USE 12 3 12 7 IMAGE IS GRAINY OR MISSING 12 3 12 8 IMAGE HAS BLACK OR DARK AREAS 12 3 12 9 IMAGE HAS WAVY INTERFERENCE 12 4 12 10IMAGE HAS THREE 3 UNIFORM BLACK AREAS LEFT MIDDLE RIGHT 12 4 12 11 R...

Page 9: ...y to Factory Defaults A 7 A 9 2 Create a Temporary Video Connection Restore LCD Display with Tech Support Help A 7 A 10 LCD DISPLAY BLANK TOUCH SCREEN DISPLAYS ULTRASONIX LOGO ONLY A 7 A 10 1 Check Tr...

Page 10: ...Table of Contents 00 053 101 Revision C SonixMDP SP OP Service Manual vi...

Page 11: ...e LCD Display D 4 LCD Display and or Speaker Replacement D 5 Console Access D 6 Console Removal D 7 Console Mount Including Tilt and Swivel D 8 Side Shroud Removal D 9 Modulo Removal D 10 Front Block...

Page 12: ...List of Service Drawings 00 053 101 Revision C SonixMDP SP OP Service Manual ii...

Page 13: ...options that may not be available on all platforms Therefore some service instructions will apply only to specific models configurations Caution United States law restricts this device to sale or use...

Page 14: ...ent of a failure by Buyer to comply with the terms of this license the license granted by this paragraph shall terminate Further because unauthorized use of such computer programs will leave Ultrasoni...

Page 15: ...ble components including LCD display with built in speakers and a multi position articulated lift system operator console modulo transducers and UPS Figure 1 1 SonixMDP SP OP Ultrasound System Table 1...

Page 16: ...acoustic materials and technology these lightweight transducers are ergonomic and durable for maximum clinical use Refer to 6 2 1 Transducers for a complete list of transducers available with the syst...

Page 17: ...r 137 cm 54 in Weight with UPS and battery SonixMDP and Sonix SP only 102 kg 225 lbs Weight without UPS and battery 77 kg 179 lbs Input 100V 120V 50 60 Hz 200V 240V 50 60 Hz Power Rating 120 VAC 7 0A...

Page 18: ...V China 220V Libya 110 220V Tahiti 110V Columbia 110V Luxembourg 110 220V Taiwan 110V Costa Rica 110V Macao 220V Tanzania 220V Cuba 110V Madeira 220V Thailand 220V Cyprus 220V Majorca 110 220V Trinida...

Page 19: ...ascal 50 kPa to 106 kPa kilopascal Warning Operate in an indoor environment only free from moisture flammable liquids gases corrosive substances strong electrical or magnetic fields and equipment that...

Page 20: ...hospital grade power cord as follows Table 3 7 Hospital Grade Power Cord Specifications Electrical Rating Value Measurement System Only 100V 120V 50 60 Hz 200V 240V 50 60 Hz Current Draw System Only 1...

Page 21: ...such as an ESD strap 3 1 4 Electromagnetic and Radio Frequency Interference This equipment has been tested and found to comply with the EMC limits for EN 55011 Group 1 Class A and EN 60601 1 2 These l...

Page 22: ...le is CAT5 Category 5 10 Base T unshielded twisted pair 3 1 5 3 Image Management Network Obtain the following information from the system administrator list of all equipment that is part of the Image...

Page 23: ...e the shipping container for any damage that may have occurred during transport 2 Look for evidence to ensure that the crate has not been opened 3 Examine the Tip and Tell attachment on the outside of...

Page 24: ...the bottom remove the cardboard cover 3 Lift off the plastic bag covering the system Note Before unpacking the system ensure there is adequate room for removing it from its packaging The space should...

Page 25: ...on 3 7 4 If a printer was ordered with the system lift it off the foam packing at the back of the system 5 Remove the paperwork from beneath the rear of the console 6 Remove the foam packing from the...

Page 26: ...8 7 Slice the tape in the center of the foam at the rear of the system then remove the foam bending it open to clear the rear pull handles 8 Remove any transducer boxes or Biopsy kits from the rear o...

Page 27: ...Revision C Chapter 3 System Installation 3 9 10 Gently remove the foam packing from the sides of the system 11 Remove the foam from around the front wheelbase 12 Undo the back cardboard flap and remo...

Page 28: ...either side of the system 14 Open out the cardboard base 15 With one person standing behind the system tip the system back so the front wheels clear the foam depressions 16 A second person should plac...

Page 29: ...direction 18 Set the front of the system down onto the now level foam 19 Place the foam ramps removed in step 13 under the front cardboard flap taking care to center the ramp on each wheel 20 From the...

Page 30: ...ensure that system cannot move when the brakes are set 3 3 1 2 LCD Display Tip the LCD display up and ensure that it tips forward and back as desired rotates from side to side stays firmly in position...

Page 31: ...ower the console To Adjust the Console Angle 1 Push forward on the lever under the right side of the console 2 Use the front pull handles to gently rock the console forward or backward until the desir...

Page 32: ...and Power Panel 3 3 2 1 Voltage Configuration The diagram below shows the location of the EMI Filter which houses the system s fuses Refer to 3 3 3 2 for details on how to remove the fuse box and rep...

Page 33: ...age Settings 1 Power off and unplug the power cord from both the wall outlet and the system 2 Use the screwdriver to open the fuse box lid 3 Position the screwdriver at the top as in step 2 using it t...

Page 34: ...the power cord is firmly connected to the AC power cord receptacle Figure 3 3 3 Plug the power cord into a wall outlet hospital grade electrical outlet recommended 3 3 3 1 Turning on Main Power Switc...

Page 35: ...nplug the power cord from both the wall outlet and the system 2 Use the screwdriver to open the fuse box lid 3 Position the screwdriver at the top as in step 2 using it to remove the fuse box 4 Replac...

Page 36: ...cess the UPS breakers press the bottom of the breaker to turn it off 2 Press the top of the breaker to turn it on Warnings NEVER let liquid from any source enter the UPS Failure to do this may result...

Page 37: ...ct the power cord to a wall outlet 6 Press and hold the console POWER button for one 1 second to turn on the system 7 Power off and unplug the system Caution It is important to turn on the breakers in...

Page 38: ...t the system for scratches or damage Note any damage to the system and report it to Ultrasonix 2 Connect at least one transducer to the system 3 Plug in the power cord 4 Press and hold the console POW...

Page 39: ...ipheral Tray If the USB printer was purchased from Ultrasonix it can be mounted on the system without the peripheral tray using a specially designed printer mounting kit Equipment Tools Required 1 Phi...

Page 40: ...f procedures other than those specified in the manufacturer s User s Guide delivered with system may result in hazardous laser light exposure NEVER attempt to look at the laser beam even if the barcod...

Page 41: ...these tests the system should be running in normal operating mode 4 1 CONSOLE TEST To ensure the console is functioning properly test the console and touch screen buttons dials listed in Table 4 1 and...

Page 42: ...t the UPS has been configured 3 3 4 2 Ensure the system is plugged in and powered on 3 Unplug the system s power cord 4 Ensure the system is still running i e the system is running on battery power 5...

Page 43: ...The sound of static should be audible 4 6 LICENSES Check to ensure the system is configured with at least some Active licenses If no licenses are Active the license txt file will have to be reloaded...

Page 44: ...Chapter 4 Performance Testing 00 053 101 Revision C SonixMDP SP OP Service Manual 4 4...

Page 45: ...o the Update Location Internet Update 5 From the Available Updates drop down menu select the appropriate software version 6 Select Update 7 The system will automatically download the version specified...

Page 46: ...and copy it onto some type of USB media memory stick external hard drive etc 2 Connect the USB device to one of the system s four 4 external USB ports 3 Press the console button 4 Select Administrator...

Page 47: ...tor Patient Repair Database 3 Select OK to exit 5 3 SYSTEM RECOVERY Before performing a system recovery consult an Ultrasonix Technical Support Representative as this should only be done as a last res...

Page 48: ...Chapter 5 Software 00 053 101 Revision C SonixMDP SP OP Service Manual 5 4...

Page 49: ...B ports on the Back Connectivity Panel 4 Ensure the system in plugged in and powered on 5 The USB printer will automatically communicate with the system and configure itself 6 Configure Custom Keys 6...

Page 50: ...ot all networks are identical These instructions can also be used as a reference for installing other system network printers To Connect the Network Printer to the System 1 Press the console button 2...

Page 51: ...ssories 6 3 5 Select Browse for a printer 6 Select Next 7 Select the appropriate shared network printer and select Next 8 Select Yes to continue 9 Select Yes to set the selected printer as the default...

Page 52: ...Keys 3 Select the desired Custom Key tab 4 Select the Printer checkbox 5 Select OK 6 1 3 2 Trigger Configuration To Configure the Custom Key Function for Trigger 1 Press the console button 2 Select Ad...

Page 53: ...cial commands as required enter the desired text in the space provided 7 Select OK Note The default is set to print as two 2 columns by three 3 rows for a total of six 6 images per sheet Before the pr...

Page 54: ...bility in your area Table 6 2 Transducers SA4 2 24 Phased Array BPC8 4 10 Curved Array BPL9 5 55 Linear Array PA7 4 12 Phased Array L9 4 38 Linear Array mTEE8 4 5 Phased Array L14 5 38 and L14 5 38 GP...

Page 55: ...ng the modulo export User Data to an external USB backup medium memory stick external hard drive etc This will ensure access to this data if either the modulo or hard drive needs replaced during servi...

Page 56: ...console button 4 Select Administrator System Export 5 Check the item s to be exported 6 Select OK to begin the export process or Cancel to exit without exporting 7 If OK is selected in step 6 a comple...

Page 57: ...ystem The following options are available for import Imaging Presets 3D 4D Presets DICOM Server Configuration Settings Measurement Order Obstetrical Tables Protocols General Preset Assignments Measure...

Page 58: ...ously created backup into one of the four 4 USB ports 3 Press the console button 4 Select Administrator System Import 5 Check the items to be imported 6 Select OK to begin the import process or Cancel...

Page 59: ...he Export Destination 6 Select the Export button to begin the backup 7 When the Export is complete the following message will be presented Note When creating a backup prior to servicing the modulo be...

Page 60: ...he left hand side of the Exam Import Export page select all data for import 5 Select the Import button to begin the procedure 6 When the Import is complete the following message will be presented Note...

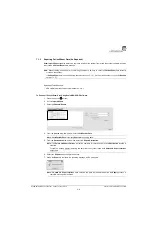
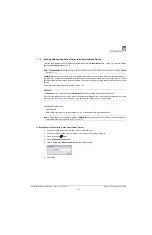
Page 61: ...xternal hard drive etc with at least 5 Gb of available space To Backup Export Patient Data via the Service Mode Option 1 Connect the USB keyboard to the one of the four 4 USB ports 2 Connect the USB s...

Page 62: ...Data Backup Restore 8 Select Go 9 Select Backup 10 If the USB device already contains patient data the following message will be displayed Select OK to continue or Cancel to exit without creating a b...

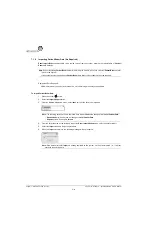
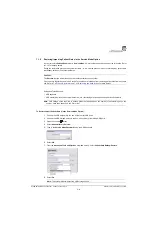
Page 63: ...ect the USB keyboard to the one of the four 4 USB ports 2 Connect the USB storage device to the one of the three 3 remaining USB ports 3 Press the console button 4 Select Administrator Service 5 Type...

Page 64: ...ientInfo folder already exists on the system the following warning will be presented Select Yes to continue or No to exit without restoring Patient Exam data 11 When Patient Exam data already exists o...

Page 65: ...is powered down and the power cord is disconnected from any power source 2 Turn 2 AC Input Breaker to the OFF position 3 Turn 1 Battery Breaker to the OFF position Note Breaker access is at the botto...

Page 66: ...the system 2 Turn 1 Battery Breaker to the ON position 3 Turn 2 AC Input Breaker to the ON position Warning Do not perform any internal system maintenance if the UPS breakers are turned on Note Breake...

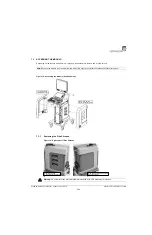
Page 67: ...Shrouds Figure 7 3 Right and Left Side Shrouds Note Because the modulo is accessible from the side of the system not all service tasks necessitate its removal Warning Do not perform any internal syste...

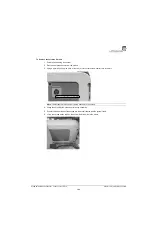
Page 68: ...ve each of the two 2 shroud fasteners a quarter turn to the left 4 Grasp the shroud by the sides and tip the top outwards 5 Ensure the bottom sides of the shroud are clear of the system frame 6 Lift u...

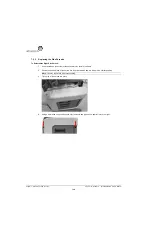
Page 69: ...ing a 4mm Allen key give each of the two 2 shroud fasteners a quarter turn to the left 4 Grasp the shroud by the sides and tip the top outwards 5 Ensure the bottom sides of the shroud are clear of all...

Page 70: ...1 Insert the tabs on the bottom of the shroud into the slots in the frame 2 Ensure the bottom sides of the shroud are clear of all cables and are sitting in the correct position 3 Tip the top of the...

Page 71: ...s on the bottom of the shroud into the slots in the frame 2 Ensure the bottom sides of the shroud are clear of all cables and are sitting in the correct position 3 Tip the top of the shroud into place...

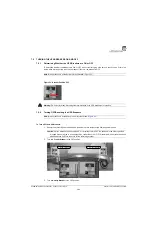
Page 72: ...and all transducers have been disconnected 2 Remove both side shrouds 7 3 1 3 Undo all modulo cables connections on the System Case Connectivity Panel cutting cable ties only as needed 4 Using the 10...

Page 73: ...put power cable 2 and UPS output power cable 3 7 Using the 4mm Allen key undo the two 2 screws and washers securing the modulo to the front of the system frame 8 Using the 2 Phillips screwdriver undo...

Page 74: ...facing right 2 Push the modulo into position so the four 4 bolt holes line up then using the 2 Phillips screwdriver fasten the four 4 screws securing the modulo to the side system frame 3 Using the 4m...

Page 75: ...PS to ensure the system powers up and runs correctly 7 4 4 9 Once the modulo and UPS test is successfully completed use as many cable ties as necessary to neatly fasten all cables keeping them tucked...

Page 76: ...vity Panels The System Case Connectivity Panel SCCP is accessible only after removing the side panel 7 3 1 Check to ensure that all cables are securely plugged into their respective slots Figure 7 4 S...

Page 77: ...ables Figure 7 7 SonixTOUCH SCCP 7 and SonixMDP SP OP SCCP 5 No Cables Figure 7 8 Sample SCCP with Secured Cabling 2 4 8 7 16 1 31 10 9 5 17 33 20 13 26 25 28 41 19 21 34 36 3 38 11 40 35 39 37 12a 12...

Page 78: ...d a BNC adapter Connect the printer to BNC Output 3 on Back Connectivity Panel B Figure 7 10 14 Video VGA Output Not in use 15 Digital Video DVI Video Output Used by the system s LCD display 16 VGA Co...

Page 79: ...39 USB Port Not in use May or may not be present OR Used by the optional ECG module USB connection when applicable 40 USB Port Not in use May or may not be present OR Used by the optional USB printer...

Page 80: ...The device connected to this BNC is controlled by the settings configured for the console Custom 1 button refer to 6 1 3 to configure Custom Keys or to Chapter 8 in the most recent User Manual 2 BNC O...

Page 81: ...ht corner of the UPS LED readout should display the word LINE 6 After initialization plug in a transducer 7 Press the console button and select the relevant transducer 8 Ensure that the system is imag...

Page 82: ...asound module servicing The third section 7 6 Modulo Internal Component Replacement enables qualified service personnel to deal with specific issues parts within the modulo itself For details on openi...

Page 83: ...crews and washers securing the modulo to the front of the system frame 2 Using the 2 Phillips screwdriver undo the four 4 screws and washers securing the modulo to the side of the system frame Warning...

Page 84: ...ten the two 2 screws securing the Front Block 7 Swing open the Front Block Ultrasound Module to expose the interior Note The modulo power cable 1 is color coded with green tape The first time the LCD...

Page 85: ...2 Phillips screwdriver To Remove the Front Block Ultrasound Module 1 With the Front Block Ultrasound Module partially open locate the cable tie securing the PCI cables to the inside of the door Reach...

Page 86: ...r the door hinges 4 Remove the modulo door hinge cover from inside the modulo and expose the two 2 hinges 5 To remove the door use the 2 Phillips screwdriver to undo the two 2 hinges two 2 screws per...

Page 87: ...rewdriver to fasten the two 2 hinges two 2 screws per hinge 2 From the exterior of the modulo using the 2 Phillips screwdriver fasten the two 2 screws holding the Side EMI Strip over the door hinges W...

Page 88: ...e top right hand side of the front block ultrasound module Note The ribbon cables coming from the PCI card are connected in reverse The top cable from the PCI card 1 is connected to the bottom PCI con...

Page 89: ...SonixMDP SP OP Service Manual 00 053 101 Revision C Chapter 7 Field Service Components 7 35 6 Thread a cable tie through the cable tie anchor on the inside of the modulo door...

Page 90: ...y tucking in all cables so they cannot interfere with any internal fans This will also ensure that no undue stress is placed upon the cables the next time the front block is opened 3 Using the 2 Phill...

Page 91: ...stomer site Equipment Tools Required 2 Phillips screwdriver scissors or utility knife anti static bag included with replacement modulo Caution Before doing any work with the modulo be sure to complete...

Page 92: ...rs and buttons 5 Push the button to open the door for the specific hard drive to be removed 6 Close the hard drive door 7 Place the hard drive in an anti static bag and return it to a representative o...

Page 93: ...hermal compound remove any excess thermal compound found on the CPU 5 Replace the CPU fan assembly and latch the two gray retention clips 6 Reconnect the cables 7 5 4 and close the front block ultraso...

Page 94: ...rd should only be done when directed by an Ultrasonix Technical Support representative or if explicitly required by a particular section in this Service Manual 1 Serial Header with one 1 motherboard c...

Page 95: ...Phillips screwdriver refasten the screw s securing the PCI card position 4 Figure 7 12 11 Using a 1 Phillips screwdriver refasten the screw s securing the PCI card bracket position 4c Figure 7 12 12...

Page 96: ...turning Parts for Service Repair Replacement for details on returning the UPS Warning Do not perform any internal system maintenance if the UPS breakers are turned on Warnings NEVER let liquid from an...

Page 97: ...ngs USE OF CONTROLS or adjustments or performance of procedures other than those specified in the manufacturer s User s Guide delivered with system may result in hazardous laser light exposure NEVER a...

Page 98: ...ransducer to the system 2 Press the console button and select the relevant transducer 3 Gently slide the edge of any coin along the transducer face to test for a line s or shadow s in the image on the...

Page 99: ...ant transducer 4 Test the transducer by taking a fresh image If the line shadow s in the image disappears then the transducer board is the problem and the front block ultrasound module rather than the...

Page 100: ...place by two 2 tapered mounting flanges Pushing the holder toward the back of the console will loosen it from these flanges allowing it to be pulled down and removed Note For best results Ultrasonix...

Page 101: ...e Peripheral Tray Basket to the Peripheral Tray 1 Using the two 2 sets of supplied nylon washers and thumbscrews attach detach the peripheral tray basket to the peripheral tray while the tray is attac...

Page 102: ...y installed Note For specific details on the transducers and the UPS battery refer to sections 7 16 1 and 7 16 2 Note The RMA number must always be clearly written on the outside of the packaging Warn...

Page 103: ...on Note DICOM Structured Reporting is supported Refer to Table 8 2 for Structured Reporting data transfer options Notes When using a hard wired network connection ensure the network is connected via a...

Page 104: ...the console button 2 Select Administrator DICOM 3 Configure the global settings as required Local Host Station Name General DICOM Station Name AE Title AE Application Entity Title of the Sonix system...

Page 105: ...ur 4 tabs will be presented AE Configuration Global Storage Settings Brightness Contrast and SonixHUB Settings 4 Create select a Device Name Edit the Application Entity AE settings for the selected De...

Page 106: ...ata entered edited in the following fields is specific to the selected Device Name AE Title AE Title of the Storage SCP IP Address Unique identifier of Storage SCP Port Listening Port of the Storage S...

Page 107: ...details on image formats Multi Frame JPEG Lossy JPEG Lossless JPEG Lossless SV1 RLE Lossless No Compression Set DICOM image format storage order for Cine loops Note Refer to the DICOM Standard for de...

Page 108: ...ct to enable the display of DICOM Storage error messages e g Failed to connect to DICOM Schedule Select an auto transfer setting End of Exam Immediate On Idle Storage Folder Select the location local...

Page 109: ...images Figure 8 6 DICOM Storage Settings Brightness Contrast Table 8 5 DICOM Storage Settings Brightness Contrast Contrast Adjusts the level of Contrast applied to the images Brightness Adjusts the le...

Page 110: ...ttings SonixHUB Settings Table 8 6 DICOM Storage Settings Global Storage Settings Note These settings are only available if SonixHUB is licensed Embed Cine As Is Select to send Cine files in AVI forma...

Page 111: ...presented AE Configuration and Brightness Contrast 4 Create select a Device Name Edit the Application Entity AE settings for the selected Device 5 Repeat step 4 as many times as required 6 Configure...

Page 112: ...d Select to Add the new AE Print Device Delete Select to Delete the selected AE Print Device Test Select to send verification request to DICOM Print Device ping to verify connection Settings Select to...

Page 113: ...images in color Deselect to print grayscale default Columns Select the number of Columns per page Rows Select the number of Rows per page Film Session Attributes Number of Copies Select the Number of...

Page 114: ...printer specific and only available if Cubic Magnification is selected in the previous field Trim Select Yes or No to use a border Trim on each page Configuration Enter printer specific Configuration...

Page 115: ...r images Figure 8 11 DICOM Print Settings Brightness Contrast Table 8 10 DICOM Print Settings Brightness Contrast Contrast Adjusts the level of Contrast applied to the images Brightness Adjusts the le...

Page 116: ...gs AE Configuration Devices Use the Devices option to add as many DICOM Worklist Servers as required Name Enter select the Name of an AE Worklist Device and populate the three 3 AE fields AE Title IP...

Page 117: ...tion requires a third party USB modem Contact your dealer or Ultrasonix Technical Support to learn more about this option Caution System networking options are intended for use inside your organizatio...

Page 118: ...o enable Online Support Add Use to Add extra non Ultrasonix Online Support IP addresses Note Ultrasonix Online Support addresses are added automatically Delete Use to Delete extra non Ultrasonix Onlin...

Page 119: ...ettings 6 Under General select Obtain an IP address automatically or Use the following IP address and enter the assigned static IP address Subnet mask and Default gateway 7 Select OK and exit the Menu...

Page 120: ...box has been selected 6 Complete the Account Information and Options sections Phone Number Username Password and Timeout 7 Select OK and exit the Menu system 9 1 2 1 Dialup Communication Test To Perfo...

Page 121: ...guration Page Wireless Figure 9 5 Wireless Network Connection Setup Note Not available on the SonixOP platform Notes Wireless Network Connection options are controlled by MS Windows not Ultrasonix Onc...

Page 122: ...the menu system 9 1 3 1 Wireless Communication Test To Perform a Wireless Communication Test 1 Press the console button 2 Select Online Support This should connect the system to an Ultrasonix Technic...

Page 123: ...console button 2 Select Remote Support 3 Enter the PIN Personal Identification Number provided by Ultrasonix Technical Support 4 When prompted select Download Run Run in order to install the required...

Page 124: ...Chapter 9 Network Configuration 00 053 101 Revision C SonixMDP SP OP Service Manual 9 8...

Page 125: ...media memory stick external hard drive etc To Obtain and Copy License txt onto the System 1 Press the console button 2 Select Administrator Licensing 3 Make note of the System Identification Number sh...

Page 126: ...ss the console button 2 Select Administrator Licensing 3 Select Local Drive 4 Under the Look in drop down menu select the drive containing license txt for example data_1 D 5 Highlight license txt and...

Page 127: ...ike frequency of use and environmental conditions In every case frequent checks of safety related items are highly recommended Table 11 1 Maintenance Procedure Frequency Test Clean Frequency Interval...

Page 128: ...om the top of the display to the bottom water mild detergent PH level at or near 7 and water solution Cautions Power off and unplug the system before cleaning Do not spill or spray water on the contro...

Page 129: ...olutions to a soft non abrasive cloth and wipe the barcode reader water mild detergent PH level at or near 7 and water solution Cautions Power off and unplug the system prior to cleaning the touch scr...

Page 130: ...r 7 and water solution 11 2 9 SonixGPS Warning Disconnect the wireless adapter prior to cleaning Caution DO NOT apply cleaning solutions directly to the wireless adapter Note Wireless adapter usage sh...

Page 131: ...ce procedure frequencies Use a vacuum cleaner to remove the dust from the system exhaust filters or vents If a vacuum cleaner is not available dust off by hand or with an anti static brush 11 2 10 1Cl...

Page 132: ...he side shrouds 7 3 1 and the modulo 7 4 1 3 After removing the modulo use the 2 Phillips screwdriver to remove the three 3 exhaust fan filters from the side of the modulo 4 Vacuum both sides then rei...

Page 133: ...listed below Use the procedures in section 7 4 Replacing the Modulo to aid in the assembly and disassembly of the system and 7 6 Modulo Internal Component Replacement to aid in accessing the inside of...

Page 134: ...o cracks or other damage to the transducers before they are used Inspect the transducer surfaces for cracks and feel for cracks with finger tips as well Where any transducer including but not limited...

Page 135: ...that contain perfume If there are any questions contact Ultrasonix Medical Corporation Gel Name Manufacturer Address Aquasonic 100 Parker Laboratories Inc 286 Eldridge Road Fairfield NJ 07004 USA Ph...

Page 136: ...Cautions DO NOT drop the transducers DO NOT hit the transducers against any surface that can dislodge or damage any of the transducer components DO NOT pinch or kink the transducer cable DO NOT use a...

Page 137: ...ncluding safety procedures involving personal protective equipment such as gloves protective eyewear and protective clothing DO NOT use sterilization or disinfection methods that have not been recomme...

Page 138: ...GENTS 75 IPA Cidex Activated Dialdehyde Solution 14 day Cidex Plus 28 day Cidex OPA Cidezyme Klenzyme McKesson Brand Metrizyme Milton Disinfecting Liquid Nuclean Omnicide FG2 T spray M ISCELLANEOUS SA...

Page 139: ...cleaning always remove covers accessories and attachments To Clean a Transducer 1 After every patient exam wipe the ultrasound transmission gel off the transducer 2 Wipe the transducer and cable with...

Page 140: ...instructions on cleaning disinfecting the mTEE8 3 5 transducer refer to the most recent Sonix Ultrasound System mTEE8 3 5 User Manual ENDOCAVITY TRANSDUCERS CLEANING DISINFECTING AGENTS Cidex Activat...

Page 141: ...ransducer is disinfected prior to shipping 11 3 5 and 11 3 6 the transducer is properly packaged for shipment 11 3 3 2 all shipping waybills paperwork is completed as per the relevant regulations and...

Page 142: ...Chapter 11 Maintenance 00 053 101 Revision C SonixMDP SP OP Service Manual 11 16...

Page 143: ...Resetting the UPS Breakers and 7 2 3 Turning ON the UPS Breakers If the system still does not power on it may be necessary to replace either the front block or the entire modulo Contact Ultrasonix Tec...

Page 144: ...a qualified Ultrasonix Service Technician There may be issues with the RAM A 4 1 Clear RAM A 4 2 Undetected RAM A 5 1 Test RAM Chips A software update may be required 5 1 Software Updates 5 1 2 Softwa...

Page 145: ...nse Status Re import license txt to ensure that Licenses are not set to Disabled A 6 3 Re Import License txt Check to ensure the transducer is not defective test the transducer on another system and c...

Page 146: ...d if necessary replace the US Module A 7 1 Test US Module 12 11 REGEDIT Some settings in the registry may need to be edited A 8 Regedit Ensure Settings are Correct 12 12 LCD DISPLAY BLANK TOUCH SCREEN...

Page 147: ...be presented on the LCD display and the touch screen Once the Memory Tests are completed the system will move to an imaging screen If the initialization process fails at some point refer to sections...

Page 148: ...rial Cable Connection Check the serial card connection 7 6 3 Replacing Reseating Cards Replace defective serial card 7 6 3 Replacing Reseating Cards Check serial port configuration for corruption A 12...

Page 149: ...with the network cable connection or with the BIOS Check for a loose faulty LAN connection on the back of the system and to the network port on the System Case Connectivity Panel A 13 1 Loose or Faul...

Page 150: ...Chapter 12 Troubleshooting Issues 00 053 101 Revision C SonixMDP SP OP Service Manual 12 8...

Page 151: ...es not power up follow the remaining suggestions in Appendix 12 1 before contacting Ultrasonix for further instructions A 2 SYSTEM HAS POWER BUT IS NOT POWERING UP A 2 1 Check Internal Modulo Power Co...

Page 152: ...d drive 1 data hard drive 2 8 Save settings and exit BIOS 9 System should restart and initialize properly 10 Close the system 7 5 5 Closing the Front Block Ultrasound Module A 4 SYSTEM SEEMS SLOW A 4...

Page 153: ...wo files using the Update key then select Delete 8 Reboot the machine A 4 6 Cleanup System If the RAM is undetected it may have a loose connection or be defective Ensure RAM size is 2 Gb per system sp...

Page 154: ...rity Setting To Adjust the Clarity Speckle Reduction Imaging Mode 1 Press the console button 2 Tap the touch screen Clarity button 3 Turn the associated touch screen dial to adjust the level of speckl...

Page 155: ...t Open to re import license txt A 7 IMAGE HAS THREE 3 UNIFORM BLACK AREAS LEFT MIDDLE RIGHT A 7 1 Test US Module To Test the US Module 1 Disconnect all transducers 2 Connect a completely different tra...

Page 156: ...SB keyboard is connected to the system 2 Press the WINDOWS START KEY and select 1 Type regedit and press Enter 2 In the registry go to HKEY_CURRENT_USER Software Ultrasonix Exam Settings 3 Make the ch...

Page 157: ...nnection 5 Disconnect the video splitter s blue or green connector from the system s RCA plug 6 Reconnect this RCA plug with the RCA cable yellow from the television A 10 LCD DISPLAY BLANK TOUCH SCREE...

Page 158: ...button 4 From the Service dialog select Windows Explorer and press Go 5 From the left hand menu right click My Computer and select Properties Hardware Device Manager 6 If there is a yellow and black...

Page 159: ...and hold the console SELECT button while moving the trackball to the bottom of the list The logs should now be highlighted in gray 11 Press CTRL C to copy 12 ALT TAB to Notepad and press CTRL V to pas...

Page 160: ...ables are securely connected 5 Re boot the system 6 Close the modulo 7 3 Accessing the Modulo A 12 4 System Hangs When Loading Maps at Initialization Troubleshooting this issue is a multistep process...

Page 161: ...onnected securely to the LAN port on the back of the system network port on the System Case Connectivity Panel A 13 2 BIOS Network Configuration for two 2 Network Ports When the modulo has two 2 netwo...

Page 162: ...al Area Connection 3 Select Properties General Internet Protocol TCP IP 4 Select Properties 5 Select Use the following IP address and enter the relevant information 6 Select OK and exit A 14 TRANSDUCE...

Page 163: ...nment Immunity Test IEC 60601 Test Level Compliance Level Electromagnetic Environment Guidance Electrostatic discharge ESD IEC 601000 4 2 6 kV contact 8 kV air 6 kV contact 8 kV air Floors should be w...

Page 164: ...nd FM radio broadcast and TV broadcast cannot be predicted theoretically with accuracy To assess the electromagnetic environment due to fixed RF transmitters an electromagnetic site survey should be c...

Page 165: ...livery Ultrasonix shall have no responsibility for defects in materials or workmanship of any Product after the expiry of the applicable period for each aspect of the Limited Warranty In the event tha...

Page 166: ...Appendix C Ultrasonix Limited Warranty 00 053 101 Revision C SonixMDP SP OP Service Manual C 2...

Page 167: ...ual 00 053 101 Revision C Appendix D Service Drawings D 1 APPENDIX D SERVICE DRAWINGS Caution Service drawings do not include cable connections Please refer to the relevant sections in this Service Ma...

Page 168: ...Appendix D Service Drawings 00 053 101 Revision C SonixMDP SP OP Service Manual D 2...


Page 169: ...C Appendix D Service Drawings D 3 SonixMDP SP OP Exploded Overview SonixMDP SP OP N A N A A 01 Rev 1 S2001_Overview Field Service Component Applicable Product s System Serial No Range Modulo Serial N...

Page 170: ...mm Allen key M5 Split Lock Washer x2 UXID 00 031 336 Monitor Arm Cover UXID 00 038 144 M5x12 Button Head Screw x2 UXID 00 031 316 TooL 3mm Allen key 1 M4x10 Button Head Screw x4 UXID 00 031 321 TooL 2...

Page 171: ...her x4 UXID 00 031 104 M3x8 Pan Head Screw x4 UXID 00 031 056 Tool 1 Phillips Speakers x2 UXID 00 013 009 LCD Display UXID 00 020 007 4 LCD Display Plate UXID 00 030 330 M4x8 Pan Head Screw x4 UXID 00...

Page 172: ...asher UXID 00 031 053 Monitor Ground Wire ECG Ground Cable where applicable UXID 00 008 298 2 M4 Split Lock Washer x2 UXID 00 031 320 M4x10 Button Head Screw x2 UXID 00 031 321 Tool 2 5mm Allen key M4...

Page 173: ...069 M6 Acorn Nut x4 UXID 00 031 080 Tool None Required M6 Star Washer x4 UXID 00 031 216 Console Removal SonixMDP SP OP MDP SP OP1 0 0910 0001 N A A 01 Rev 1 S2003 1B_Console Replacement Field Servic...

Page 174: ...l Base Bottom UXID 00 030 321 Spacer UXID 00 031 343 M4x10 Flat Head Screw x2 UXID 00 031 324 Tool 2 Phillips screwdriver M6 Nylock Nut UXID 00 031 042 Tool 10mm Socket wrench Console Mount Including...

Page 175: ...4 Turn Fastener UXID 00 031 259 Tool 4mm Allen Key Left Side Shroud UXID 00 038 138 1 4 Turn Fastener UXID 00 031 259 Tool 4mm Allen Key Side Shroud Removal SonixMDP SP OP MDP SP OP1 0 0910 0001 N A A...

Page 176: ...6 Tool 4mm Allen key 2 Cable Retainer Plate UXID 00 030 422 M6 Split Lock Washer UXID 00 031 069 M6x12 Nut UXID 00 031 070 Tool 10mm socket wrench 1 SonixTOUCH SonixMDP SonixSP SonixOP SXTCH1 0 0811 0...

Page 177: ...x2 UXID 00 031 046 Tool 2 Phillips screwdriver 2 1 M4x8 Pan Head Screw x2 UXID 00 031 007 Tool 2 Phillips screwdriver SonixTOUCH SonixMDP SonixSP SonixOP SXTCH1 0 0811 0006 to current MDP SP OP1 0 091...

Page 178: ...nt ECG Kit UXID External Tooth Lock Washer UXID 00 031 053 ECG Ground to Modulo UXID 00 008 298 Flat Washer UXID 00 031 129 Nylock Nut UXID 00 031 084 Tool 7mm socket wrench ECG Module Removal Replace...

Page 179: ...ew x2 UXID 00 031 289 Tool 3mm Allen Key 2 M5x8 Button Head Screw x4 UXID 00 031 289 Tool 3mm Allen Key M4 Fender Washer x4 UXID 00 031 203 3 UPS UXID 00 032 112 SonixTOUCH SonixMDP SonixSP SXTCH1 0 0...

Page 180: ...ficient room to allow the cover to be tipped clear of the battery UPS Battery UXID 00 032 111 SonixTOUCH SonixMDP SonixSP SXTCH1 0 0811 0006 to current MDP SP OP1 0 0910 001 to current N A Rev 1 Rev A...

Page 181: ...ear x2 UXID 00 032 139 Directional Lock Castor Front x2 UXID 00 032 145 Wheel Replacement SonixTOUCH SonixMDP SonixSP SonixOP SXTCH1 0 0811 0006 to current MDP SP OP1 0 0910 001 to current N A Rev A 0...

Page 182: ...details on Filter Cleaning refer to 11 2 10 SonixTOUCH SonixMDP SonixSP SonixOP SXTCH1 0 0811 0006 to current MDP SP OP1 0 0910 001 to current N A Rev 1 Rev A 01 System Filter Removal Replacement S30...

Reviews: