Chapter 7: Field Service Components
00.053.101, Revision C SonixMDP/SP/OP Service Manual
7-28
7.4.5
Testing the Modulo (No UPS Installed)
After the modulo has been removed and reinstalled – for whatever purpose – test it to ensure all cables have been
properly connected.
To Test the UPS and Modulo:
1.
Plug in the power cord.
2.
Press the console
POWER
button to turn on the system.
3.
After initialization, plug in a transducer.
4.
Press the console
button and select the relevant transducer.
5.
Tap the touch screen
Presets…
button and select the relevant transducer.
6.
Ensure that the system is imaging properly (i.e., there are no oddities such as black lines, excessive noise,
etc.).
7.
Once the system is working, power it off and unplug it.
7.5
FRONT BLOCK/ULTRASOUND MODULE SERVICING
Modulo Servicing has been divided into three (3) separate sections, the first (
) dealt with the
modulo as a discreet entity.
This, the second section, deals with front block/ultrasound module servicing.
The third section (
7.6 Modulo – Internal Component Replacement
), enables qualified service personnel to deal with
specific issues/parts within the modulo itself.
For details on opening/removing the front block, refer to
.
7.5.1
Accessing the Front Block/Ultrasound Module (Without Removing the Modulo)
Because the modulo – and therefore the front block/ultrasound module – is accessible from the side of the system,
not all service tasks necessitate its removal.
Equipment/Tools Required:
• #2 Phillips screwdriver.
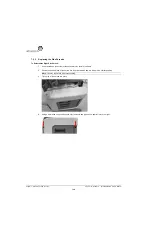
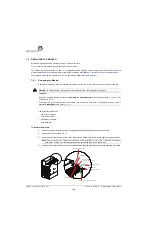
To Access the Front Block (Without Removing the Modulo):
1.
Ensure the system is powered down, unplugged and all transducers have been disconnected.
2.
Remove the side shrouds (
Note:
If the system was ordered with a UPS, follow the test instructions in
Caution:
Before doing any work with the modulo, be sure to complete sections
) in order to the
protect the integrity of the client's data.
Warning:
Do not perform any internal system maintenance if the UPS breakers are turned on.
Caution:
Always wear a grounding strap when opening and working inside the modulo.
Summary of Contents for SonixMDP
Page 1: ...SonixMDP SP OP Ultrasound System Service Manual...
Page 2: ......
Page 4: ......
Page 10: ...Table of Contents 00 053 101 Revision C SonixMDP SP OP Service Manual vi...
Page 12: ...List of Service Drawings 00 053 101 Revision C SonixMDP SP OP Service Manual ii...
Page 44: ...Chapter 4 Performance Testing 00 053 101 Revision C SonixMDP SP OP Service Manual 4 4...
Page 48: ...Chapter 5 Software 00 053 101 Revision C SonixMDP SP OP Service Manual 5 4...
Page 124: ...Chapter 9 Network Configuration 00 053 101 Revision C SonixMDP SP OP Service Manual 9 8...
Page 142: ...Chapter 11 Maintenance 00 053 101 Revision C SonixMDP SP OP Service Manual 11 16...
Page 150: ...Chapter 12 Troubleshooting Issues 00 053 101 Revision C SonixMDP SP OP Service Manual 12 8...
Page 166: ...Appendix C Ultrasonix Limited Warranty 00 053 101 Revision C SonixMDP SP OP Service Manual C 2...
Page 168: ...Appendix D Service Drawings 00 053 101 Revision C SonixMDP SP OP Service Manual D 2...


