SonixMDP/SP/OP Service Manual 00.053.101, Revision C
Chapter 7: Field Service Components
7-45
7.14.2 Testing the Transducer Board
To Test the Transducer Board:
1.
Unlock and remove the transducer from its current transducer port.
2.
Re-attach and lock the transducer into a different transducer port.
3.
Press the console
button and select the relevant transducer.
4.
Test the transducer by taking a fresh image. If the line/shadow(s) in the image disappears, then the transducer
board is the problem and the front block/ultrasound module rather than the transducer needs to be serviced.
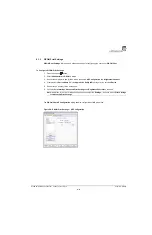
Figure 7-14: Acceptable Transducer Test Image
Note:
Refer to
for an example of an acceptable transducer image.
If there is any doubt about the image, contact Ultrasonix Technical Support and forward them a digital copy
of the image in question for verification of the diagnosis.
Close up of Near Field
Summary of Contents for SonixMDP
Page 1: ...SonixMDP SP OP Ultrasound System Service Manual...
Page 2: ......
Page 4: ......
Page 10: ...Table of Contents 00 053 101 Revision C SonixMDP SP OP Service Manual vi...
Page 12: ...List of Service Drawings 00 053 101 Revision C SonixMDP SP OP Service Manual ii...
Page 44: ...Chapter 4 Performance Testing 00 053 101 Revision C SonixMDP SP OP Service Manual 4 4...
Page 48: ...Chapter 5 Software 00 053 101 Revision C SonixMDP SP OP Service Manual 5 4...
Page 124: ...Chapter 9 Network Configuration 00 053 101 Revision C SonixMDP SP OP Service Manual 9 8...
Page 142: ...Chapter 11 Maintenance 00 053 101 Revision C SonixMDP SP OP Service Manual 11 16...
Page 150: ...Chapter 12 Troubleshooting Issues 00 053 101 Revision C SonixMDP SP OP Service Manual 12 8...
Page 166: ...Appendix C Ultrasonix Limited Warranty 00 053 101 Revision C SonixMDP SP OP Service Manual C 2...
Page 168: ...Appendix D Service Drawings 00 053 101 Revision C SonixMDP SP OP Service Manual D 2...


