8
Move the ballast trays back into the base of the bed, secure them with 2 screws. Reconnect the plugs
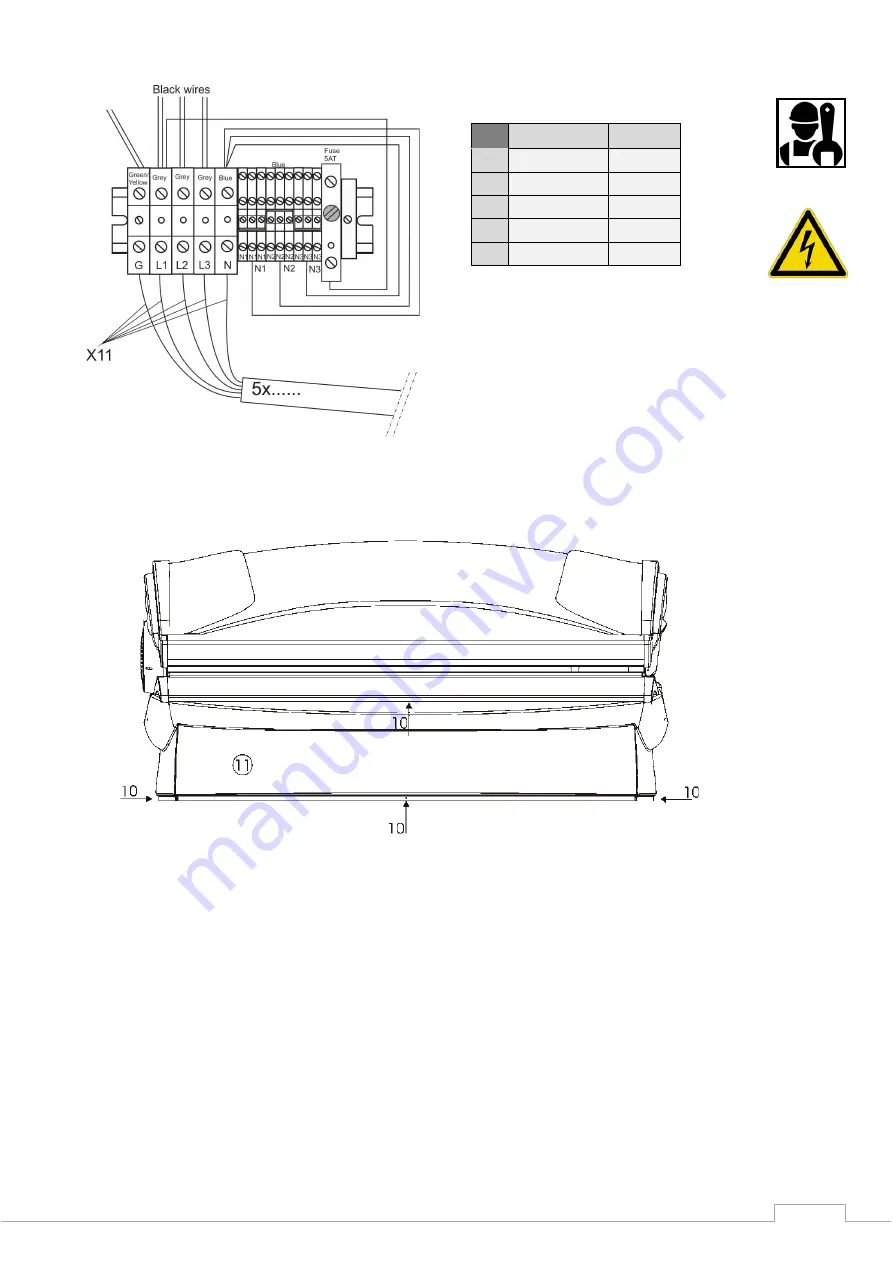
X1 and X2 (Fig.B) and the networkcable and reconnect the power supply cable (Fig. G).
Connect the supplied, flexible hoses for the air exhaust of the bed and top (Ø 150 mm en Ø 200 mm).
Note that this exhaust hose is not to be obstructed and that sufficient fresh air can get in. Your
sunbed is now ready for use.
The position of the top, open or closed, is preinstalled at a certain height. In case you would like to
change this height, the locking bolts at the rubber caps (Fig. B: R1 and R2) need to be adjusted.
The pressure that is needed to open or close the top can be adjusted by tighten or loosen the Allen
bolts (Fig. B:R1 and R2).
Colour
Function
G Yellow/green Earth
L1 Brown
Phase
L2 Black
Phase
L3 Grey
Phase
N Blue
Neutral
Fig. G
Fig. H


