Compressor Unit Instruction Manual
ULVAC CRYOGENICS INCORPORATED
6-1
6. MAINTENANCE
Scheduled and Unscheduled Maintenance ...................................... 6-1
Replacement of Adsorber ................................................................. 6-1
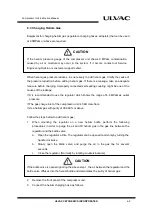
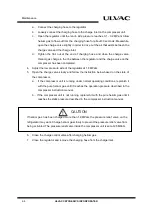
Charging Helium Gas ....................................................................... 6-5
Always disconnect the compressor from all sources of electrical power before performing
any maintenance procedures.
6.1 Scheduled and Unscheduled Maintenance
◇
Scheduled Maintenance
:
Replacement of the adsorber (after every 30,000 hrs)
◇
Unscheduled Maintenance
:
Adding helium gas
6.2 Adsorber Replacement
One of the scheduled maintenance required on the compressor is the replacement of the
adsorber within every 30,000 hours. Use more than 30,000 hours cause to be a machine
trouble on refrigerator unit. Keep to remove and replace the adsorber proceed within
every 30000 hours as following procedures:
◆
Removing the Adsorber
1. Close the main valve of high vacuum system.
2. Shut down the refrigerator unit and the compressor unit.
3. Switch off the primary power.
4. Disconnect the flexible hoses from gas-return and gas-supply connectors at the
rear of the compressor.
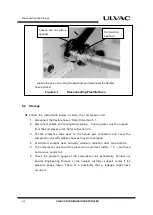
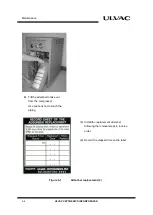
5. Remove the jam nuts holding the self-sealing coupling (male) .(Figure 6-1 (1))
6. Remove the rear panel from the compressor by unscrewing 7 screws.(Figure 6-1
(1))
7. Disconnect the flexible hose from the adsorber inlet. (Figure 6-1 (2))
WARNING
Summary of Contents for C15T
Page 2: ......
Page 8: ...F 6 ULVAC CRYOGENICS INCORPORATED This page intentionally left blank...
Page 14: ...S 4 ULVAC CRYOGENICS INCORPORATED This page intentionally left blank...
Page 16: ...IW 2 ULVAC CRYOGENICS INCORPORATED This page intentionally left blank...
Page 34: ...Operation 4 2 ULVAC CRYOGENICS INCORPORATED This page intentionally left blank...
Page 38: ...Disconnection and Storage 5 4 ULVAC CRYOGENICS INCORPORATED This page intentionally left blank...
Page 46: ...Maintenance 6 8 ULVAC CRYOGENICS INCORPORATED This page intentionally left blank...
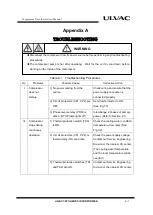
Page 50: ...Troubleshooting A 4 ULVAC CRYOGENICS INCORPORATED This page intentionally left blank...
Page 54: ...Circuit Diagram B 4 ULVAC CRYOGENICS INCORPORATED This page intentionally left blank...
Page 57: ...Flexible Hose C 2 ULVAC CRYOGENICS INCORPORATED This page intentionally left blank...
Page 61: ...CS 2 ULVAC CRYOGENICS INCORPORATED This page intentionally left blank...
Page 63: ...Revisions R 2 ULVAC CRYOGENICS INCORPORATED This page intentionally left blank...

