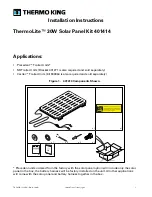
Fig. 8.1
Panel Header (Top)
2-1410-018 L Latch
2-1410-020 T Panel Clamp Top
2-1060-002 Alligator Clamp
2-1060-001 Alligator Clamp
2-1410-015 Panel Clamp Bottom
2-1410-017 Gasket
The beauty of the “gator clamp” installation method is its simplicity it can be used on just about any type of roof or rack
installation.
For rack systems, asphalt shingle roofs, or tile roofs follow these simple steps:
8. Mounting the Solar Panels Using Gator Clamps.
Snap a chalk line across the roof or rack where you want the top edge of the collectors to be located. The panels
should slope slightly down toward the feed end of the array for proper drainage.
Since normal horizontal expansion and contraction of an array of panels takes place every day as panels heat up
and cool down, it is preferable to lock the center of each array in place so that the expansion and contraction takes
place evenly to the left and right of this center point. The center panel of an array may be locked in place by locating
the gator clamps on that panel adjacent to the left and right of
one
of the header ribs (see Fig. 8.3, page 15). These
gators should be attached using (2) lag bolts as opposed to (1).
Do not use this procedure more than once on any
array of panels.
Position the first gator clamp on the chalk line 6” from the top corner of the first panel. The first panel will be the one
that is connected to the feed line at the bottom header.
Subsequent gator clamps should be spaced out evenly along the chalk line every 24”. Each gator clamp can be
located anywhere along the top header to match up to the spacing of the roof rafters
as long as there is a 2” space
between the edge of the gator clamp and the ribs on the panel header that exist every one foot.
This allows
for horizontal expansion and contraction. For barrel tile roofs, each gator clamp needs to be positioned so that it is
centered on the top ridge of a tile.
1.
4.
2.
3.
MOUNTING THE SOLAR PANELS USING GATOR CLAMPS.
-
14
INSTALLATION MANUAL HELIOCOL
®
SOLAR POOL HEATER
©
2014 UMA Solar


