USER MANUAL — 74-36103-ENG R6
21
GETTING STARTED
IMPORTANT
Bed must be properly installed and verified prior to be put in service. Refer to the list below to ensure proper
set up.
Steps list for set up
1. Perform a complete visual inspection of the bed. Contact
Umano Medical
or local representative if there are
any damages or missing item.
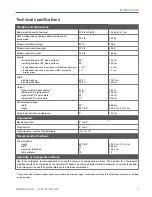
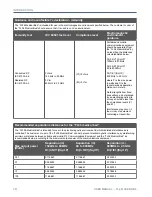
2. To prevent permanent damages, ensure bed has reached
environmental conditions for use
(page 8) prior
to plug it. Refer to the section of
technical specifications
(page 7).
3. Apply brakes. Try to move the bed to verify if brakes are engaged.
4. Install headboard and footboard on the proper side, labels and controls on the outside. Ensure not to mix
boards with other units, if setting up more than one bed. Boards configuration could be different and a mix
up could result in inoperative functions. Ensure there is no obstruction between the frame connector and the
footboard connectors when installing the footboard.
5. If applicable, plug patient control and install accessories. Refer to
Accessories
section (page 61).
6. Plug the bed power cord in a hospital grade power outlet. If applicable, store the remaining of the power
cord on the power cord support brackets while keeping clearance in prevision for movement from elevation
system. A power supply of 4 to 5 hours is needed to allow bed to reset its settings according to environmental
conditions of use and to reach a minimum charge of the battery. In case of complete discharge, bed may need
a 24-hour plugging for a full recharge.
7. If applicable, on the footboard, ensure that the green LED beside the power cord pictogram is ON. Test each
control of the footboard. If applicable, set preferences.
8. If a “bip” can be heard and no functions are working, it is possible that the setting’s reset, according to
the environmental conditions of use, was not completed and that the bed detects a too high environmental
temperature variation. Let the bed rest in order for the settings to reset properly.
9. Raise every siderail and ensure they each lock properly in upper position. Release and lower each siderail to
ensure of smooth motion.
10. If applicable,
test each control press button on patient control.
11. Ensure functionality of each LED light and audio indicators.
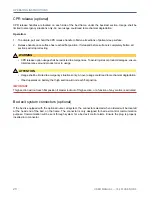
12. If applicable, test the CPR emergency release handle: raise backrest section and pull CPR handle located on
one side of backrest section. Bed will return in flat position. Repeat to test second handle.
13. If applicable, connect the nurse call communication system to the bed nurse call connector. Test for proper
operation.
14. If applicable, test the room lights functions for proper operation.
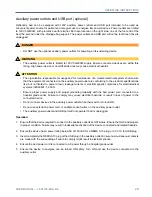
15. If applicable, verify following options for proper operation: auxiliary power outlets and USB port, nightlights, etc.
Summary of Contents for ook cocoon
Page 1: ...2 0 1 7 0 8 7 4 3 6 1 0 3 E N G R 6 User manual FL36...
Page 2: ......
Page 3: ...2 0 1 7 0 8 7 4 3 6 1 0 3 E N G R 6 User manual FL36...
Page 22: ......
Page 50: ......
Page 62: ......
Page 74: ......
Page 78: ......

