OPERATING INSTRUCTIONS
USER MANUAL — 74-36105-ENG R5
41
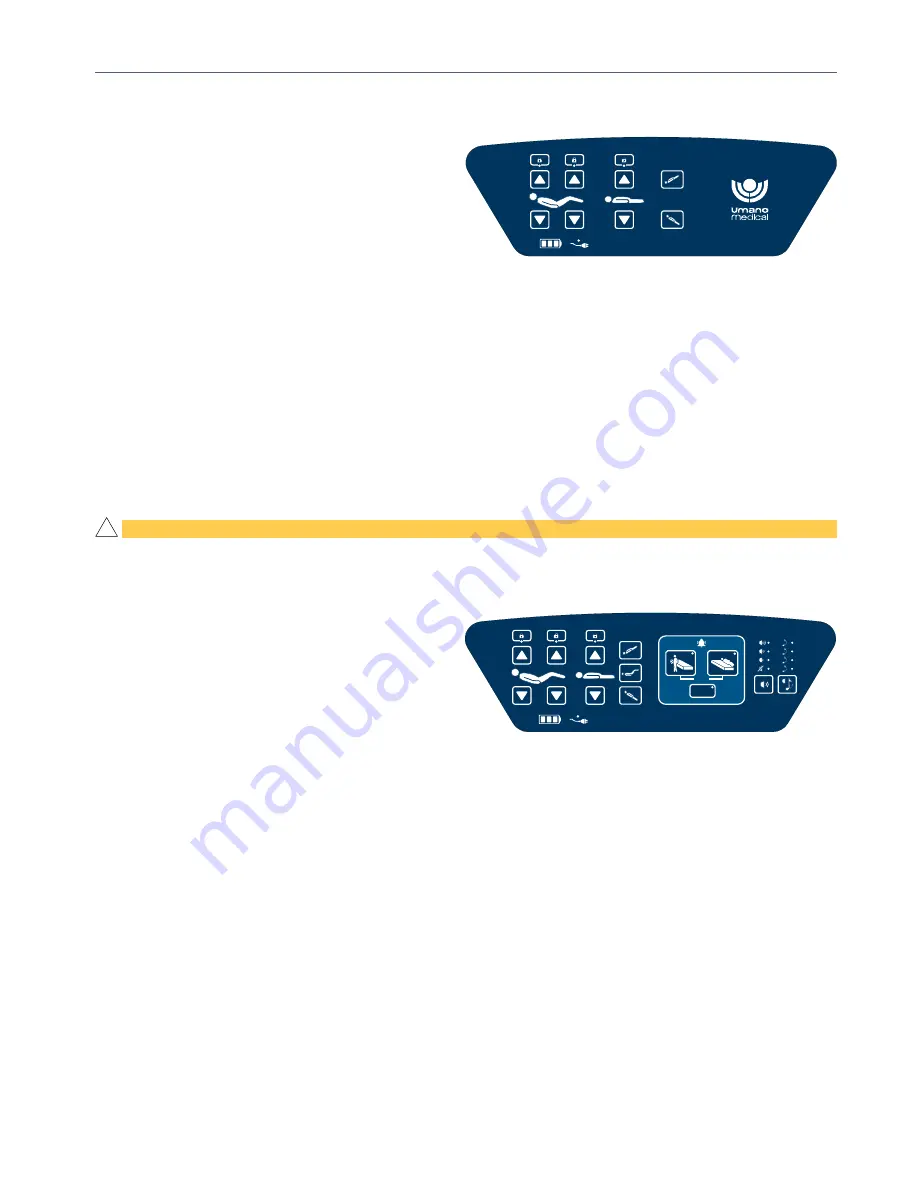
Standard configuration
Bed motion lockout to the siderails controls can be
set with one of the 3 closed padlock pictogram press
buttons with integrated LED. A solid amber LED ON
indicates that bed motion illustrated below is locked in
the siderails, the bed motions can still be activated from
the footboard control panel. To unlock motion, press
the button displaying the amber LED ON.
The UP/DOWN press buttons offer motion of
backrest section from 0
o
to 60
o
, motion of thigh and foot sections
simultaneously and elevation system in a height range from 10" to 31.5" depending on casters option. Press
buttons offer one-touch positioning for a 16
o
Trendelenburg position, vascular foot position and -16
o
reverse
Trendelenburg position.
To activate:
1. Press and hold button.
2. Release button when the required position is reached.
Bed exit configuration
WARNING
• The bed exit detection system must be used with patients with minimum weight of 50 lb/22.6 kg. If not
avoided, the bed exit detection system may not detect all movements and the functionality could be affected.
Bed motion lockout to the siderails controls can be
set with the same steps as the
standard configuration
(page 41). Refer to this section for more details.
The UP/DOWN press buttons offer motion of
backrest
section from 0
o
to 60
o
, motion of thigh and foot sections
simultaneously and elevation system in a height range
from 10" to 31.5" depending on casters option. Press
buttons offer one-touch positioning for:
• 16
o
Trendelenburg position and -16
o
reverse Trendelenburg position
• vascular foot position
• selection of audio signal level
• selection of audio signal type
• selection of bed exit control level of detection for Detection 2 or Detection 1
• auto-arm for bed exit control system
To activate:
1. Press and hold button.
2. Release button when the required position is reached.
STANDARD CONFIGURATION ILLUSTRATED
QDF36-2428
4
3
2
1
AUTO
2
1
QDF36-1042
ZERO
BED EXIT CONFIGURATION ILLUSTRATED
!
Summary of Contents for ooksnow FL36
Page 1: ...2 0 1 7 1 0 7 4 3 6 1 0 5 E N G R 5 User manual FL36 MH...
Page 2: ......
Page 3: ...2 0 1 7 1 0 7 4 3 6 1 0 5 E N G R 5 User manual FL36 MH...
Page 46: ......
Page 58: ......
Page 74: ......
Page 90: ......


