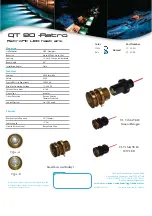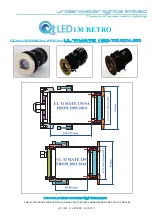
47
6
/('
/('
5(752
'8$/
,QVWUXFWLRQVIRUFRQYHUWLQJWKHRULJLQDO
47
UDQJHWR47
6
'XDOFRORXU
/('
7KHIROORZLQJSURFHGXUHLVDFKLHYHGIURPLQVLGHWKHKXOO
7KH³(;,67,1*/,*+7´SDUWVLQGLFDWHGEHORZVKRXOGQRWEHUHPRYHG$OORWKHUSDUWVPXVWEHFDUHIXOO\UH
PRYHG7KRURXJKO\FOHDQWKHJODVVOHQVDQGWKHLQVLGHRIWKHOLJKWEDUUHO
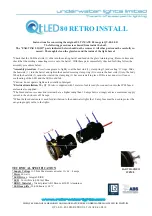
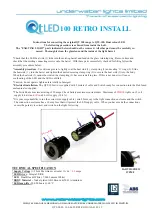
*Check that the LED heat sink (1) slide into the existing barrel and land on the glass retaining ring. Remove item and
check that the existing connecting screws onto the barrel. With these parts successfully checked for fi tting follow the
assembly procedures below.
*
$VVHPEO\SURFHGXUH
-Use silicone grease to lightly coat the heat sink (1), clamp ring (3) and sealing ‘O’ rings
. Slide
the heat sink (1 ) into the barrel and tighten the knurled securing clamp ring (3) to secure the heat sink (1) into the body.
When the heat sink (1) cannot be rotated the clamp ring (3) has secured all in place. If this is not done it will cause
overheating of the LED and the LED could fail.
*Caution: do not operate lights unless totally submerged.
*
(OHFWULFDOLQVWDOODWLRQ
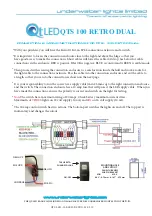
The QT
6
0 retro is supplied with 2 meters of cable
DQG6ZLWFK
ready for connection into the
+XE
fused
enclosure also supplied.
*The
6ZLWFKKDV
a
PD[LPXP
rating
RI
20 amps
&KHFNEDWWHU\PD[LPXPFXUUHQWGUDZ0D[LPXPRI
7+5((
OLJKWVRQYROW
VXSSO\$DQG
6,;
RQYROWVXSSO\$
*
,WLV\RXUUHVSRQVDELOLW\WRUXQWKHFRUUHFWVL]HVXSSO\FDEOHPLQPPVTWRWKHOLJKWFRQQHFWLRQHQFORVXUHDQGWKHVZLWFK
7KHFRQQHFWLRQHQFORVXUHKDVDDPSIXVHWKDWZLOOSURWHFWWKH/('VXSSO\FDEOH:KHQ\RXKDYHPDGHWKHFRQQHFWLRQV
HQVXUHWKHSRODULW\LVFRUUHFWDQGVZLWFKRQWKHOLJKWIRUWHVWLQJ
7(&+1,&$/63(&,),&$7,21
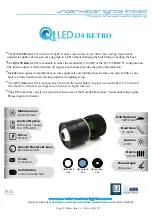
6XSSO\9ROWDJH
11
-28vdc Maximum current at 11vdc =
DPSV
/(''ULYHU
- Integral-
<(6
/('
'XDO%OXH :KLWH/XPHQV:KLWH
%2'<0DWHULDO
1LFNHOSODWHG$%%URQ]H
& 5083 Aluminium
/('ODPSOLIH
20,000 hours @ 60° C
($57+6&5(:
,7(0
5(752,167$//
ZZZXQGHUZDWHUOLJKWVFRP
7+(47/('5$1*(,6'(6,*1('$1'0$18)$&785('%<81'(5:$7(5/,*+76/7',17+(
8.
&YJTUJOHMJHIU
&YJTUJOHMJHIU


