8
???
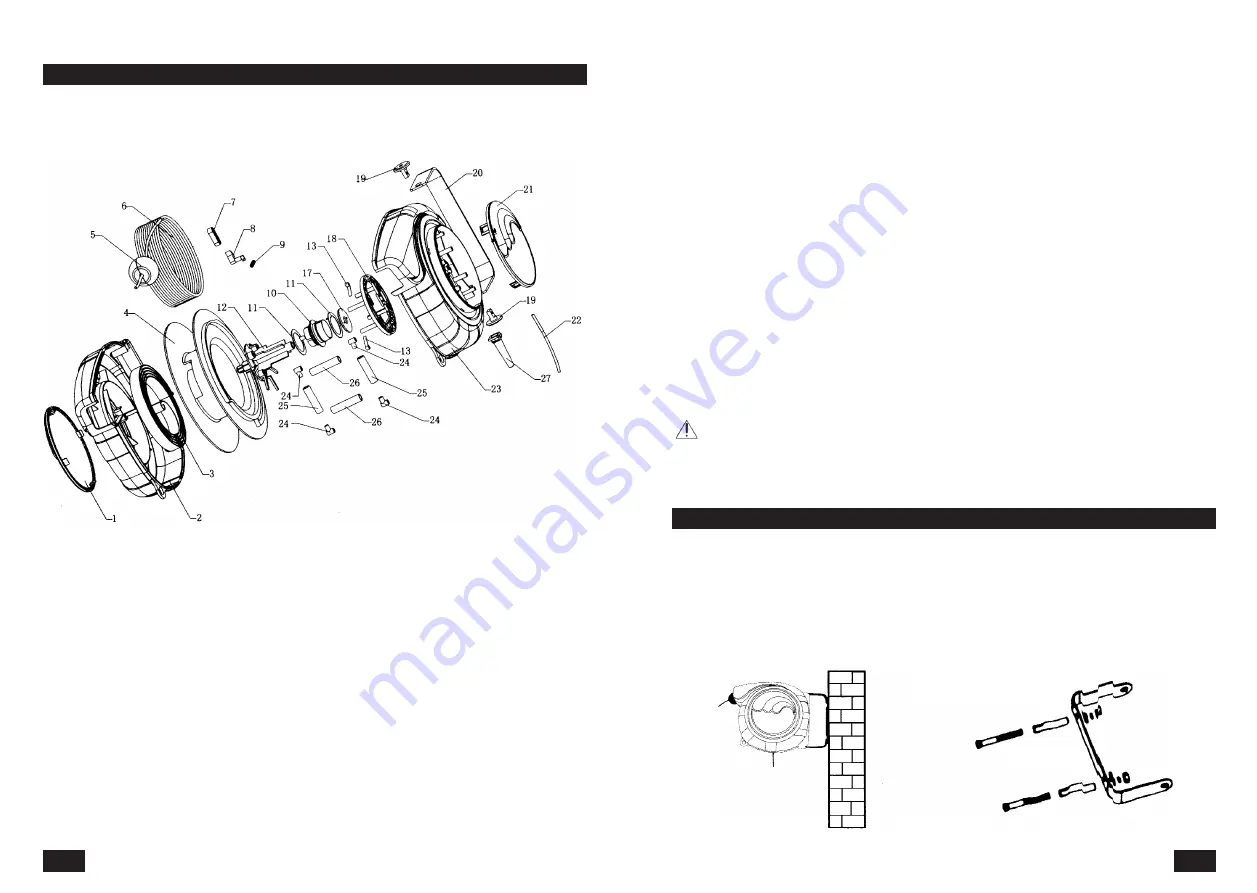
DETAILED PART DRAWING
5
•
Before connecting the machine to the wall outlet make sure that the main switch is in the "OFF" position.
When you finished your work, disconnect the power plug from the wall outlet and switch off the main
switch.
•
Never carry electrical tools and appliances by their power cord. When disconnecting the plug from the
wall outlet, never pull the cable by its cord.
•
Protect the power cable from high temperatures, oils, paint thinners and make sure that the cable is not
hanging over sharp edges.
•
Inspect the power cable regularly. If damaged have it replaced by qualified technician. Inspect extension
cables regularly. If damaged, have it replaced.
•
If you need to use an extension cable, use cable with appropriate power rating. Use only completely
unwound. Inspect extension cables for damages regularly. Damaged cable must be repaired or changed
immediately.
•
Before performing any maintenance, repair or adjustment, switch off the main switch and disconnect the
power cable from the wall outlet.
•
Make sure that machine may not be switched on accidentally. Do not keep your fingers close to the main
switch, unless absolutely necessary.
•
If you mount your machine to the work table, release the safety button after installation.
•
Do not use in environments where explosives are stored or used (paint shops, warehouse with
flammables etc.).
•
Do not use in humid environments or if wet.
Power equipment
•
If your machine is equipped with depressed springs, use suitable device to release them slowly and
safely.
•
Make sure no part is left inside the packaging box before throwing the packaging materials out. If so, take
it out and install it. Use the part listing for check-up and the installation drawing for guidance.
•
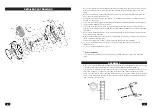
Console mount. You may mount your extension cable set on a wall, using a revolving console (pic. 3) or to
other place (ceiling etc.) In order to turn the cable set around in 180°, make sure that there is a free
space of 500 mm on both sides of the cable set. Mount the console on wall or ceiling, using the supplied
screws, spring washers and flat washers. The console has a two mounting holes with distance between
them of 130 mm. (See picture 4).
ASSEMBLY
pic. 3
pic. 4


