background image


UT3550 Battery Tester Users Manual 

12 

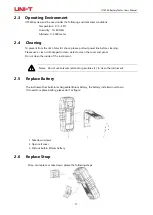
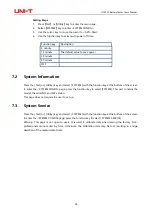
1. Take down screw 

2. Push the strap 

3. Push down and then pull out the strap 

2.7


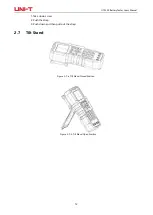
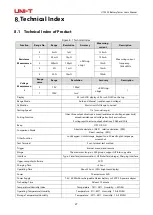
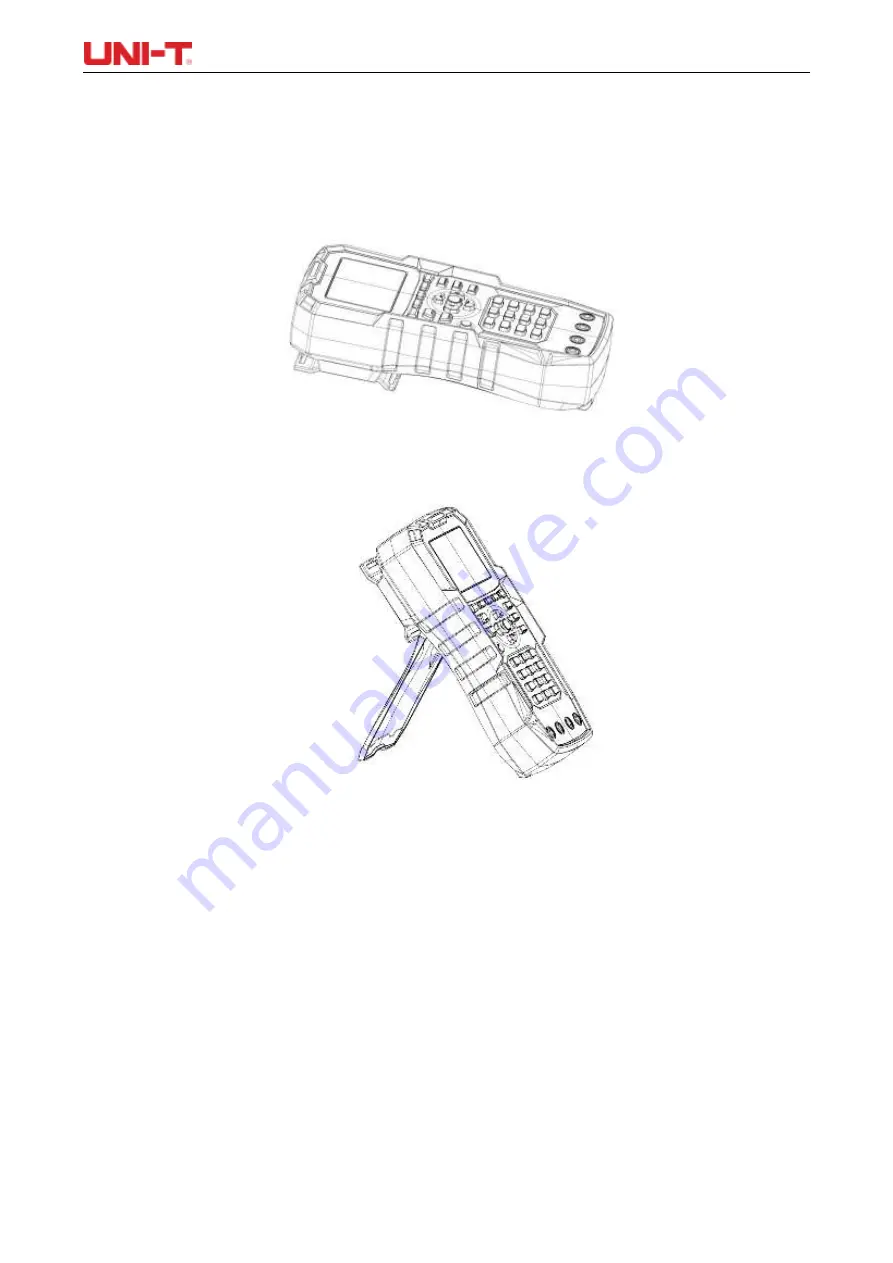
Tilt Stand 


Figure 2-7-a Tilt Stand Closed Position 


Figure 2-7-b Tilt Stand Open Position 


Summary of Contents for UT3550

Page 1: ...1 UT3550 Battery Tester User Manual www uni trend com com ...

Page 2: ...warranty If the product is proved to be defective within the warranty period UNI T reserves the rights to either repair the defective product without charging of parts and labor or exchange the defected product to a working equivalent product determined by UNI T Replacement parts modules and products may be brand new or perform at the same specifications as brand new products All original parts mo...

Page 3: ...e use of a power source not provided by UNI T d Any maintenance on altered or integrated products if such alteration or integration leads to an increase in time or difficulty of product maintenance This warranty is written by UNI T for this product and it is used to substitute any other express or implied warranties UNI T and its distributors do not offer any implied warranties for merchantability...

Page 4: ...nal safety DO NOT the outer shell of the instruement Non professional maintenance personnel should not open the outer shell of the instrument to try to repair the instrument The undischarged charge still exists for a period of time after the instrument is turned off which may cause electric shock DO NOT use instruments that work abnormally If the instrument does not work properly and its danger is...

Page 5: ...5 Interface Panel 9 Inspection and Installation 10 2 1 Packing List 10 2 2 Requirements of Power Supply 10 2 3 Operating Environment 11 2 4 Cleaning 11 2 5 Replace Battery 11 2 6 Replace Strap 11 2 7 Tilt Stand 12 Preparation before Measurement 13 3 1 Power on and Run 13 3 1 1 Power on and off 13 3 1 2 Introduction of Test Lead 13 3 1 3 Test Lead 13 3 1 4 Connection of Test Lead 13 3 2 Measurement...

Page 6: ...et up 21 6 2 Display and Determination 22 6 2 1 Display after Opening the Comparator 22 6 2 2 Example of Qualified Determination 23 6 2 3 Example of Unqualified Determination 23 System Configuration 24 7 1 System Configuration Settings 24 7 1 1 LANGUAGE Setting 24 7 1 2 DATE and TIME Setting 24 7 1 3 AUX SCREEN Setting 25 7 1 4 KEY BEEP Setting 25 7 1 5 BAUD Setting 25 7 1 6 BRIGHTNESS Setting 25 ...

Page 7: ...mand for Programmable Instrument to fulfill remote control and data collection The AC resistance testing principle can be used for the internal resistance testing of almost all batteries including lithium batteries Hydrogen fuel batteries lead acid batteries button batteries and other batteries The design allows direct on line measurement of the UPS without loss of accuracy and stability IP65 dust...

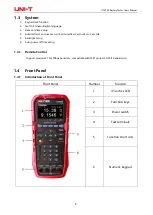
Page 8: ...inistrator account can set code 5 Backlight setup 6 Auto power off time setup 1 3 1 Remote Control Support maximum 115200bps baud rate compatible with SCPI protocol ASCII transmission 1 4 Front Panel 1 4 1 Introduction of Front Panel Front Panel Number Function 1 3 5 inches LCD 2 Function keys 3 Power switch 4 Test terminals 5 Function short cuts 6 Numeric keypad ...

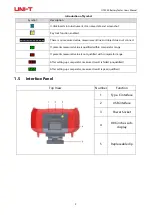
Page 9: ...ject does not connect It presents measured value is qualified within comparator range It presents measured value is not qualified with comparator range After setting up comparator measured result is failed unqualified After setting up comparator measured result is pass qualified 1 5 Interface Panel Top View Number Function 1 Type C interface 2 USB interface 3 Power Socket 4 0 96 inches sub display...

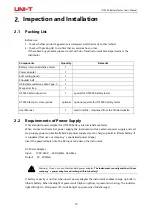
Page 10: ...irements of Power Supply It has standard power adapter for UT3550 battery internal resistance tester When connect with external power supply the instrument will use external power supply and cell stop supply power automatically External power supply also can charge up built in lithium battery It is suggested that use our company s specialized power adaper Insert the power adapter into the AC input...

Page 11: ...e use a clean cloth dipped in clean water to clean the cover and panel Do not clean the inside of the instrument Notes Do not use solvents alcohol or gasoline etc to clean the instrument 2 5 Replace Battery The instrument has built in rechargeable lithium battery the battery installed in cell barn If it need to replace battery please do it as figure 1 Take down screws 2 Open cell cover 3 Pull out ...

Page 12: ...3550 Battery Tester Users Manual 12 1 Take down screw 2 Push the strap 3 Push down and then pull out the strap 2 7 Tilt Stand Figure 2 7 a Tilt Stand Closed Position Figure 2 7 b Tilt Stand Open Position ...

Page 13: ... replace new test lead if test result appears deviation 3 1 4 Connection of Test Lead Before measurement follow the steps below to connect the test lead to the test terminals of the instrument 1 Before connecting the test line please make sure that the power switch is OFF 2 Make sure there is no connection at the top of the test leads of the four terminals 3 Connect the test leads of the four term...

Page 14: ... 3 2 a If the positive and negative poles of the terminal of the DUT are connected reversely and the test voltage value is negative please exchange positions of the red and black test pen Figure 3 2 a Connect the Test Lead to the DUT When testing with an alligator clip user can use the test lead to directly champ the terminal of the DUT for four terminal testing If testing with a crown probe test ...

Page 15: ...ement 3 3 1 Short Circuit Test Method of Short Circuit Zeroed The first step push Utility key to enter setup page The second step short contact test pen The third step use function key to select F4 SET ZERO The fourth step push F4 OK the instrument start to zeroing The fifth step When zeroing finfished go back to setup page Short Circuit Zeroed Method of Kelvin Test Lead Correct Short Circuit Meth...

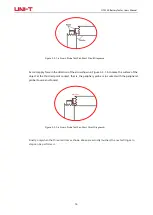
Page 16: ...hown in Figure 3 3 1 b to make the surface of the object at the third red point contact that is the periphery probe is in contact with the peripheral probe Source and Source Figure 3 3 1 a Crown Probe Test Pen Short Circuit Diagram b Finally only when the three red dots as shown above are actually touched the next setting zero step can be performed ...

Page 17: ...ey the instrument will execute a measurement cycle and the instrument is in a waiting state at other times Remote Send the command TRIGGER to measure once and return the measured value Setting Steps 1 Press Test key to enter the main page of Test 2 Use the cursor key to move the cursor to the TRIGGER field 3 According to user s needs use the function keys at the bottom of the screen to select the ...

Page 18: ... lock at the same time When the range is automatic the instrument will predict the range in each measurement period so the test speed will be slightly slower than the locked range Moreover in the case of automatic measurement frequently changing the range will slow down the response Usually when the instrument is used as a sorting measurement the automatic range mode is not suitable For sorting me...

Page 19: ...e On the VIEW DATA page user can also use the function keys at the bottom of the screen to perform the following operations on the data Save to USB disk after inserting the U disk this function key can save the data in the U disk Clear this function key can clear all data Page Up Page down Jump to this function key can realize the page up and down or jump of multiple pages of data If user want to ...

Page 20: ... keep the current data into internal storage User can view the collected data in VIEW DATA page Setting Steps of Timer 1 press Utility key to enter setup page 2 Use the cursor to select Timer filed 3 Use numeric keypad to enter time unit is second 5 1 2 Beep The beep function is effective only when comparator function is turned on Beep function has three settings OK qualified beep NG unqlified bee...

Page 21: ...lute value and percentage comparison mode must enter the nominal value As for direct reading comparison mode the nominal value does not participate in calculation Setting Steps for Absolute Value Comparison ABS Δ or Percentage Comparison PER Δ 1 Press Test or Utility key and select COMP SET with the function key at the bottom of the screen to enter COMP SET page 2 Use the cursor to the R COMP or V...

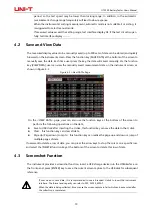
Page 22: ... the comparator data needs to be reset after switching the comparison mode 6 2 Display and Determination 6 2 1 Display after Opening the Comparator When the comparator setting is completed press Test to enter the main page of TEST as shown in Figure 6 2 1 Figure 6 2 1 Page to Be Measured after the Comparator is Turned on After the comparator is turned on the COMP logo will appear at the top of the...

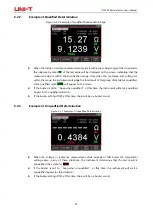
Page 23: ...mark will appear on the screen If the buzzer is set to beep when qualified at this time the instrument will emit a qualified buzzer for the qualified situation If the buzzer setting if OFF at this time there will be no buzzer sound 6 2 3 Example of Unqualified Determination Figure 6 2 3 Example of Unqualified Determination When the voltage or resistance measurement value exceeds or falls below the...

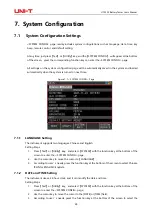
Page 24: ...NGUAGE Setting The instrument supports two languages Chinese and English Setting Steps 1 Press Test or Utility key and select SYSTEM with the function key at the bottom of the screen to enter the SYSTEM CONFIG page 2 Use the cursor key to move the cursor to LANGUAGE 3 According to user s needs press the function key at the bottom of the screen to select Chinese CHN or ENGLISH English 7 1 2 DATE an...

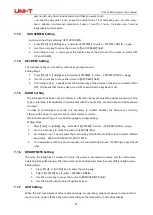
Page 25: ...e it immediately communicates with the host at the set baud rate and the keyboard is locked In order to communicate correctly it is necessary to confirm whether the baud is set correctly otherwise the upper computer cannot communicate correctly The instrument with Type C use SCPI language to programming Setting Steps 1 Press Test or Utility key and select SYSTEM to enter SYSTEM CONFIG page 2 Use t...

Page 26: ...ion key at the bottom of the screen to enter the SYSTEM CONFIG page press the function key to select SYSTEM This part contains the model the serial NO and FW version This page does not require the user to set up 7 3 System Service Press the Test or Utility key and select SYSTEM with the function key at the bottom of the screen to enter the SYSTEM CONFIG page press the function key to select SYSTEM...

Page 27: ...resistance and voltage low limit and conform Sorting result has two output situations PASS and FAIL Beep OFF OK NG Comparison Mode Absolute deviation ABS relative deviation PER Direct reading SEQ Other Function Lock keypad U disk storage keypad tone Chines English language screenshot Test Terminal Four terminal test method Trigger Internal manual and remote Storge The maximum storge is 500 groups ...

Page 28: ...UT3550 Battery Tester Users Manual 28 Temperature Index Over 28 less 18 each degree plus 0 1 the specified precision Accuracy guarantee time 12 months Operating Altitude 2000m ...

Reviews: