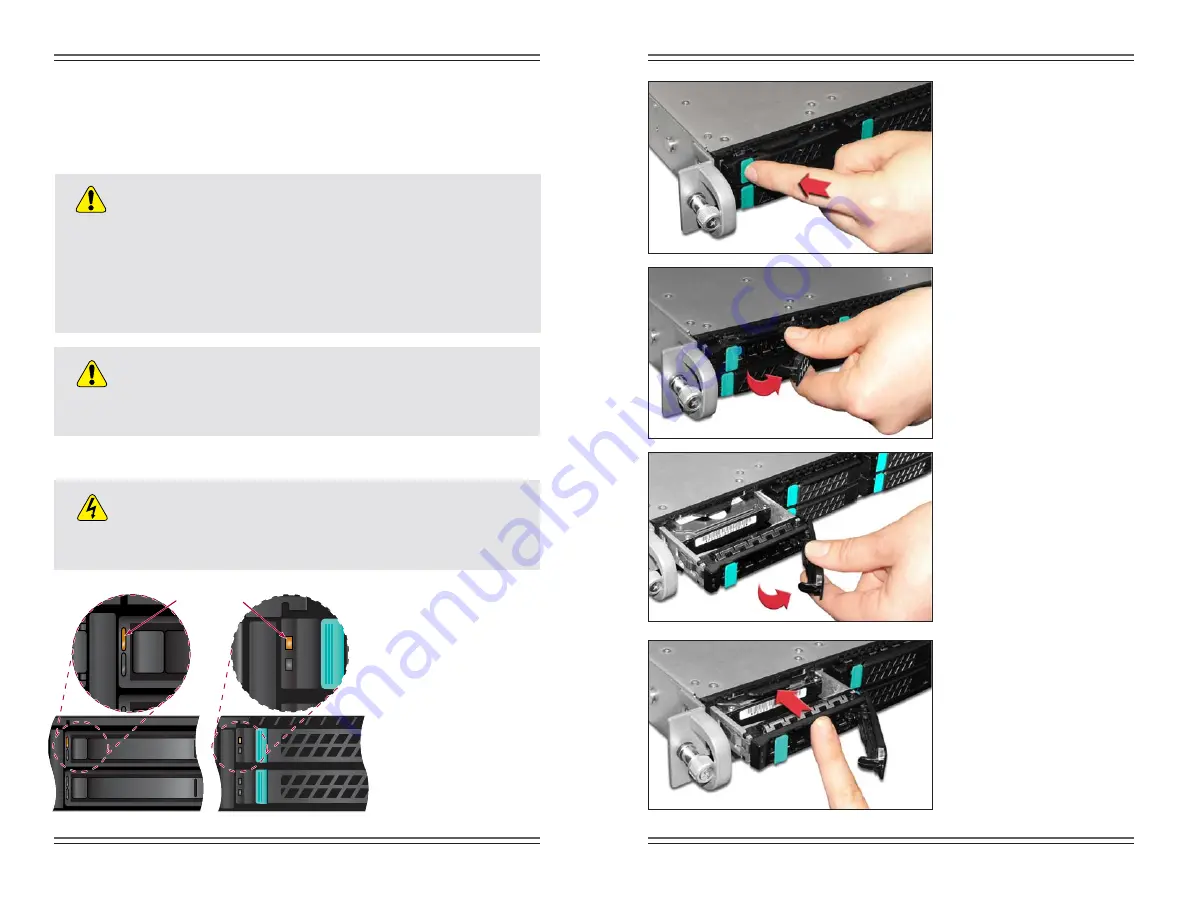
Failed drive
Static-Sensitive Devices
Electrostatic discharge (ESD) can damage electronic components. To prevent damage to
any printed circuit boards (PCBs), it is important to handle them very carefully. The
following measures are generally sufficient to protect your equipment from ESD damage.
CAUTION
n
Be sure that the appliance is properly grounded to the chassis
ground through the AC power cord or enclosure frame.
n
Touch a grounded metal object before removing drive from the
antistatic bag.
n
Handle drive by its edges only; do not touch components on
the bottom.
CAUTION
Removal of any drive that does not have a red light during this
procedure, or during the REBUILD will result in system failure.
WARNING
Disk drives are static sensitive devices. Please make proper use
of the wrist strap included in the disk FRU kit.
Step 1:
First remove the
front bezel if installed to
expose the disk drives. When
looking at the front of the
appliance, the failed disk
drive will have an illuminated
amber LED on the disk sled.
The failed LED is on the top.
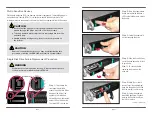
Step 2:
Press the green release
button located beside the drive’s
LEDs on the failed drive to unlatch
the handle.
Step 3:
Swing the handle fully
out to disengage the drive.
Step 4:
Slide the drive half way
out of the drive bay and wait for it
to spin down.
Allow 10-20 seconds before
removing the drive from the
drive bay.
Single Disk Drive Failure Replacement Procedure
PAGE 2
PAGE 3
Step 5:
While the system is
running Insert the replacement
drive into the disk bay and slide
the disk straight in until it stops.
Step 6:
Swing the handle in
toward the appliance. Continue
pushing the handle in until you
feel it lock in place.
(continued on the back side)


