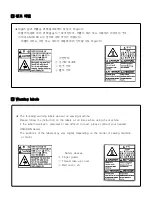

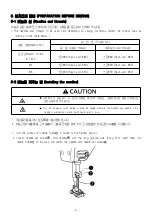


★ 사용하기 전 바늘 설치 시 반드시 전원을 OFF시켜 주십시오. 그렇지 않으면 폐달 오작동으로
인한 상해의 원인이 됩니다.
★ Turn off the power switch before installing the needle, otherwise the machine may operate if the
treadle is pressed by mistake, which could result in injury.
- 9 -
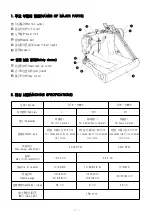
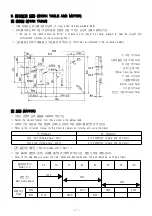
5. 봉 재전의 준비 (P REPARATION BEFORE SEWING)
5-1 바늘과 실 (Needles and thread s)
바늘과 실은 봉제 조건에 의해 다르지만, 아래표를 참고하여 선택해 주십시오.
( The needles and threads to be used very depending on sewing conditions. Select the correct ones by
referring to the table below. )
바늘 번호(Needle No.)
실 번 호 (Thread No.)
윗 실 (Upper thread)
아래실 (Lower thread)
오르강(Organ) TV
×
64
#11,#12
스판#80 (Spun yarn #80)
스판#80 (Spun yarn #80)
#14
스판#60 (Spun yarn #60)
스판#60 (Spun yarn #60)
#16
스판#50 (Spun yarn #50)
스판#50 (Spun yarn #50)
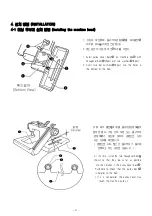
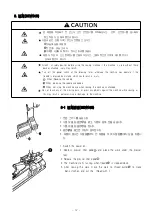
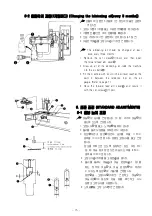
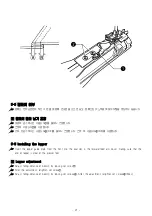
5-2 바늘을 끼우는 법 (Installing the needles)
1. 미싱풀리를 돌려서 침포①를 최상점에 둡니다.
2. 바늘고정나사②를 풀고 바늘③의 긴홈을 전방을 향하게 하고, 침포①에 바늘고정나사②를 체결합니다.
1. Turn the pulley until needle holder① is raised to the highest position.
2. Loosen needle set screws②, hold needles③ with the long grooved side facing front, insert them into
needle holder① all the way, and fasten the needle with needle set screws②.
Summary of Contents for DT6-H892?3
Page 2: ......
Page 4: ...5 off A S 31 2 40 25 OFF A S A S...
Page 32: ...22 10 1 13 19 2 9 16 16 20 16 3 13 19 4 19 13...